
 CAD
CADOn Being an Underwater Photographer Who Favours the Shallow End
Hello there, my name is Ian Donato.
If I was to describe myself as an underwater photographer I would hasten to add that I’m one who has intentionally avoided the deep end. By that I mean a few things. Firstly, I’m a snorkeler not a diver and rarely get any deeper than six metres. Secondly, I use a compact camera (an Olympus TG-4) and only ambient light. Don’t get me wrong, I have nothing but admiration for underwater photographers who plumb the depths with sophisticated cameras and lighting arrays.
The wonderful thing about social media from an underwater photographer’s point of view is seeing what others in the game get up to and befriending them. A well lit octopus or peacock mantis shrimp shot gets me every time. However, in my own case, the shallow end of underwater photography suits me just fine.
That might be explained largely by the fact that I didn’t even get into underwater photography until after my fiftieth birthday, when a friend of mine gave me an inexpensive action camera. Prior to that I would snorkel with a buddy who had a camera but, at the time, it seemed the camera just got in his way of enjoying a jolly, good ol’ snorkel. However, one day in the Cabbage Tree Bay Aquatic Reserve (located in Sydney, Australia) while snorkelling with my action camera tucked away in the pocket of my swimming shorts I saw something beneath me that was alive and lighting up like the mothership from Close Encounters of the Third Kind. At first, I had no idea what this creature was but as I dived down to investigate I was compelled to take out the action camera from my pocket.
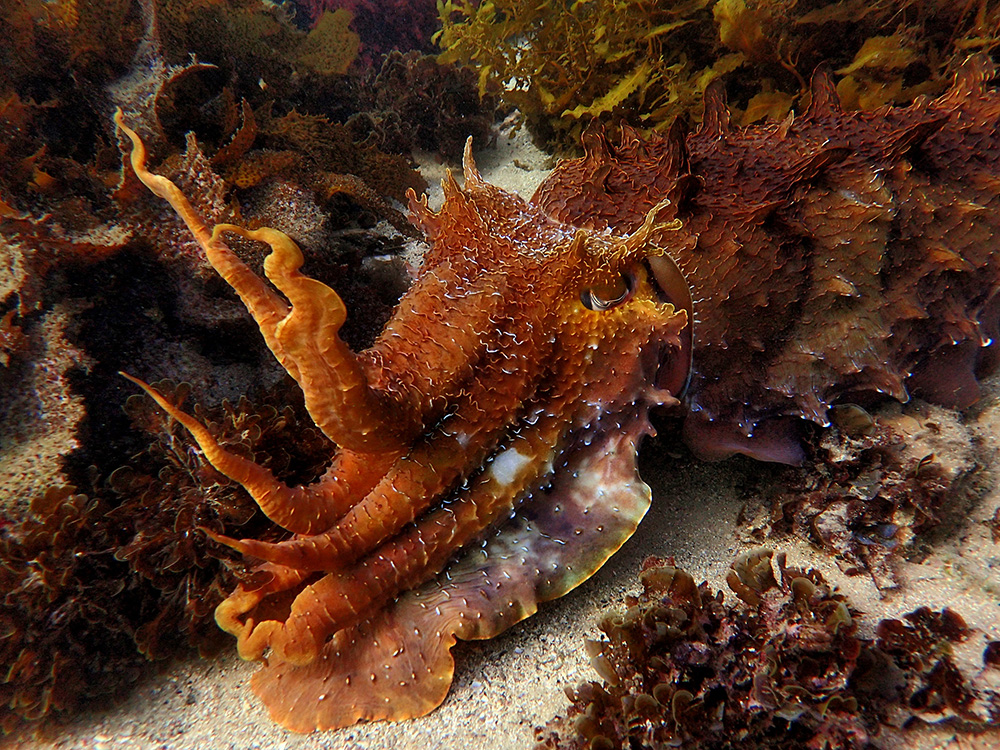
As it happened, the creature revealed itself to be an Australian giant cuttlefish and the shots I clumsily (yet enthusiastically) captured that day ended up in the local paper along with an article about the cuttlefish and my encounter with it. From that moment on underwater photography had its hooks into me.
As time went on and I began to compare my images with those of other underwater photographers, even with just the local ones who went to the same bay as I did, I noticed my shots were technically inferior. I developed a serious case of resolution envy. My inexpensive action camera (free in fact, considering it’d been a gift) had opened the door to underwater photography but the time had come to move on. However, it would seem I’d not move on terribly far you could argue.
You see, with that action camera came my technique or lack thereof. Bear in mind for starters that this action camera didn’t even have a viewfinder. Talk about primitive! I even considered myself a cave painter among Renaissance artists. And, although I use a viewfinder now, I still think of myself as a cave painter but I’m cool with that. While other underwater photographers are using two hands and taking their sweet time to line up a shot then off go their strobes, I’m checking if the sun is more or less behind me and diving down with maybe thirty seconds on the clock with my TG-4 outstretched in one hand.
Thankfully, technique or no technique, it’s all about the creatures and it’s all about the photos. An underwater photographer’s story, mine in particular, is secondary to the creatures and the photos. And, I’m very cool with that.
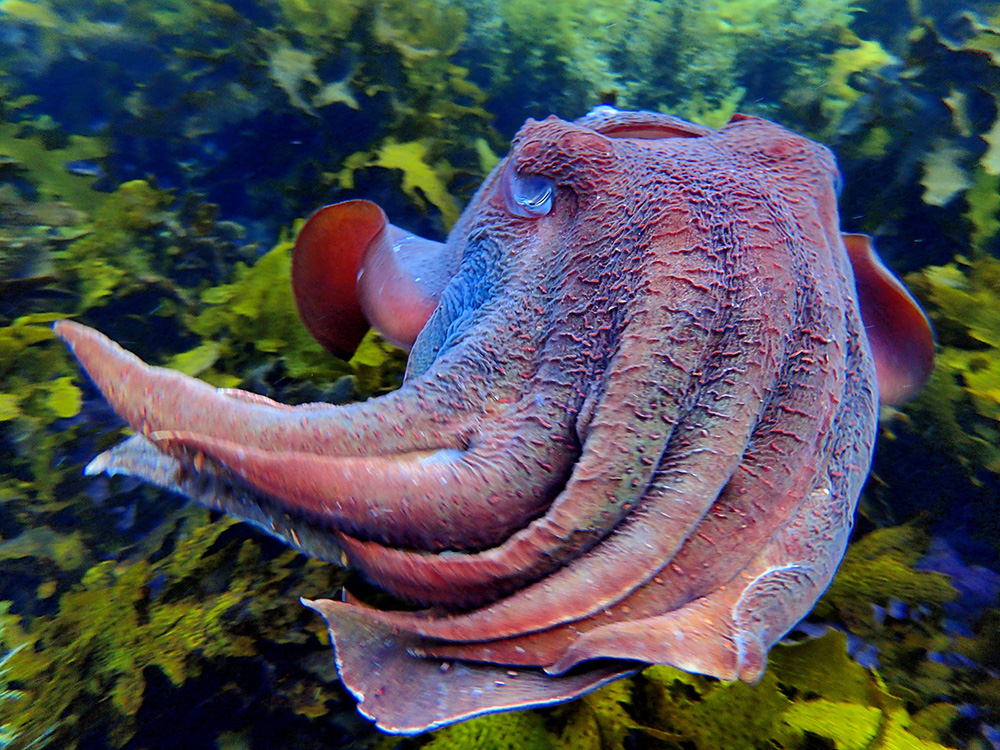
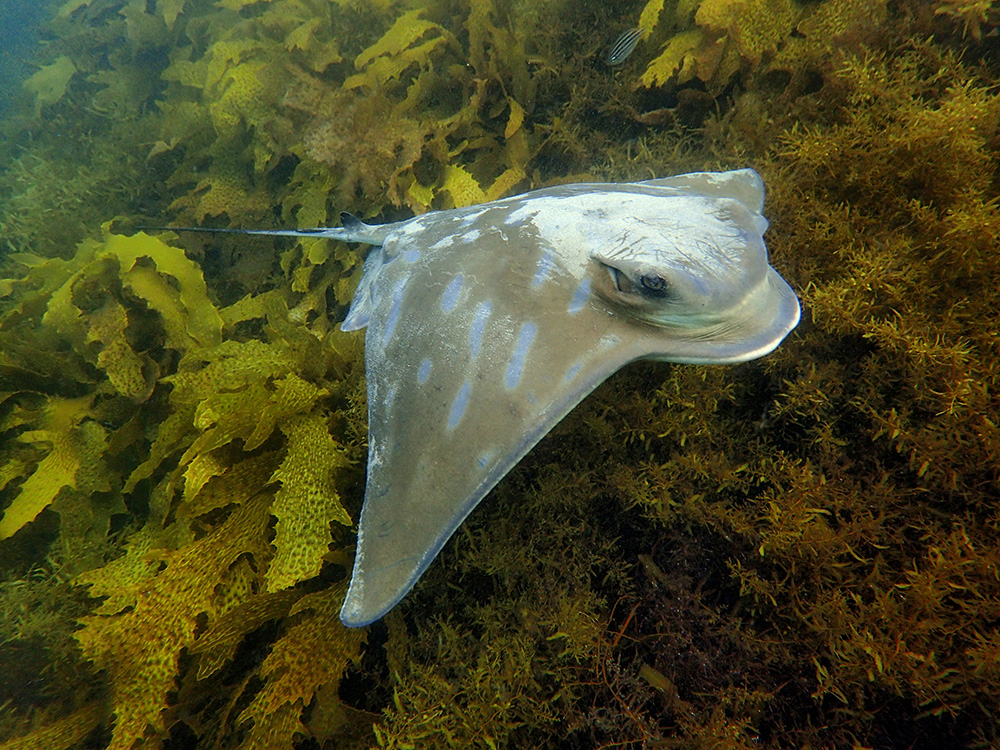
Where I snorkel there’s a revolving cast of creatures, depending on what season it is, although there are those such as the Eastern Blue groper that are in the bay all year round. If I had to pick a favourite time of year it’d be the colder months when the giant cuttlefish and Port Jackson sharks roam freely about the bay. To this day, each time I see a giant cuttlefish hovering below me I feel just as excited as I did seeing what I’d thought had been something from outer space. And when a photo turns out, sometimes so much better than I’d even hoped for, I’m as exuberant as a child on Xmas morning.

Which happens to remind me of something that took place at the bay the other day.
There I was, after a snorkel, rinsing out my snorkelling gear near the iconic Fairy Bower pool. This kid, he must’ve been about four years old, came up to me and said, ‘you know what?’
‘What?’
‘I’m going to get my own diving gear.’
‘Cool.’ I said.
Then he said, ‘you know what I’m going to do when I get my diving gear?’
‘What?’
‘I’m going to dive straight down to the bottom!’ He pointed down at the water to show he wasn’t kidding.
‘Cool.’ I told him.
At that, he gave a little nod and took off.
And now, for what they’re worth, here are my tips for snorkelers using just a compact camera and ambient light…
Tips for Snorkelers Using a Compact Camera and Natural Light
1. Aim to have the sun behind you. Of course, your subject may be un-cooperative in facing the right way, so there will be compromise. Having the light at your shoulder should bring good, even interesting, results. At any rate, what you want is the lion’s share of the available light on the side of the subject you’re shooting.
2. Get closer, get lower. Easier said than done, I know. Compact cameras use wide angle lenses which are a boon but the drawback is you’re seldom as close as you think you are. Sounds crazy perhaps. Still, more often than not, to bag a shot of an undersea creature that’ll impress, you will find you have to get closer. And, by lower, something akin to eye level makes more of a connection. A shot from under the creature, or at least taking in some of the surface, tends to make a hit. However, the simple mantra here is ‘lower, closer.’

3. Okay, you’re closer, you’re lower, so far so good. But wait, do you have the whole creature in frame? ‘But wait,’ you say in return, ‘didn’t you say to get close?’ Yeah, I did and if you’re going for a head shot or something along those lines having the whole creature in the frame is not an issue. However, in general having the whole creature in the frame makes for a sweeter shot I promise you. The tip I have here is to go for a shot at a slight angle from the front of your subject, for what it’s worth I try to employ this often with varying success I’ll readily admit but when it comes off right it’s sweet as a nut. The other thing about this sort of shot is that it makes the creature’s eye more of a feature, having the eye as the focus point of the photo kicks butt in my book.
4. Can tip no.2 sometimes be ignored? You betcha! Like any rule there are exceptions, all those whale shark pics shot from above and from some distance away for instance. However, we’re talking about great big subjects here and the need for the water to be clear. Another reason to largely stick to the ‘get closer’ approach is the nature of water- too much, pardon the pun, dilutes your results.
5. If it’s possible, safe, and not too stressful to your chosen subject make multiple passes to take photos from different angles and/or to nail that shot that seems to be ‘the shot’. This approach can also be employed to get a little closer to the subject each time without getting right in its face from the get-go. The other trick here, which comes at the price of forgoing RAW files (in the compact camera I use anyway), is the ‘sequential shooting’ mode- taking a series of photos with each pass. Without sequential shooting and all the other bits of witchcraft that come with digital photography, I myself would have precious little to show.

6. Right then – so you have the sun behind you, your camera primed and set to sequential shooting. You’re raring to go. Stop. Just for a moment. Study the subject, study its nature and how it is situated. Take a few seconds to consider the pictures you’re about to take. What sort of photo would you like to see? I guess what I’m saying here is visualizing the results to help gain them. This sort of thing gets easier, like everything, with practice. By the same token, hang about too long on the surface and the moment as well as the subject can be gone. Tricky stuff, but there is a balance to be won.
7. Bag the best shot you know how and then, employing further witchcraft, do a little post production on your photos. Be it photoshop or the software that comes with the camera. Add light or remove it. Mess with the color, but only if you really need to. My favorite is adding contrast, contrast is my thing. However, let’s not forget the first rule of showbiz- less is more! It really does come down to starting out with the best shot you were able shoot in the water.
Good luck and happy shooting.
Ian

- The Dangers of Becoming Obsessed with the Australian Giant Cuttlefish – October 5, 2021
- Goin’ Nuts with an Olympus TG-6 (Shooting from the Hip for Snorkelers) – April 5, 2021
- In Praise of Chance Encounters – September 11, 2020
2 comments
Great article,Ian. Thanks for sharing your experiences!
Loved learning about what drove you to become a uw photographer Ian! Tks for the tips ?