
 CAD
CADTips For Shooting Underwater Split Shots
Those of you who have stumbled upon my portfolio have certainly noticed that split photography is, for variety of reasons, one of my favourite disciplines. We all know that any diving adventure includes a lot more than just submerging under the surface and observing the underwater world. It starts with meticulous preparation, carrying your gear, kitting up, etc…
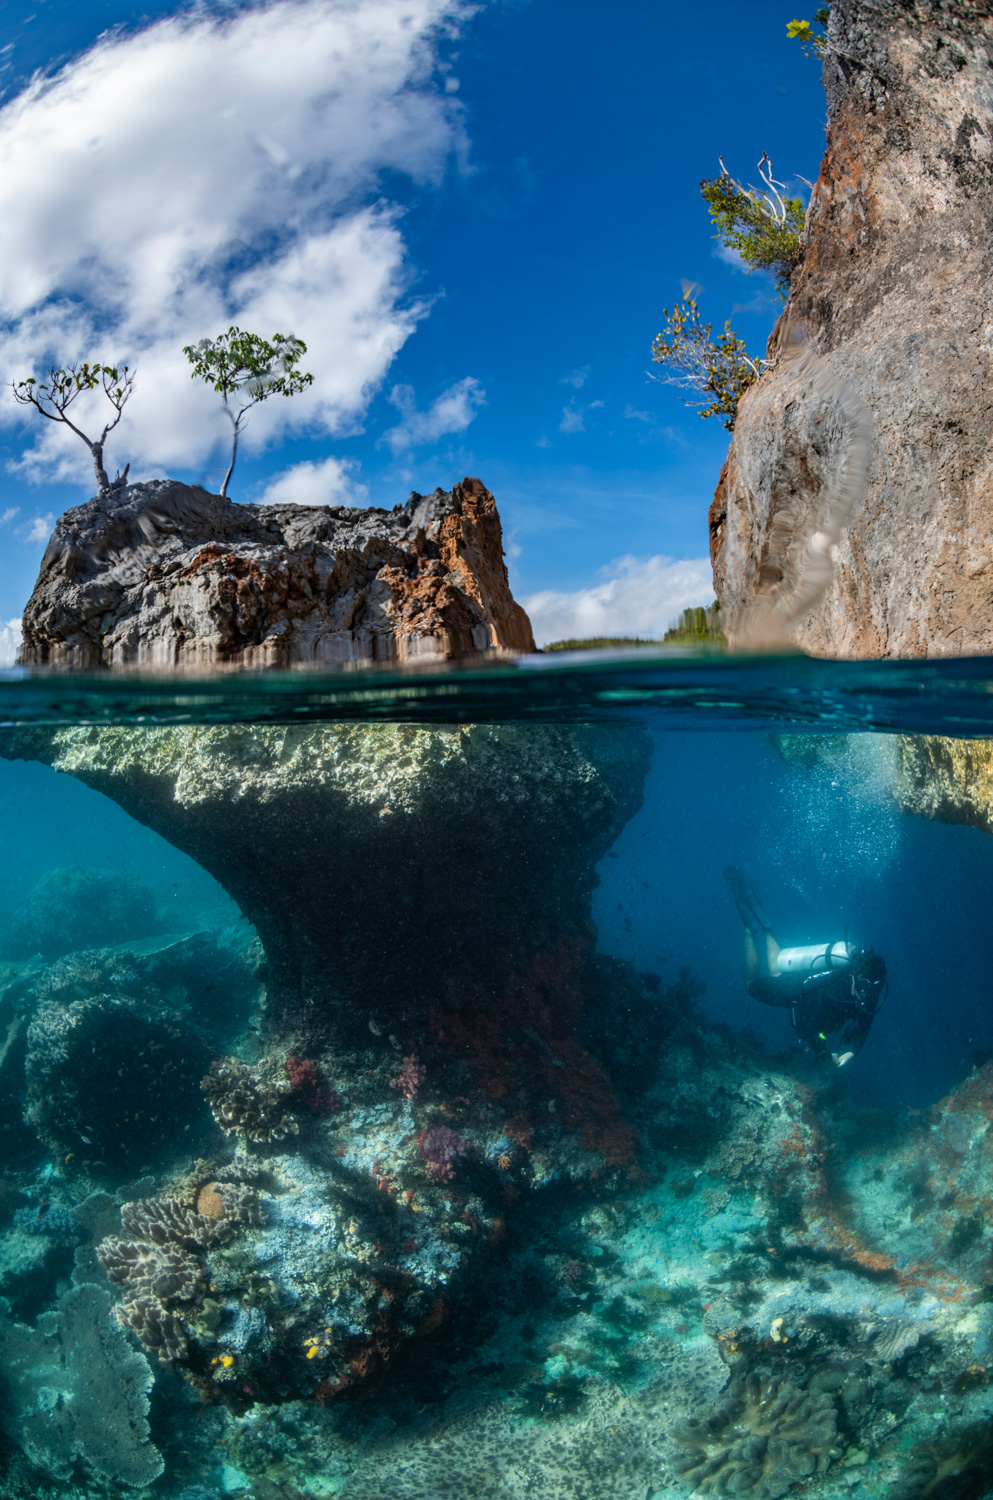
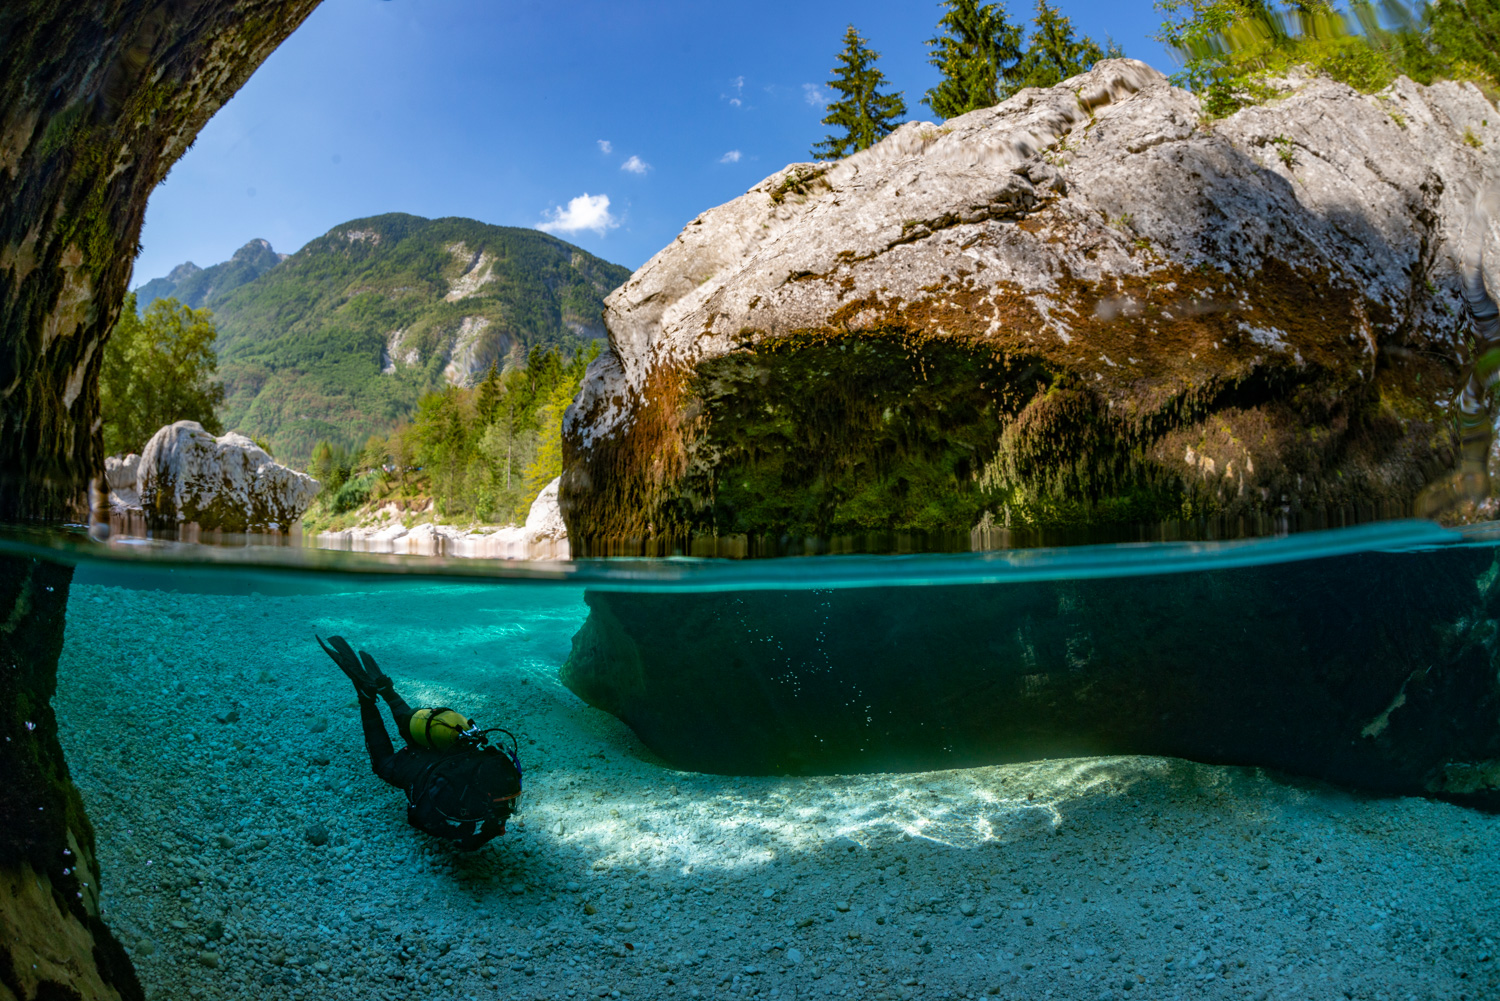
Split shots, also known as over / under photos are one of the most unique techniques of underwater photography. They are also among the most challenging.

There are several reasons why I am personally fascinated with split shots:
- Mountains that surround us when entering the water, waterfalls rumbling above a swirling stream, interesting skies enhancing the atmosphere – these elements play a significant role in the overall experience. While pure underwater photography does not include those in the final product, with split shots, however, we are able to tell the story in a broader context.
- The second reason would be my fascination for the moment when the view changes from landscape to underwater. Typically, the audience would “read” the image in the same order, scanning the above water part first. The underwater part should answer the questions that arise after getting familiar with the dry part: How does it look under the waterfall? How does it feel to dive between steep walls of a river canyon?
- Finally, this type of photography attracts the attention of a wider audience rather than just underwater photography lovers, as for some the dry part serves as a tool to spark the curiosity for checking out what is down there to see.

Here are some of my tips to getting a great underwater split shot:
1. Analyze and visualize your image to the smallest details
Most of my over-under shots are well planned landscape images precisely composed and exposed. In landscape photography there is very little tolerance as far as composition imperfections are concerned, therefore I often try to plan the image in my mind to the last detail. I know exactly what I put in my frame (which rock, which tree, which overhang etc.).
The actual execution of the shot can be the least difficult phase of the whole process.

2. Choose the right time
In the majority of cases, the higher the sun, the less difference we have in exposure of the above and underwater part. In other words, when the sun stands upright, both parts have similar exposure settings. With that in mind, mid-day seems to be the optimal time of the day to go for splits.
However, there are always other aspects to consider.
At many spots, the light isn’t optimal at noon, while at others the sun is hidden, etc.… These unique features take priority over the lighting conditions.
The clarity of the sky is another factor to consider. The clearer the skies and the air, the darker it appears on the image. We are able to expose the underwater part better without overexposing the upper part. Having mentioned all of these factors, on my most successful split-shots the conditions were far from ideal, yet the composition and all other factors played along.

3. The right equipment
A wide angle setup including the fish-eye lens and a super large dome port is the best way to go. Our optical system behaves differently in each environment. While the depth of field and effective focus distance in upper part is easily determined, underwater the camera creates a virtual image appearing a lot closer to the sensor than it is. Combining these two images with different depth of field results in compromised sharpness.
Whether we focus on the object underwater or above, these two will never be in perfect compliance (completely in focus), however, the bigger the dome and the higher F stop we use, the more acceptable the compromise. In 100% of my split shots I have used a fish-eye lens (Nikon 10.5mm and Tokina 10-17mm on APS-C DSLR and Sigma 15mm on Full Frame DSLR). I use the Subal 9” Dome port, which helps me keep the difference in depth of field in both parts at a very acceptable level, but also helps me keep the surface line at the desired position.
Tip: Always focus on the underwater subject, otherwise the photo might turn into a dry landscape shot with an add-on.

4. Settings
Ideally, we want to have enough light to stop the lens down to f13 on full frame or f11 on APS-C DSLR. Nowadays, modern cameras allow us to compensate for the possible lack of light by boosting up the ISO, all while maintaining a fast shutter speed – ideally 1/160s – 1/250s (especially when shooting in rough seas). Slower shutter speed can be used if conditions are calm and the water is rather still.
Strobes can be used if we are including a dominant subject positioned close to the camera, however I wouldn’t use them for landscape over/under shots.

5. Be completely prepared
If you planned a specific split shot, think of the entire execution process in advance. Ideally, do not take the tank, take off the weight belt, have a snorkel with you etc. Quite often a well planned shot fails due to poor execution, which can be avoided by planning the shot logistics in advance.


Check out more of Martin’s stunning work on his Instagram account – @martin.strmiska
You can follow him on Facebook at AquaSphere Underwater Photography
Or visit his website at aquasphere.sk

- Tips For Shooting Underwater Split Shots – January 3, 2020