
 USD
USDThe Ultimate Settings Guide for Underwater Compact Cameras!

This may be the most frequently asked question by divers venturing into the exciting world of underwater photography – What are the best settings for underwater photography? The hard truth is that there isn’t one magical setting that will make all your photos look like David Doubilet‘s… You will have to master several techniques to cover all the different shooting conditions and like always – practice makes perfect! The more you shoot, the more you practice, the better you’ll become and soon enough you’ll feel comfortable changing these settings even several times during the dive.
The good news is that there are only a few basic scenarios you need to prepare for, which require completely different settings. The rest is just fine-tuning.
Before we go over the scenarios, I would like you to do 2 things for me:
- Read about the following terms in Google:
- Find them in your camera. Learn to identify their units and how to adjust them in Manual and Aperture Priority mode, or how to simply monitor them in Auto and Program modes.
I would gladly explain these terms here, but since they have to do with general photography, others have explained them far better than I can, and we’d rather concentrate on the Underwater settings, which is why you’re here!
…. Ok, you’re back? Great! Let’s start!
Before diving into the more variable settings, I’d like to go over the initial settings which are quite similar in every shooting mode.
Disclaimer: I should note that when writing this, I was using the Canon G7X II and Sony RX100 IV as reference, since they are the most popular compacts in the market at this time.
Most, if not all of this article is still very relevant to other compact camera models as well as mirrorless, and even DSLR’s.
Other brands might call the settings below by different names, but the concepts remain the same.
Note: Advanced photographers might not always agree with the guidelines below, since a deeper understanding of photography may allow you to use different settings than those listed below and still get amazing results. This article is aimed towards beginners who are making their first steps in UW photography and they would benefit the most out of following these guidelines.
Important Menu Settings for Underwater Photography
RedEye Reduction – OFF.
No redeye problem underwater and this will mess up your strobe function.
AF Assist Beam (Canon) / AF illuminator (Sony) – OFF
This is the tiny LED that lights up in dark places to help the camera focus. While it would be nice to have this, it’s usually blocked by the housing, so no need for it here.
Quality – RAW (more about shooting RAW here).
If you’re not yet comfortable shooting RAW, make sure you’re on L / Super Fine JPG, to maintain the highest quality.
ISO – Never ever use Auto ISO when shooting stills!! I have seen countless photographers make this mistake. Even if your camera is set to manual mode, if you use Auto ISO you are letting the camera adjust ISO as it desires, which basically bypasses your manual settings. This means your photos will most likely turn out bad.
Metering Mode – Multi / Evaluative.
This is the default setting and most common. Some photographers like using a different setting here, but if you’re not sure what it does, stick to the one mentioned here.
Focus Mode – AF-S Single (One Shot) / AF-C Continuous (Servo) / AF-A Auto
This is a matter of personal preference. I prefer AF-S Single in most cases. If you like tracking your subject before snapping the shot, use AF-C. Use AF-A if you really trust your camera.
Focus Area – Flexible Spot / Center
This is usually the best setting, since other modes includes automatic selection of the focus point, or face recognition, both of which are not useful or reliable underwater.
Custom Buttons – Personal preference.
Many cameras allow customizing one, two or more buttons to your liking. Assigning things like WB, back-focus, flash compensation and other handy functions to the C button can help you reach those settings faster underwater, with one click.
Back focus is something worth noting; this basically means that you’re moving the half-press action, which tells the camera what to focus on, to a button on the back of the camera. This is very common among underwater photographers, since the half-press is often hard to control through the housing or with gloves. It’s not easy to get used to shooting with two buttons (thumb first, index finger second), but once you get the hang of it, it should come pretty natural.
Now that we’re all on the same page, here are the most common scenarios:
Bright Daylight dive, Good Viz, No Strobe
This is the most common dive you might encounter. You’re somewhere in the Caribbean, with your brand new Canon G7X, Sony RX100 IV or any other compact / mirrorless camera. You haven’t bought a strobe yet because you preferred to start easy, before investing too much in this, but you still want to get good shots!
In this mode you may shoot photos from any distance, either far or close.
Recommended mode – Aperture Priority (AV / A)
Aperture – f/5.6 is usually a good sweetspot.
ISO – 200-800 (depending on depth, the deeper you go, the higher ISO)
WB – Underwater*.
Flash – Off
* White Balance Underwater – If no underwater WB mode exists, there are several other tactics you can use:
- Slate method – take a white slate with you on the dive. Use custom WB to sample the slate several times during the dive, as you change your depth, so that the camera “learns” the colors at that depth and adjusts accordingly.
- Manual Temperature setting – some cameras allow adjusting the WB manually, which goes by K units (5000K, 7500K, 10000K etc.). The deeper you go, the higher you want this to be. If the camera allows, set the tint towards pink (magenta) and red (amber) as well.
Important Note – 90% of the trashed photos in this scenario result from the same thing – blurry photos due to incorrect shutter speed. It’s crucial that you notice which shutter speed your camera is using when you take the shots and make sure it’s fast enough to avoid blurry photos. Ideally it should be faster than 1/200. If it isn’t, raise your ISO.
Twilight Dive / Low Viz / Deeper than 66ft, No Strobe
I’m grouping all of the above conditions together, as they require similar settings.
Basically, in this situation you have less available light to shoot with and no strobe to help you out. You want to allow the most light through your lens, and make sure the shutter speed is fast enough to prevent blurry photos.
This is one of the hardest situations for an underwater photographer, and occasionally it will be close to impossible to get a good shot. If you feel that all your photos are turning out terrible, perhaps it’s time to lower the camera and enjoy the dive without it…
Recommended mode – Aperture Priority (AV / A)
Aperture – Widest possible. F/1.8 – F/2.8 will usually be your choice, depending on the camera model.
ISO – 800-3200 (depending on depth, the deeper you go, the higher ISO)
WB – Underwater*. See note above if no UW mode exists. You will most likely need to correct the tint even more towards Magenta.
Flash – Off
Important Note – 90% of the trashed photos in this scenario result from the same thing – blurry photos due to incorrect shutter speed. It’s crucial that you notice which shutter speed your camera is using when you take the shots and make sure it’s fast enough to avoid blurry photos. Ideally it should be faster than 1/200. If it isn’t, raise your ISO.
Using an external strobe (or two)
Many divers starting out with UW photography will be tempted to set everything on Auto. Camera on Auto, strobe on TTL and jump in the water!
While that is indeed the easiest way, it will rarely produce the results you are looking for.
The problem is that most of these cameras (Sealife excluded), have engineered their Auto modes to identify most land photography situations and adjust accordingly, but they put little thought to underwater scenarios.
When faced with the underwater world, the camera often gets confused and uses wrong settings, resulting in blurry / overexposed photos, random use of the flash and wrong flash output if used.
In reality, just by following a few easy guidelines, you can use your camera on fully manual mode, with minor adjustments during the dive, and get far better results, even with little prior knowledge in photography. Especially when using an external strobe.
Why are underwater strobes so damn important? Read all about it here!
Recommended mode – Manual (M)
Aperture – f/5.6-f/8
Shutter Speed – 1/250 – 1/2000. You can fully control your background by changing the shutter speed only. The faster the shutter speed, the darker your background will be. e.g. 1/2000 for black background, 1/1000 for dark blue background, 1/ 250 for bright blue background. The shutter speed determines how much ambient light you’re letting in, while your subject is lit by the flash.
For shallow depth and better viz, you would likely need a faster shutter speed (1/1000 – 1/2000).
NOTE – This is where a compact operates differently from a DSLR and some Mirrorless cameras. A compact is not limited by Maximum Flash Sync Speed, so it allows you to use very fast shutter speeds with a flash. A DSLR will not allow that due to the type and design of the shutter. This is actually an advantage compact cameras have over DSLR’s!
ISO – 200-800 (depending on depth, the deeper you go, the higher ISO)
WB – Auto WB (AWB)
Flash – On / Fill Flash / Forced On – all of these modes should work, depending on your camera model.
External flash settings – this is a tricky one. We’ll divide this to TTL / Non-TTL.
TTL Flash Exposure
If your flash offers TTL, it will mimic the action of the camera’s built-in flash, and fire the correct amount of light to get proper exposure on your subject.
If TTL is performing as it should, then simply set the strobe on TTL mode, using the above settings and shoot away! Remember that TTL works better up close than on wide angle shots.
** Note – some cameras, such as the Canon G15 and G16, don’t support TTL flash in manual mode. In that case, you can either set your mode to TV (shutter priority) and adjust the shutter according to the background, or use the method below for Non-TTL flash.
For more info on TTL, read this post.
Non-TTL Flash Exposure
In this case you will be setting the strobe power manually using the power dial. This is not as hard as it seems, and it’s often easier than using TTL, if TTL is acting up. Another advantage is lower battery consumption on the camera, since you can set your built-in flash to the minimum output, without affecting the strobe’s output.
- First, set your strobe on the right pre-flash mode to work with your camera. You will usually have two modes – with pre-flash or no pre-flash. One will work and sync with the flash, and the other will come out dark. Use the one that works!
- Second, set your built-in flash to minimum output. That can usually be done in the menu, under flash output or flash compensation.
While shooting, you can easily notice if your flash is too strong or too weak, and change the dial accordingly. I find myself often shooting on full power, or one step lower, when shooting wide angle / medium range, and when shooting macro, I would usually have the dial in the middle or lower.
The distance of the flash is also very important. The further it is from the subject, the stronger you need to fire it. We often place our camera very close to the subject, and forget the strobe is much higher up, or to the side, resulting in a dark photo.
Using the pop-up / built-in flash
All compact cameras include a small pop-up / built-in flash, which is usable in some housings. First of all, check if your housing allows use of this flash. Second, if you have a diffuser that came with the housing – use it! It’s crucial for the light to go past the port of the housing, otherwise you will get a big chunk of shadow on the bottom part of your image. The diffuser also helps “diffuse” the light by enlarging your light source and preventing harsh shadows.
There are two major problems with using the internal flash:
- Backscatter – the underwater photographer’s nemesis. Backscatter will show when the light source is close to the camera lens, as it is in this case. These are reflections from the particles in the water.
- Power – the internal flash is rather weak and isn’t effective further than 1-2 feet.
Due to the 2 problems listed here, I recommend using the pop-up flash only on subjects closer than 2 feet, and the closer the better. If the visibility is bad, I would shoot no further than 1 ft away! Otherwise, backscatter will ruin your shot.
The recommended camera settings would be similar to those listed above for an external flash. The main difference is the distance from your subject, which can be up to 5-6 feet with an external flash, but only 1-2 feet with the pop-up flash.
This mode is great for macro! Just make sure that when using an external close-up lens, it does not obstruct your flash.
Recommended mode – Manual (M)
Aperture – f/2.8 (this is a large aperture, to let in more light)
Shutter Speed – 1/250 – 1/2000. You can fully control your background by changing the shutter speed only. The faster the shutter speed, the darker your background will be. e.g. 1/2000 for black background, 1/1000 for dark blue background, 1/ 250 for bright blue background. The shutter speed determines how much ambient light you’re letting in, while your subject is lit by the flash.
For shallow depth and better viz, you would likely need a faster shutter speed (1/1000 – 1/2000). Especially since your aperture is set to let in more light.
ISO – 200-800 (depending on depth, the deeper you go, the higher ISO)
WB – Auto WB (AWB)
Flash – On / Fill Flash / Forced On – all of these modes should work, depending on your camera model.
Night Dives
While this is a more adventurous type of diving, the photography part is actually easier, since you have no ambient light to work with and balance! The only light you will use, is the one created by you, making it much easier to control.
The secret to good photos at night is a good focus light. Without a focus light, your camera is blind. It will hunt for focus and refuse to shoot, or even worst, take blurry out-of-focus shots.
Ideally, you can get a focus light that switches off when the strobe flashes, so that its beam won’t interfere with the shot and the subject will be lit by the strobe alone. Look for the AFO (Auto Flash Off) feature when choosing a focus light.
Another great feature is using red light for focus. The camera is very sensitive to red light, so it can easily focus using only that. Most marine life can’t see red light at all. It just isn’t in their visible spectrum. This fact helps you get much closer to fish and critters, without spooking them away with your bright light. The red light will most likely not show up in the photos as well, so you don’t need to worry about canceling it out.
On the other hand, it is harder for us humans to notice things under red light, which is why many still prefer a white light over red.
Once your camera can focus, all you need to do is light the subject with your strobe. Shutter speed doesn’t matter here that much and other settings are fairly straightforward.
Recommended mode – Manual (M)
Aperture – f/5.6 – f/8
Shutter Speed – 1/250s. If you’re using a white focus light that doesn’t turn off automatically, use a faster shutter speed to get rid of it in the shot – 1/1000s or so.
ISO – 200. Maintain the best image quality.
WB – Auto WB (AWB).
Flash – On / Fill Flash / Forced On – all these modes should work, depending on your camera model.
Strobe – If your camera and flash support TTL, that’s best for night dives. Otherwise, set the flash on medium power and adjust as needed.
Shooting photos with a video light (Macro & Close-ups)
More about this technique here
A few years back, video lights were either huge and expensive, or small and weak.
In the last couple of years, we’re seeing a boom in LED technology, resulting in more affordable, more compact and more powerful underwater video lights and dive lights. This still doesn’t mean you can ditch your strobe and shoot with LED lights only, since strobes still produce about 10 times more light than an equivalent video light around the same price range. However, video and dive lights are a good alternative for lighting and often easier to use and more accessible.
The secret to shooting photos with video lights is to stay close! Don’t try to shoot anything with a video light further than 1-2ft.
Keeping your subject under 1 foot away is ideal. That’s why video / dive lights are great for macro.
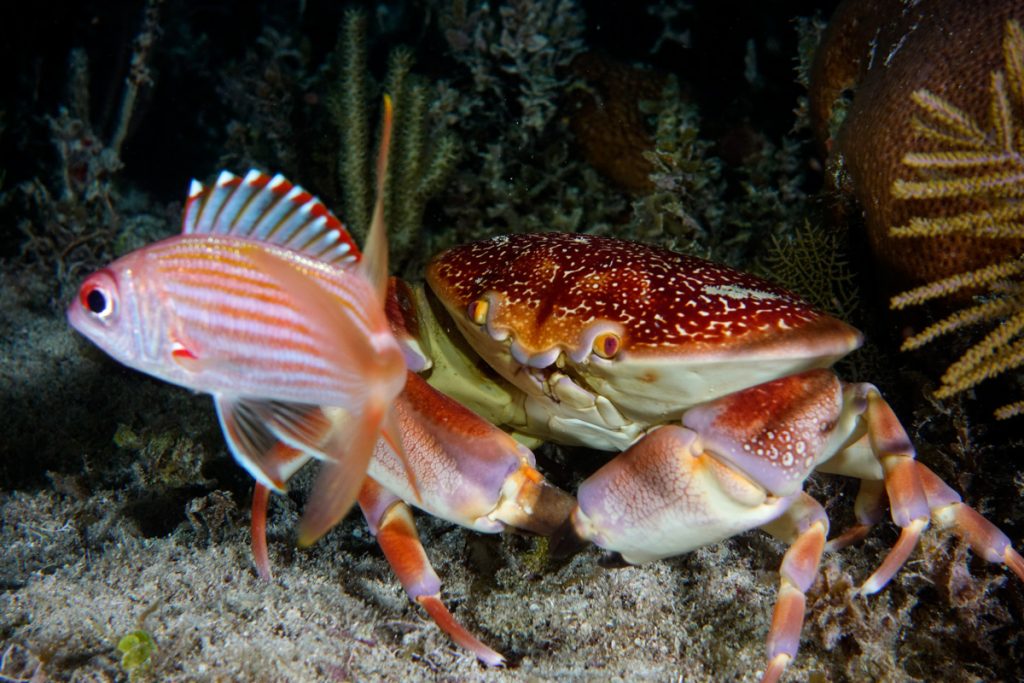
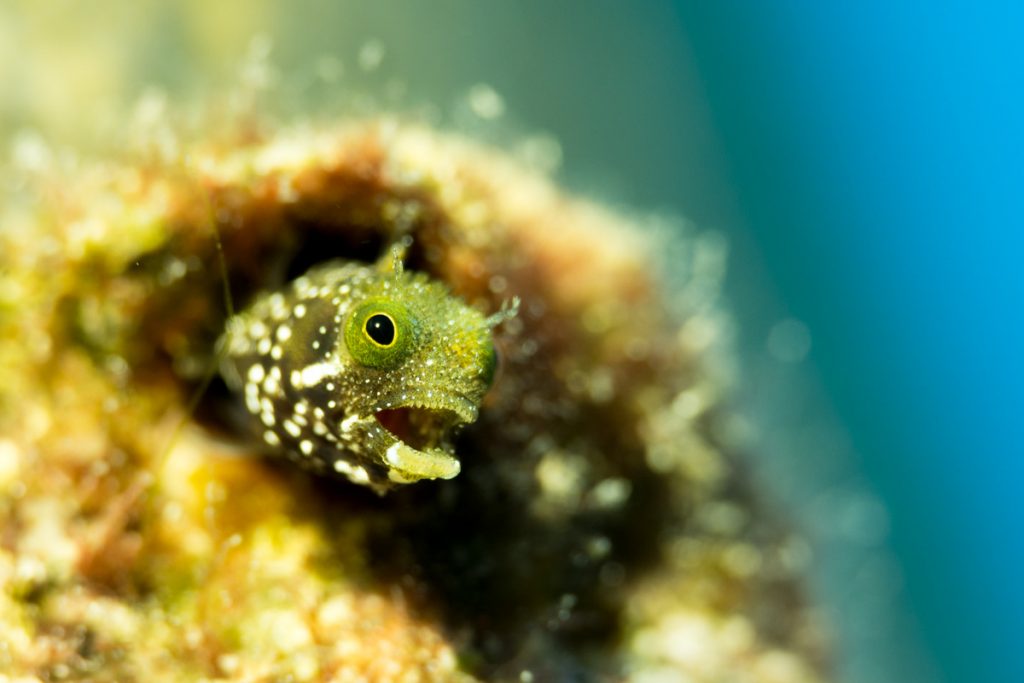
The main advantage, is that you don’t have to worry about recycle speed, which slows you down, so you can shoot in continuous / burst mode. This way it’s more likely one of your shots will be in perfect focus and capture the precise moment that little Blenny yawns or the Arrow Crab stuffs food in his little mouth.
Recommended mode – A / AV (aperture priority)
Aperture – depends on your light. If you have a strong light (3000+ lumens), you can “afford” a smaller aperture (f/8 – f/16). Otherwise, use f/2.8 – f/4.
Shutter Speed – Will be chosen automatically by the camera. Make sure it’s faster than 1/100s to freeze movement. Over 1/200s is even better.
ISO – 400-1600 (The stronger your light is, the lower ISO you can use)
WB – The best way is to use a slate and set custom WB by shining your light at it. Otherwise, use Auto WB (AWB).
Flash – Off of course.
Shooting mode – Continuous / Burst. Capture several images to make sure one is in focus.
Metering – It might be a good idea to use Spot or Center metering in this case, especially if using a narrow beam light. This will make sure exposure is metered from the center of the frame, preventing over-exposure of your subject.
IMPORTANT – This technique is more prone to blurriness than using a strobe, so make sure you review the photos immediately after taking them, while still with the subject, and zoom into them on your LCD screen, to make sure they’re in focus and not blurry. Otherwise, try again!
Summary
These scenarios should cover 90% of the conditions you will encounter on your dives. The remaining 10% may require a more creative, out-of-the-box thinking, and after gaining a deeper understanding in camera settings and getting to know your camera better, you should be able to adjust your settings to almost every situation you’re faced with!
In general, I don’t recommend messing around with camera settings too much during a dive. To make your dive more enjoyable, and less risky, adjust everything in advance. Perhaps you can prepare one additional setting to use during the dive. Practice several times before the dive on adjust that setting, and which buttons you will need, so you don’t start looking for them underwater while smashing into corals and losing your dive buddy.
Have you encountered a situation that I didn’t cover in this post? Can’t find the settings on your camera? Need more advice? Contact me at ran@housingcamera.com! I’m always happy to help 🙂
If you want to gain a deeper understanding on underwater photography, and why the settings listed above make sense, join me on one of our Underwater Photography Workshops!
RM

Visit his personal portfolio at www.ranmorphoto.com.
- Native Lenses vs. Wet Lenses for Underwater Photography – December 20, 2023
- The Complete Guide to Practicing at Home for Underwater Photographers – October 4, 2023
- Best Strobe for Underwater – The Ultimate Strobe Guide (Updated!) – June 29, 2023
48 comments
Nice job condensing a broad subject!!! Thanks!
Sure thing Tom!
Thanks!
thanks. learned a lot. will practice.
thank you. learned a lot from reading your write-up. will start practicing with my new g7x mark2
Great to hear that Fred!
It’s an excellent camera! Enjoy 🙂
THANKS LEARN A LO
Ran, i have googled and googled and googled. then found this site; it is a really good in depth start for the beginner UWP, all i would say to anyone is judge each photo on its own merits… not 2 photos will ever be the same settings, so don’t expect to put on 1 setting and it will be fine for all photos thats where i went wrong really learn the camera settings and capabilities….but what Ran has put has absolutely brilliant content for anyone who is starting out…
Hi Jason!
Thanks for the kind words! I’m very happy to hear that you found my articles useful! 🙂
And I completely agree. There’s not one setting that works for all. The settings listed in this post are meant to serve as a good reference, but it’s not match for getting a deep understanding of photography and learning what each setting on the camera actually does and how it affects the different lights sources underwater.
Happy diving!
Ran,
I’m currently using a nauticam housing with a g16 and Inon strobe.
I’m considering updating to a g7x my ii.
Does the g7x mk ii allow the pop up flash power to be reduced? Also, is there an option for back button focus?
What are your thoughts?
Ran,
I’m currently using a Nauticam housing with a g16 and Inon strobe.
I’m considering an update to a g7x mk ii with Nauticam housing.
Will the g7x mk ii allow the pop up flash power output to be adjusted. Also, is there a back button focus option available?
Hi Tom,
Yes, the G7X II allows setting the flash to “manual” and then choosing between “minimum”, “medium”, “high” outputs.
If you set it to minimum, you will significantly save battery life and improve recycle speed.
There is no back button focus option available. Those are rarely possible on compacts, mostly on mirrorless / DSLR’s where there are more customizable buttons available.
Overall it’s a great upgrade. Image quality is a LOT better, as well as overall performance. Native macro capabilities are not as good as the G16 but when using a diopter (macro lens), the final results are much better than the G16.
Great article! I have a Canon S95 in UW housing – the camera has a user-defined button at top, so you can choose AFL and press this to focus, shutter to take pic. Then this releases focus for next shot.
Thanks Roy!
Yes, the S95 is quite unique in that aspect, usually only mirrorless and DSLR cameras allow that type of focusing technique.
Thanks for the input!
Nice write up. Question on camera setting with wet lenses. I’m using a Sony RX100V and Fantasea housing for the first time. I picked up the Fantasea 12+ diopter and expect the UWL-09F any day now. For the 12+ diopter, Fantasea instructions say to put the camera in macro mode when using the lens. On the RX100V, this means selecting macro from the SCN setting which greatly reduces the adjustable functions of the camera. Is this right? For the wide angle, a type a and b adapter is included for use depending on the housing. Which is the better adapter for the Fantasea housing? Thoughts?
The RX100 V does not really have a macro mode, the scene mode is not required for macro focusing distance. You can just use the lens as is.
Which wide angle lens are you using the Inon H100 ? If so, you will need the type II for 24mm lenses and the type I for 28mm lenses.
Let me know if you have any further questions, I will be happy to help.
Do you have a reference scale of depth vs ISO/WB changes for normal daylight dives? I plan on diving between 30-60ft with some changeable lens filters. So I’m trying to get my ISO and WB correct so that I don’t have to waste the majority of my dive videos with trial and error.
Do you have a reference scale of depth vs ISO/WB changes for normal daylight dives? I plan on diving between 30-60ft with some changeable lens filters. So I’m trying to get my ISO and WB correct so that I don’t have to waste the majority of my dive videos with trial and error.
Hey Jake,
I understand your willingness to save time and get the settings right the first place, using a chart, but I don’t think such a chart exists.
These charts were used in the age of film, when you couldn’t really see what you’re getting, so it would eliminate a lot of guess work. Even then, many adjustments would be made in post, but you wanted to get it “sort of” right.
The great thing these days is that you can see what you get in the camera screen.
As a rule of thumb, your ISO needs to be as low as possible as long as you have enough light.
Light varies a lot, even if a cloud passes by, that could change your entire lighting immediately.
As for WB, some cameras have Auto UW WB mode, which is a great help. If yours doesn’t feature that, you will have to do some trial and error to get it right for video. For stills it’s not a problem, since you can use RAW.
For the depths you’re diving, if you’re not using any lights, I would raise the WB to as high as 10,000K, to warm it up, then add purple tint as needed to correct the green tint.
Hope that helps somewhat.
Hi Ran,
Great info. I have a sea life 2500 dragon as a video light for when using my go pro, but now I’m wanting to take pictures with my G7x ii. I’m thinking of getting the sea life strobe, would you recommend leaving the video light on or twisting it away when I come to take a photo? Cheers Dale
Hey Dale!
Glad I could help.
I would definitely recommend using the video light as a focus light, especially when shooting under corals and darker spots. It’ll help the camera focus much faster.
Just try to eliminate the effect of the video light by using a faster shutter speed, which doesn’t affect the strobe light.
Or, you can actually use the video light creatively as a fill light from the other side, to lift up the shadows and get nicer lighting.
Play around with it, see what you like best! But no need to twist it away.
Thank you so much Ran ??
Hi Ran
Appreciate all your valuable info on xour page.
What is your take on using redfilters when no strobe is available?
My understanding is that it simply absorbs blue and green light to make a more even color distribution in reference to red. But that only further reduces the precious amount of light and lowering blue/green and pushing red can be done in post rather easily.
Is there any advantage in having a physical redfilter present vs adjusting in post?
Thanks!
Great article, thank you. I’m struggling a little with a new camera and as I’m freediving I often don’t have a lot of time to nail my shots (especially on deeper stuff at 20-30m). But I’ll keep practicing. Thank you 🙂
Glad you enjoyed it!
Definitely harder when freediving, there’s a lot less time to change settings in real time.
It’s much easier to shoot wide angle than macro while freediving…
Hi David!
Glad I can help 🙂
What you’re saying is quite accurate, especially when shooting RAW. However, I’ve found that it’s very difficult to reach a natural looking result in post, whereas with a filter, when used properly at the right depth, it’s quite easy.
There is an ideal depth to use a red filter, around 10m / 33ft in my opinion.
Shallower than that, everything comes out too red, deeper, colors start getting weird and purple.
Also, when shooting video, it’s almost impossible to correct the colors in post and reach the same result as a filter.
I don’t use a filter that often, since I always prefer using lights, but I do appreciate its value for video and certain ambient light shots.
Thanks for providing “first aid” to UW nubes ! A couple of questions that I hope you can help with:
1. Why do you recommend aperture priority ? Isn’t the biggest risk that you get motion blur, which would indicate shutter priority ?
2. Any real advantage of using a red filter vs post-processing – or UW WB mode for that matter ?
3. What video format would you suggest out of XAVC S HD, AVCHD and MP4 (HD) ? Frame / bit rate ?
Glad I could help!
1. I prefer working in Aperture Priority since you have a lot more room to play with the shutter speed, rather than the aperture. I do indicate to always make sure the shutter speed is fast enough to avoid motion blur. If you find it comfortable, you can shoot with Shutter Priority as well.
2. Yes for sure. Post processing can only go so far. Using a red filter strategically in the correct depth (5-10m / 15-30ft is ideal), will add some red that you cannot get out of post processing, and combined with good post-processing, would produce the best results. Furthermore, when shooting photos, you can shoot RAW, no problem. Then you can edit your WB up to 50,000K. When shooting videos, you’re limited to the in-camera WB which is up to 10,000K. So there a red filter is very significant.
3. MP4 is widely supported and easiest to work with. It’s also the smallest file size. But lowest quality out of the 3. AVCHD is a higher quality video and XAVC S HD would be highest quality and detail, but also largest file size. This post goes into further detail and offers a video comparison between XAVC S HD vs AVCHD.
Ran, great article. I’d like to ask a question about the maximum flash shutter speed sync. I currently have an a6500 and the fastest speed sync is 1/160. Given the limitations, what do you recommend in order to control the ambient light? I’m attempting to get that black background, studio look but starting to think it’s impossible with that slow of a shutter speed. Is this something that can be overcome? Any information you provide would be much appreciated.
Hey Richard!
Glad you like the article!
There’s no way around it – black background in daylight dives is FAR easier with a compact camera, since you can just use 1/2000s to get rid of the background.
With DSLR’s and MIL, the secret is a very strong strobe and being close to the subject.
The 1/160s on the A6*** series is even more limiting than most DSLR’s (which are limited to 1/250s).
It is possible though!
You set your ISO on lowest, shutter speed on 1/160s and aperture on as low as you need to get a black background.
Then you fire up your strobes all the way to maximum and make sure they light up the subject well enough.
Also, you have to make sure the background is clear behind your subject, otherwise you end up lighting the background.as well. It helps to put the strobes from the side, so they don’t reach the background.
Hope that helps!
Hey guys, I am looking for a little guidance. I currently use a little Olympus tough (832), with a video light for focus and spotting mounted on the shoe and a sea and sea TTL only strobe triggered optically mounted on a tray. My challenge is that I can’t find a trick to get a fast shutter speed. Increasing the ISO does not help and at the limit only causes over exposure. I think I should go to a low ISO so the video light has less impact, and the strobe becomes more dominant – but that takes shutter speed to even slower speeds. Maybe a limit of the camera?
Hey Doug!
Controlling shutter speed on those Olympus tough cameras is quite a challenge, due to the lack of manual mode.
You can try bringing the exposure compensation slider down, that’s the only thing I found that helps. And using the camera on f/2 instead of f/8.
When using the flash, I believe it might limit it anyway to 1/60s.
Hi Ran, thank you for your guides and tutorials! I am learning a lot about how to setup my Sony RX100Mk5 so that I can take great photos. Question for you about how to setup a back focus button on that camera. I can see where to turn off Pre-AF, but I don’t understand how to setup a button for back focus or how to turn off AF with Shutter. Also, do you recommend High ISO NR or Picture Profiles? Steadyshot? Again thank you so much!
Hey Ben!
So sorry for the late response.
You can’t set back focus on the RX100V as far as I know. That’s usually available on DSLR’s and Mirrorless cameras. Not so much on compacts.
High ISO NR is nice to have and works well. When you shoot RAW, I believe it’s not applied anyway. And I do recommend shooting RAW.
Same goes for picture profiles. When you shoot RAW, you can save the JPG later with any profile you like. sRGB usually shows up well in browses so I recommend that.
Steadyshot is almost always good to have. Only in case of panning or other long exposure effects it could cause problems, but usually just leave it on.
Hope that helps!
Good article I will be applying this weekend. I will have questions later!
Glad to hear you enjoyed it Tom! Sorry for the late response 😉
Hi Ran,
Thanks for your lovely guide. I’m a total beginner and upgraded from a GoPro to the LX10. Will try it out tomorrow! Was so hard to find some good how-to-start guides. I would like to learn more, where can I find more articles? 🙂
Awesome! Glad you enjoyed it Filip 🙂
We have plenty more guides and tutorials here.
Good luck with your new venture (Camace)!
Thanks for this. Along with the personal touch when I was struggling.
My pleasure Sheryl! Hope it helped!
Спасибо за статью, очень полезные советы. Как переназначить фокусировку с кнопки затвора на sony rx 100 5a, на заднею кнопку. У меня что-то не получилось.
Sure thing!
The C button (trash button) can be configured in the menu to activate the AF / MF Control Hold. That will give you the back focus functionality.
You can see it on exactly 2:51 in this video: https://www.youtube.com/watch?v=AgK8IkGcMCQ
Bom dia! Sou iniciante como fotógrafa subaquática, tenho uma Olympus TG6. Como meus mergulhos vão no máximo até 20 metros de profundidade, você saberia me informar qual a configuração ideal para não precisar ficar alterando a cada mergulho?
Depende de quais luzes você usa.
Se você não usar nenhuma luz, a captura subaquática de largura ou instantâneo funcionará muito bem.
Se você usar luzes, a profundidade subaquática ou macro, dependendo do que você está fotografando, é excelente.
Great write-up. It’s amazing how far compact cameras have come and how well they perform underwater now!
Great comprehensive article. One thing I noticed: the suggestion for a red focus light is applicable to DSLRs mostly. To a certain extent with contrast detect point and shoots (though they like white light also), but especially with PDAF mirrorless, the best colour for focus lights is green since the sensor is most sensitive and has the most sensels in that colour.
Thanks for the comment, Brad! Another consideration here is the sensitivity of the marine life, not just the camera sensor – I’d be really interested in seeing a study on how different animals react to focus lights of different colors. The standard thinking has been, “red wavelength lights are less likely to scare off skittish creatures”, allowing you to focus on them without spooking them before the shot. But I’ve seen other research into flash photography on marine life with contradictory results…an interesting topic!
Have you updated this guide for the newer FG7X Mark III. The menus are a bit different from the Mark II?
We have not but thanks for your feedback, I will put it on our blog roadmap.