
 CAD
CADHow to fix underwater photos – understanding Camera RAW
So you finally got a camera that actually takes photos underwater. Isn’t it cool?
The first thing that you probably already found out about underwater photography is:
It ain’t easy!
Shooting good photos above water is hard enough, but diving, maintaining your balance and controlling your breathe, taking care not to harm the corals, avoiding getting stung by a lionfish AND taking good photos…? That’s just being greedy.
But what you can do, and I highly recommend, is giving yourself more leeway, by using RAW format.
In case you haven’t heard about RAW format, or in case you heard bad things about it (it’s time consuming, it’s unnecessary etc.) let me explain shortly what it means.
What is RAW?
RAW format is how your camera actually takes photos. After capturing the RAW image, usually the camera will post process the image and convert it to JPEG, in order to show the image on a digital screen and shrink the file size. This process is very similar to developing photographic film. Once the development is complete, much of the captured details are gone forever and the RAW format is deleted.
If you choose to hold on to the RAW file, you obtain the ability to process it yourself and use the data on the file to make “magic”! Or at least fix images much beyond what you thought possible.
In order to process and develop a RAW file, you will need a RAW processor such as Adobe Camera Raw or Adobe Lightroom, or the software that you received with your camera.
The most important elements conserved in the RAW format are the white-balance and exposure. These will help you fix your underwater photos easily and effectively.
* I’m assuming throughout this tutorial that you were shooting without flash. Flash photography underwater is a whole different issue and will be explained in a dedicated post.
Adjusting white-balance:
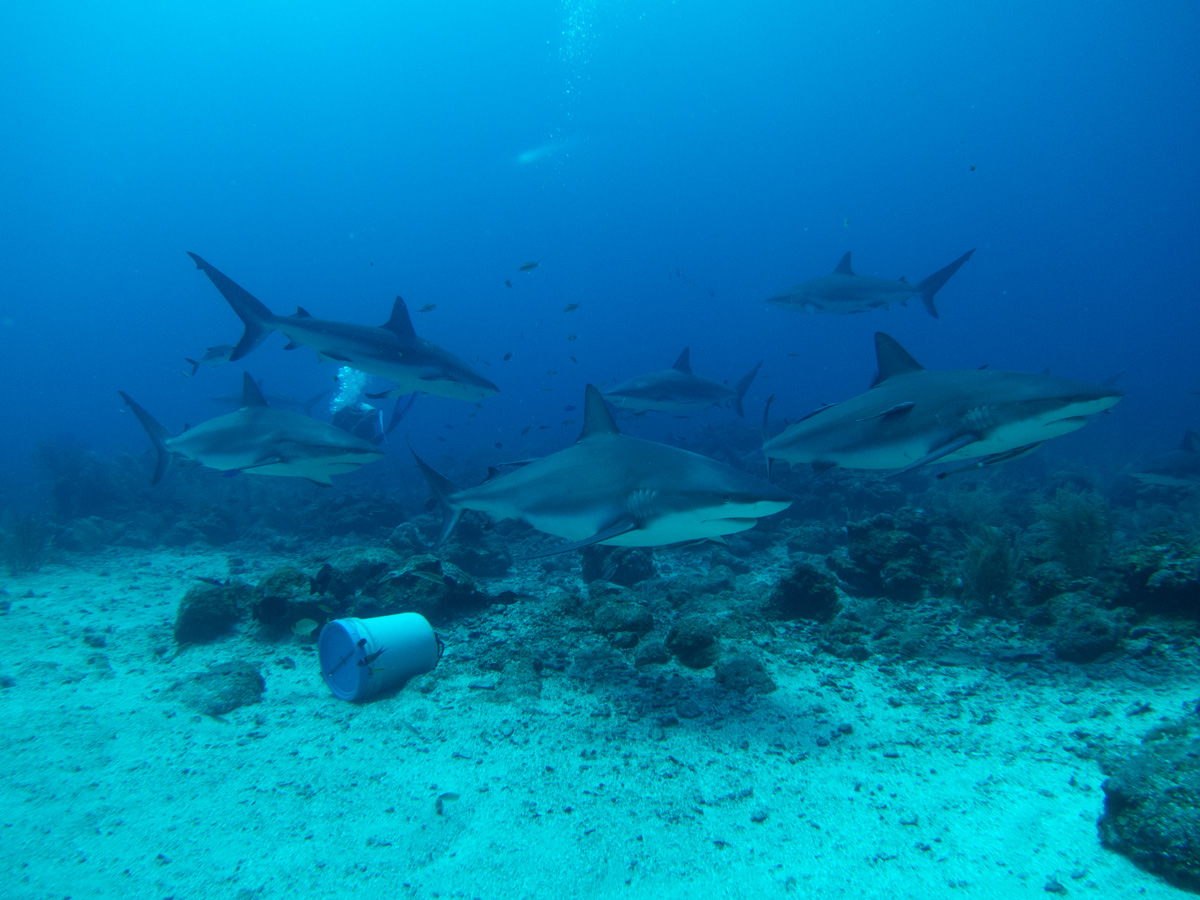
As you probably realized, colors disappear underwater. This happens due to optical absorption of light in water and greatly affects your underwater photos. The first color to vanish is red, followed by orange, yellow and green. Eventually all you have left are shades of blue.
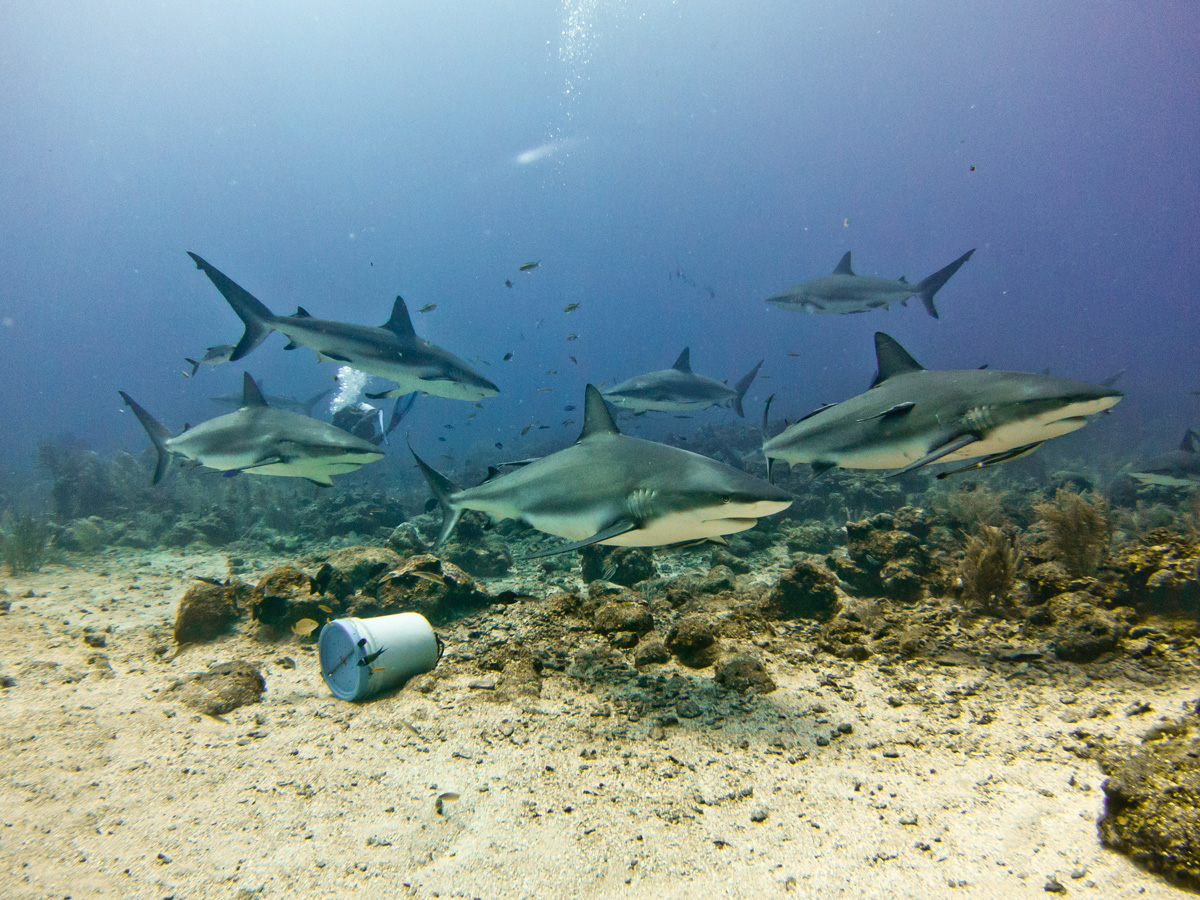
Using the white balance slider, available during the RAW processing, you can bring back those lost colors to a certain degree and bring the photo back to life, as shown below:

I recommend experimenting with the 2 sliders until you achieve the wanted result. Usually it will require dragging the Temperature all the way to the right and adding quite a lot of Magenta Tint.

Adding Contrast
Another effect caused underwater is lack of contrast. The subject tends to blend in with the environment and the water thus resulting in a boring image. Adding contrast is easy using the Contrast slider, but I prefer darkening the blacks in the image and adding a bit of exposure. That will usually give the image a more dramatic effect. Contrast-savvy individuals might prefer using the curves tool, which takes longer but may produce better results.

The controls would look something like this:

Adding Clarity and Vibrance
Clarity is a very neat tool, that allows us to boost the contrast of the midtones, thus adding punch to the image, increasing depth and emphasizing your subject. A little clarity can go a long way.
Usually, above water using too much clarity will make your image seem too “edited” or weird. Underwater, the midtones lose a great amount of their contrast so even setting the clarity to 90-100 might be good for your image. Use it wisely and take care not to over-use it in certain images.
Vibrance is just a smart way to add saturation, only to your less saturated elements in the image. This tool is easy to over-use and I recommend adding just 10-20 on the slider.
The result:
Final Touch-ups
We’re almost done! The last thing you want to do is add some final changes to finish up.
Under ‘Detail’, I recommend adding some Sharpness while increasing the Luminance in order to clean up the graininess and conserve the sharpness of the image. You can play a bit with the sliders to fine-tune your changes (remember to zoom in to see the real effect of your changes).
On the HSL tab, I like to play a bit with the Blues and Aquas hue slider, just to get the exact hue of water as I want it and getting rid of the green hue your WB changes might have left in some parts. You can also play with the Luminance of the Aquas to get some more brighten certain areas and adding depth.
One last thing, is adding some dramatic effect with the Post Crop Vignetting slider. Just a slight touch.
The final image

Trying to do all these changes on a JPG would be difficult if not impossible, and would result in a major loss in quality.
That’s why I recommend always using RAW underwater and putting in the effort to post-process your images before publishing them.
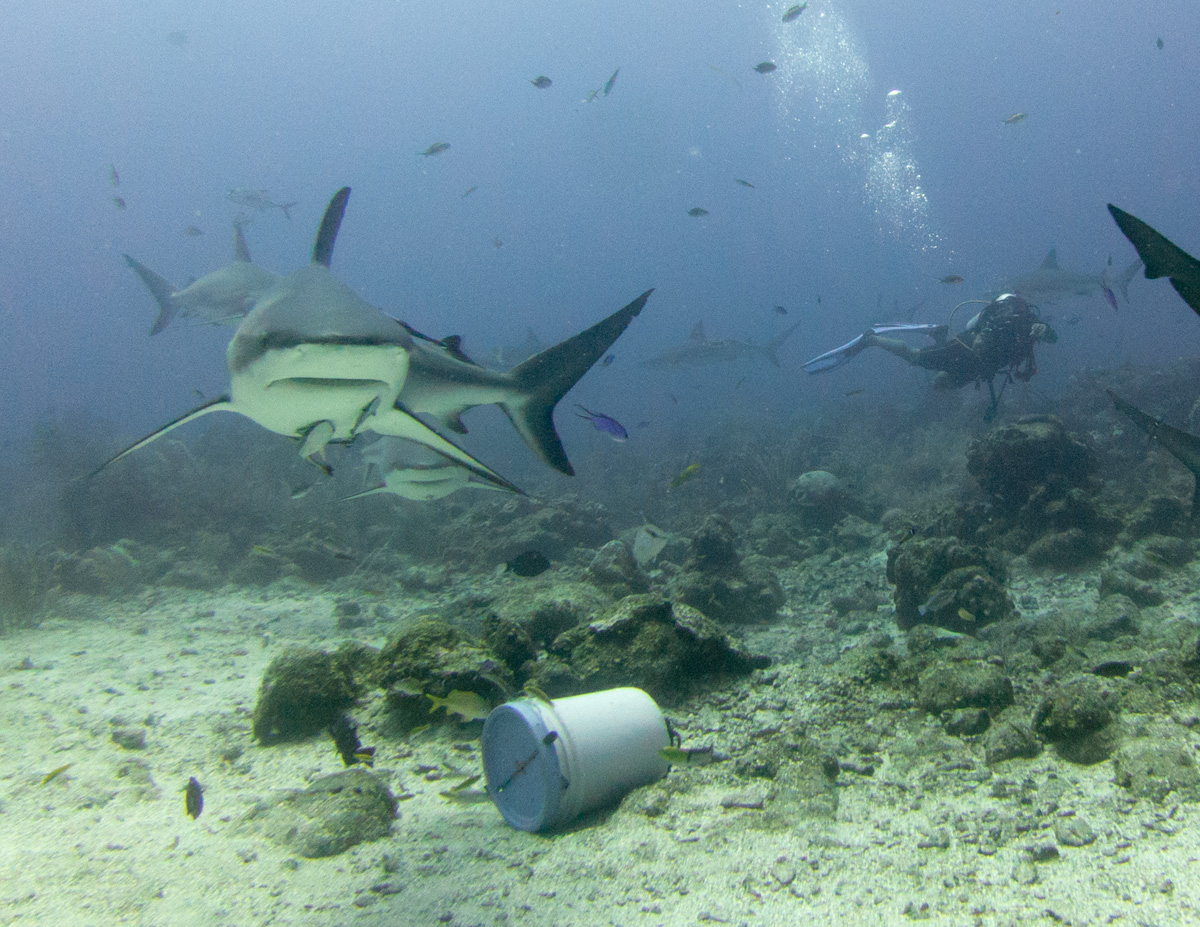
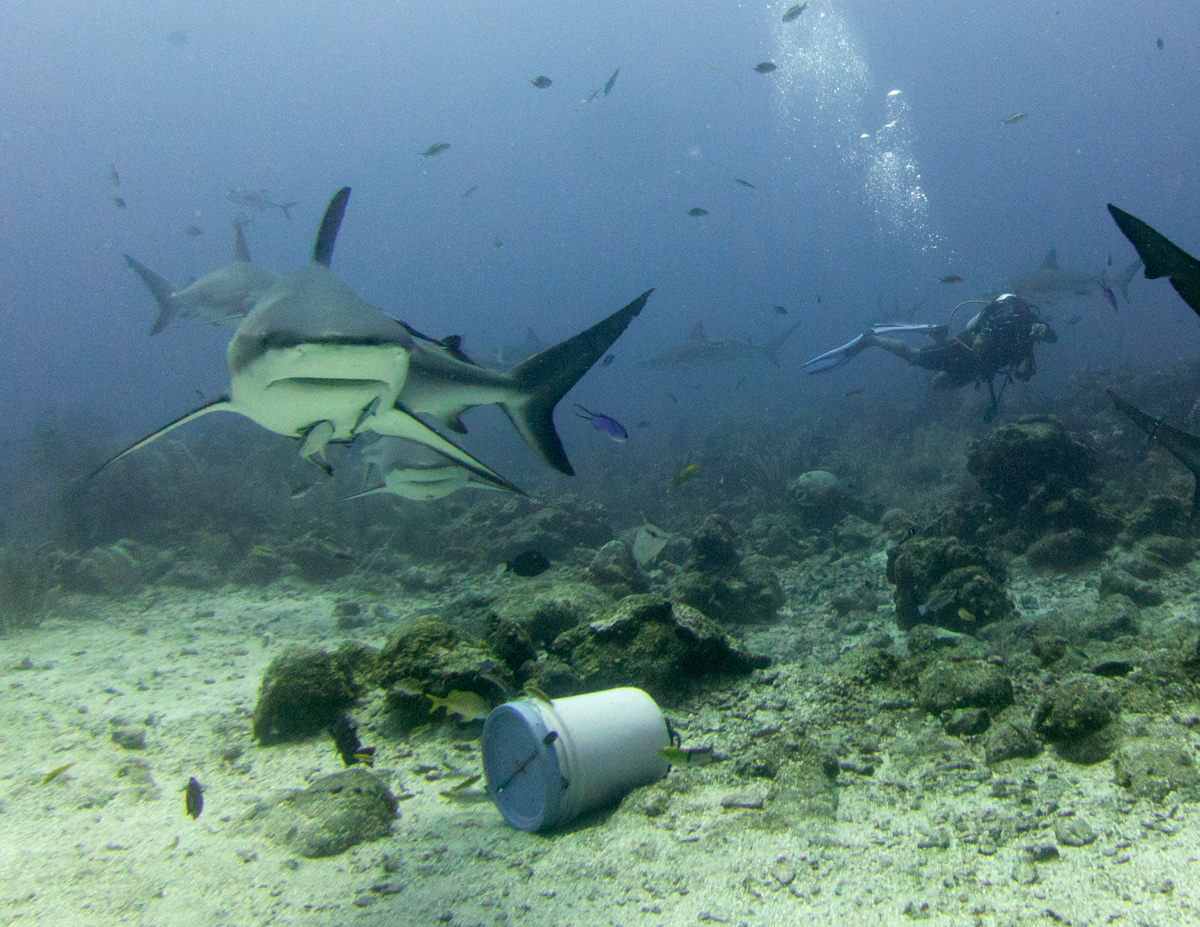
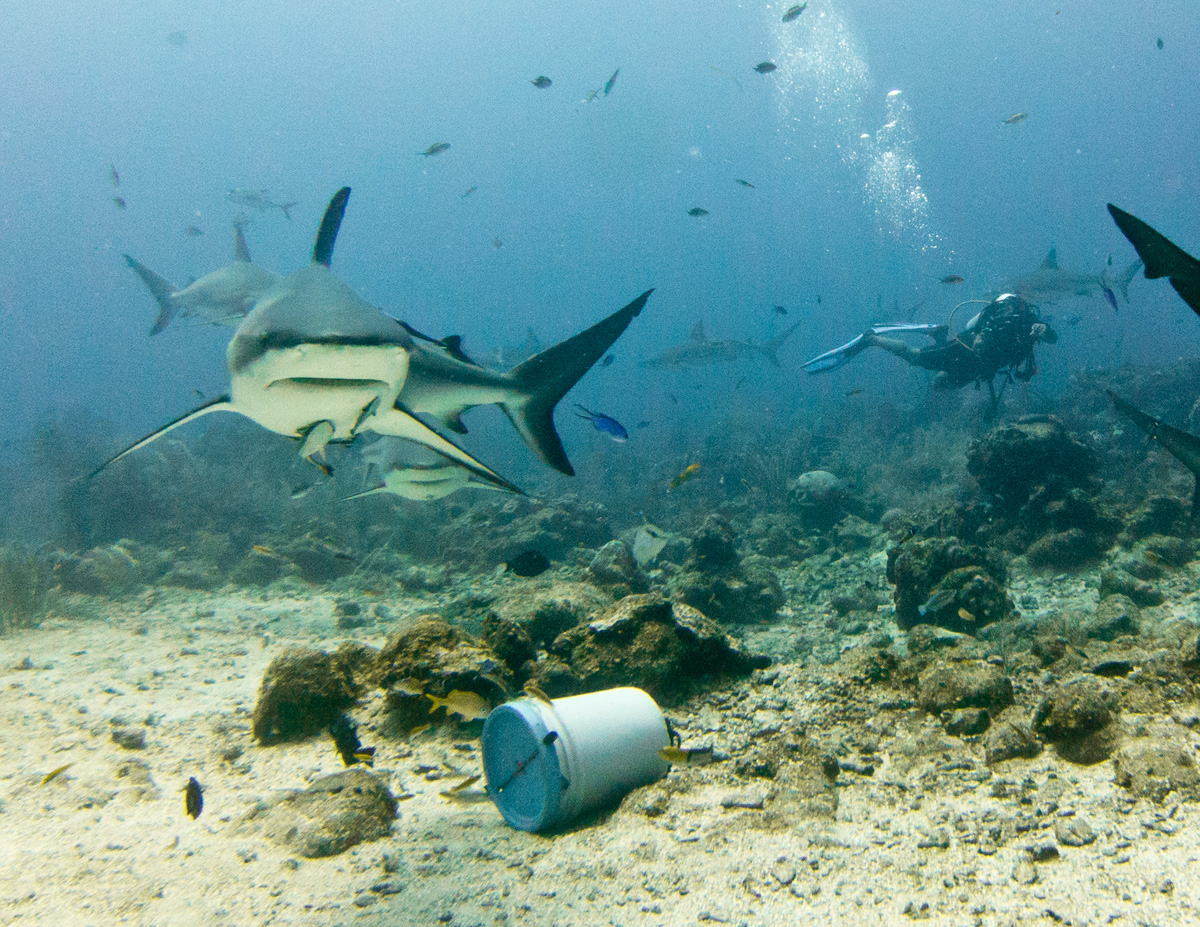
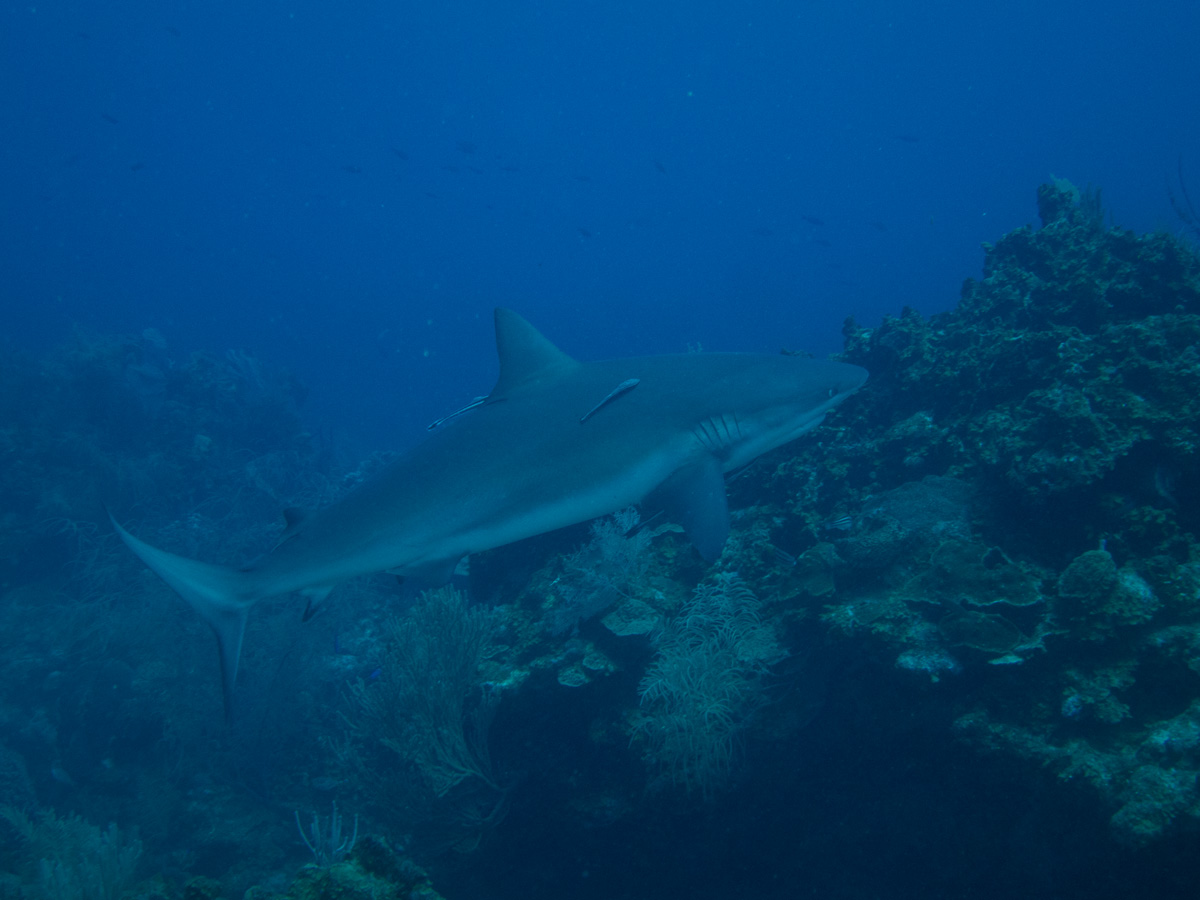
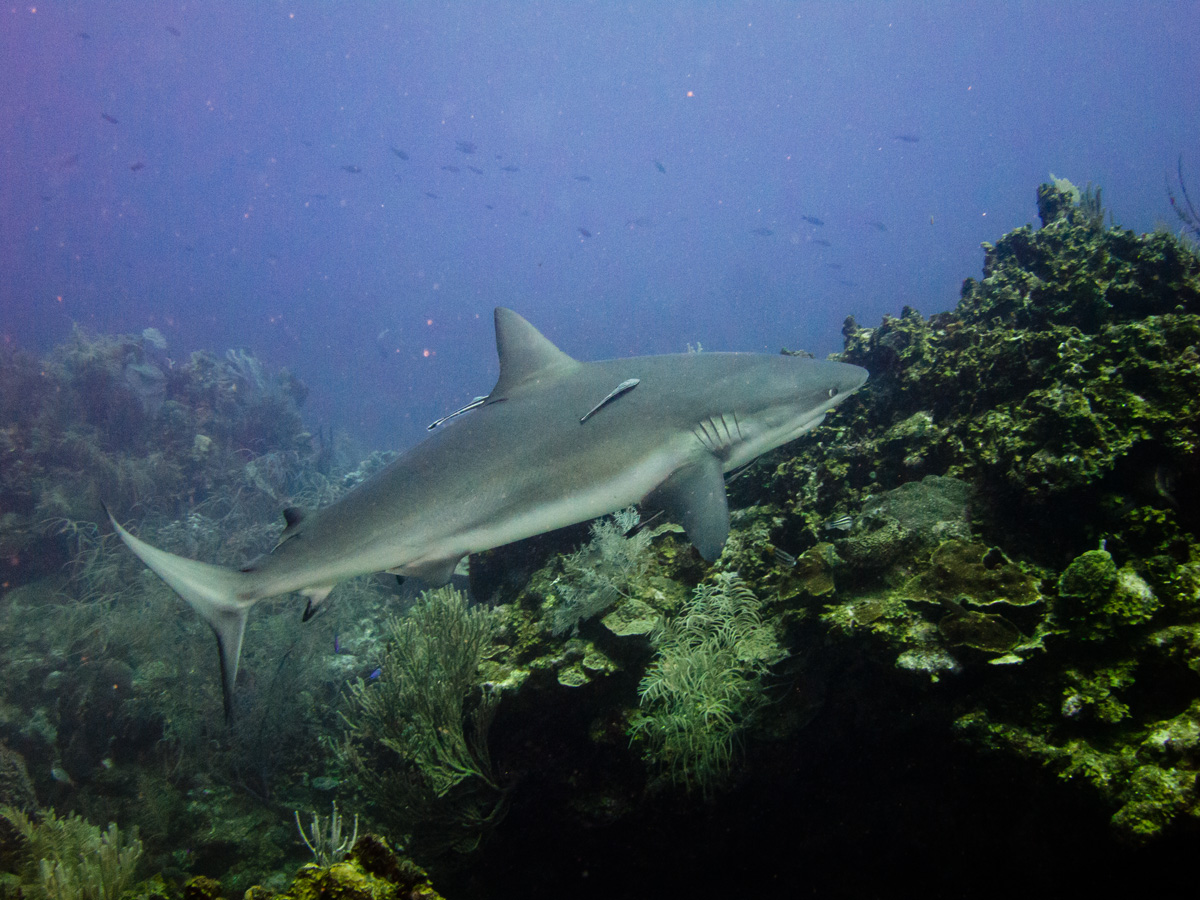
Here are some more examples: (All the images were taken in Roatan, Honduras)
Stay tuned for my next post on JPG post-processing (useful if you forgot to switch to RAW) and post processing images taken with flash.

Visit his personal portfolio at www.ranmorphoto.com.
- Native Lenses vs. Wet Lenses for Underwater Photography – December 20, 2023
- The Complete Guide to Practicing at Home for Underwater Photographers – October 4, 2023
- Best Strobe for Underwater – The Ultimate Strobe Guide (Updated!) – June 29, 2023
4 comments
Hi Ran,
Very interesting read! I am using a G16 without strobes at the moment and I am struggling a bit with the settings. From land photography I am used to shooting in RAW and use Lightroom for editing. But there seems to be a flaw in this when it somes to underwater photos. This is what happens:
Scenario 1: I shoot with automatic white balance. Result: The pictures from depths below 5 m are totally green blue and even moving the sliders for Temperature and Tint to the furthest right (or using white balance dropper) doesn’t fully bring the red and yellow back.
Scenario 2: I use my white computer wristband for Custom White balance underwater and reset it every few meters (does that even make sense when shooting in RAW?) Result: Everything is still very blue, but now in Lightroom the sliders for Temperature and Tint are AUTOMATICALLY furthest right before I even touched anything. I learned about manipulating RGB Channels, but at least I just screw up the colours entirely and it leaves me with hours trying to edit just one photo (and usually being very unhappy with the result because the colours are wrong and(or the image looks overedited).
I noticed that the preview from the camera usually doesn’t even look as bad as Lightroom’s interpretation of the RAW file. So I started shooting in RAW + jpeg and the jpegs with Custom White Balance come out okay or need very little editing that I can do without manipulating the colour channels.
Do you have some ideas on what I could change to get the colours right or improve?Do you think a redfilter might help?
Big thanks in advance!
Hi Ran,
Very interesting read! I am using a G16 without strobes at the moment and I am struggling a bit with the settings. From land photography I am used to shooting in RAW and use Lightroom for editing. But there seems to be a flaw in this when it somes to underwater photos. This is what happens:
Scenario 1: I shoot with automatic white balance. Result: The pictures from depths below 5 m are totally green blue and even moving the sliders for Temperature and Tint to the furthest right (or using white balance dropper) doesn’t fully bring the red and yellow back.
Scenario 2: I use my white computer wristband for Custom White balance underwater and reset it every few meters (does that even make sense when Shooting RAW?). Result: Everything is still very blue, but now in Lightroom the sliders for Temperature and Tint are AUTOMATICALLY furthest right before I even touched anything. I learned about manipulating RGB Channels, but at least I just screw up the colours entirely and it leaves me with hours trying to edit just one photo (and usually being very unhappy with the result because the colours are wrong and(or the image looks overedited).
I noticed that the preview from the camera usually doesn’t even look as bad as Lightroom’s interpretation of the RAW file. So I started shooting in RAW + jpeg and the jpegs with Custom White Balance come out okay or need very little editing that I can do without manipulating the colour channels.
Do you have some ideas on what I could change to get the colours right or improve? Do you think a redfilter might help?
Big thanks in advance!
Hi Verena!
The biggest problem you’re facing is that underwater, it’s not a matter of correcting colors or getting the colors right. There colors are gone. No amount of correction will bring them back the way you want them.
WB helps a bit, whether you shoot AWB and move the sliders afterwards, or use custom WB and it gets set while shooting, the result is the same – funky colors that don’t really look the way you want them to look.
Your eyes tend to correct the colors underwater making you think it looks better than it really does.
The camera’s JPG has some auto correction which improves things, that can be achieved in LR when processing a RAW file with some practice.
However, by far, the best way to get good colors underwater is to use lighting.
Here’s why:
https://www.housingcamera.com/blog/underwater-photography/underwater-strobe-damn-important
If you want to get more serious about UW photography, I strongly recommend a strobe. It’s the ONLY way to get good colors under 5m depth.
Let me know if you have any further questions!
So sorry for missing this comment!
The quick and short answer is – get a strobe.
The problem underwater is that deeper than 5m, the colors start to disappear. No amount of correction will bring them back.
Using a red filter helps somewhat, by artificially adding some red and blocking out greens and blues, but it still won’t be as natural as using an actual light.
When shooting RAW, your WB is irrelevant. You can set it while taking the photo or set it in LR, it’s exactly the same, as you noticed.
It’s also limited, to 50,000K. In the camera you’re limited to 10,000K.
Bottom line, my recommendation would be to get a light. There are very affordable strobes which make a huge difference.
Otherwise, use the built in flash in your camera along with the included diffuser. It’s quite effective even up to 2-3 feet and much better than using just ambient light. Get closer to subjects and light them up with your flash while keeping the background interesting.
Hope that helps!