
 USD
USDThe Ultimate Guide to Shooting Underwater Video

You might have run into issues in the past while shooting underwater video. The colors are off, the image is shaky, it appears unsharp (or even too sharp?), there’s flickering, or perhaps you feel the composition isn’t quite right. And that’s ok – we’ve all been there.
Getting good at this obviously takes time. But, armed with knowledge, you will be able to practice with a clear sense of what you need to improve upon and how to do so.
In this article we are going to discuss several technical and practical skills that professional underwater videographers use to shoot their films. If you follow the tips laid out in this article you should see your underwater footage instantly improve, regardless of your current experience level.
So without further ado let’s get started!
Resolution

Let’s start this article with some technical info that will make practical skills easier down the line.
Central to modern day videography we find resolution, or the amount of pixels used to capture an image. You’ve probably heard terms such as Full HD, 1080p, 4K, 8K etc. Resolution is a pixel measurement of the image, telling us how many pixels a certain resolution will make up.
Let’s start with Full HD, also known as 1080p. This resolution is measured as 1920 by 1080 pixels in a 16:9 aspect ratio.
You probably have a good understanding of what 16:9 is just by flicking through aspect ratio settings on your TV. Essentially for every 16 pixels horizontally, there are 9 pixels vertically.
16:9 is the most popular aspect ratio for TV & Web, not counting the surge or vertical aspect ratios born out of social media.
But lets go back to our Full HD resolution. If we multiply 1920×1080 we get roughly 2 point something million pixels, or 2 megapixels. That’s it! Where photos have been captured in a range of 16-50 megapixels for the last decade, our most popular video resolution is tiny in comparison. But for most screens and especially your phone, it’s all you really need.
But then came 4K, which measured at 3840×2160 pixels, or 8 point something megapixels. In other words, 4K contains roughly 4 times more pixels than FHD. Hence we get an image with much more detail, information and not to mention possibilities in post!
Because one of the great advantages of shooting in 4K is the possibility to crop in post production for FHD projects, giving you effects like digital zooms or super macro images.
Hence the video resolution of a camera can be quite important, and I’d argue far more important than the resolution for photos, which have already been amazing for decades.
Exposure
When your camera shoots photos or video it needs to create an accurate exposure to ensure the image is captured correctly, that means it’s not too dark (underexposed) or too bright (overexposed).
The way this is done is through 3 features called ISO, aperture and shutter speed. Each of these features can be adjusted, meaning you can set values that affect the look of your image.
And if this already sounds complicated, I promise it’s really not! While learning the theory behind this can seem frightening, in the end it ends up being some very simple rules to follow so stay with me.
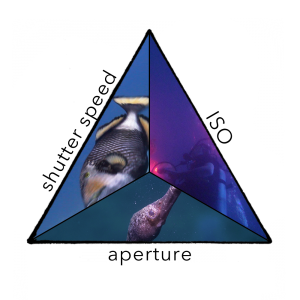
ISO
Let’s break down each of these three camera features so we understand what they do.
First, we have ISO, which is the sensitivity of your sensor to light.
We measure it in numbers, and most cameras typically have a base ISO of 100. If you increase your ISO levels, the camera gets better at capturing images in low light scenarios.
For example, you might wanna shoot at ISO 100 during a bright sunny day, but you will more likely choose a higher ISO value if you are shooting in darker settings.
What’s very important to know here is that when we use very high ISO values, it can have a negative effect on our image. Cameras will start to produce image noise at certain values, and this is different in each camera. Some cameras shoot just fine at ISO 1600, others not so well.
How can you figure out where your camera performs best? The easiest way is literally just to google “<my camera model> iso performance” and do a quick bit of reading.
So, ISO is a value that we want to keep as low as possible (although some cameras in certain video formats like Log perform better at slightly higher base levels – a topic for another day).
Aperture
Next up is aperture, which refers to the size of the opening inside of your lens.
Inside of all camera lenses sits aperture blades which, on most camera systems, are adjustable. This means that you can control the physical opening inside of your lens, or in other words, how much light is allowed to pass through to your sensor at any given time.

So let’s do an example: If you are shooting in a dark setting, you might need to open up your aperture to allow more light into your sensor, allowing you to capture images without being underexposed.
The rather confusing part here might be the values.
When we discuss the values of ISO, it’s quite easy to remember that higher values = increased sensitivity. With aperture, all the numbers are given in fractions, meaning the lower the number, the larger the opening.
So, for example, a value of f2.8 (f being the symbol used to indicate aperture) is larger and brighter than a value of f8. For now, just remember that aperture values are kind of opposite.
Shutter Speed
Last we have shutter speed.
This is a feature that relates to the amount of time the camera takes to capture an image. Hence it is measured in seconds, or fractions of seconds. For example, you might take a photo using a shutter speed of 1/250th of a second during a bright sunny day, or you might need to decrease that value if you are shooting in a low light setting.
The less available light we have, the longer we need to let the camera be exposed to it to achieve a correct exposure.
That’s the very basics of ISO, aperture and shutter speed. If you currently have a rough understanding of how they each work, that’s already amazing!
Next, let’s look at how they relate to one another.
Stops of light

As mentioned, all these features are measured in values. And what’s really cool is that they relate to each other in a system known as stops.
First off, we have “full stops.” So let’s paint a picture.
Let’s say we have a correctly exposed image at the following settings; ISO 200, F11, 1/125. That’s ISO, aperture and shutter speed.
If I want to change my ISO in this scenario to a value of 100, I am losing one stop of light. And this means I will need to compensate for the loss of that one stop to keep my image correctly exposed. Hence what I can do is either increase my aperture from a value of F11 to F8 or change my shutter speed from 1/125 to 1/60.
In other words, all these settings are connected, and by changing the values we can achieve various creative outcomes.
To be able to achieve even more accurate exposure levels, we also have 1/3 stops, meaning that in between each full stop there are 2 other numbers.
For example, with ISO, you got ISO 100 being a full stop number, then you get ISO 125 & 160 being 1/3 stops before you get to ISO 200, being a full stop number. You can of course adjust for full stops in between the 1/3 numbers as well, going from ISO 125 to ISO 250 etc.
That’s about as complicated as this article is going to get.
Now you might be asking yourself; “how do these values change my image?” And perhaps more importantly, “why can’t you just let the camera control these values for you while you focus on more important things such as breathing and staying on the right side of your NDL’s?” Well you see, there’s a little more to it.
Let me explain..
ISO & Dynamic range
As previously mentioned, higher ISO levels can mean reduced image quality. But there’s also another important factor controlled by your ISO value, and that is dynamic range.
Dynamic range (or DR) tells us how many stops of light a camera is capable of capturing. The best way to illustrate this is to understand how this works with your eyes.
Let’s say that you’re indoors and the sun is shining through your window. If you go to your window and stare at the sun (not recommended) you might be able to see the round contour of our star.
But if you sit indoors and look at the entire room, there’s no way that you’ll be able to make out details in the shadows of your house while seeing the details in the sun.
That is DR, except no camera can give as much detail as our eyes can, hence we are actually working with far less detail in our video shots. And DR is connected to ISO in that higher ISO levels reduce it’s range.
In other words, we now have 2 reasons to keep ISO as low as possible; higher values create noise and reduce DR.
Aperture, depth of field & sharpness
As you now know, aperture controls the physical opening inside of your lens, letting in more or less light depending on the value. But it also controls other important features, the first being depth of field.
Depth of field tells us something about how much of our image is in focus. You may have seen images where the background is completely blurred out, or rather out of focus.
This is achieved by using a wider aperture, such as a value of f2.8, f2 or f1.4. For example, the image of the lotus seed stalk below was shot with a relatively wide aperture, with a relatively low value of f2.8.

On the other side of the coin, you may have seen landscape photos where it appears the entire image is in focus.
This is achieved using a smaller lens opening, perhaps somewhere in the f16-f22 range. The wider we open up our lens, the smaller the depth of field becomes. Or, in other words, a smaller part of the image will be in focus.
Now this might be an effect that you will want to use, and if it is, you need to be aware of the maximum aperture when buying cameras or lenses.
Aperture also controls sharpness, in that each individual lens will have a range of aperture values where it will produce its sharpest image.
Generally this will be somewhere between f5.6 – f11, but it varies with different lenses. Again, if you want to know the sharpest aperture of your specific lens/camera just try searching up “<camera/lens name> sharpest aperture”.
Shutter Speed, frame rates & the 180 degree rule
While dynamic range, depth of field and sharpness are universal across photography and videography, the 180 degree rule only relates to video. Without going into too much of the backstory this rule comes from the days of film and relates to motion blur.
While reading this you are (hopefully) watching nothing but your screen with no motion blur. But try quickly moving your head from side to side (if you’re anything like me, expect a headrush) and while doing so, the screen isn’t so clear and sharp anymore. Early filmmakers wanted to simulate that effect in video to increase realism.
There are even studies that show that the average movie goer will notice the difference between films shot using this rule, and those shot without.
The rule is simple; your shutter speed should be double the value of your frame rate. So if your frame rate is set to 30 frames per second, or 30p, your shutter should be set to 1/60th of a second.
Now I realize we haven’t discussed frame rates yet so let’s quickly cover that too.
Frame rates is simply the number of individual photos that are captured during one second of video. The same early filmmakers that figured out the 180 degree rule were also experimenting with how many frames to use to have an image appear “normal.” They kind of arrived at different answers, complicating matters further.
In countries like the US & Japan, they use a system known as NTSC, which set the standard amount of frames per second at 29.97 or 30.
In Europe and the rest of the world, they developed and use PAL, which goes with a frame rate of 25 frames per second. But they both agreed that cinematic video should be captured at 23.976 frames or 24.
So 24, 25 & 30 frames are considered to be “normal” speed video. But what if you want to film in slow motion? Well if you were to capture double the amount of frames you need during one second, that would stretch that one second to two seconds of playback. Meaning double the frame rate, half the playback.
So if you are shooting in PAL, you want 50 frames, or if you are using NTSC you get 60 frames. So 50% slow motion in other words. Double it again, you’re down to 25% slow motion and so it goes.
Shooting video using manual exposure
Finally we get to it; “how do we shoot video at manual exposure? And what are the advantages?”
The shooting part is practically very easy. Let’s examine what we want to achieve;
Keep the ISO as low as possible – Keep up with the 180 degree rule – make creative choices with our aperture.
In other words, you won’t change your values much when diving. Your ISO will likely be set to the lowest amount you can get away with and you won’t change it much during a dive unless you go very deep or visibility is reduced. So let’s just say that your ISO stays at 200.
Then we find our shutter speed and set it to double that of our frame rate. And you probably won’t be changing your frame rates much during a dive, as most of us tend to capture things in our highest available resolution & frame rate combo possible. So let’s say we are capturing at 50 frames, meaning our shutter is set to 1/100.
Do you see where I’m going with this? Your shutter is pretty much set and your ISO will very rarely be adjusted.
In other words, you are mostly just adjusting your aperture during your dive to achieve a correct exposure in various lighting conditions.
Now the benefits of knowing and doing all this, except for the already mentioned correct motion blur, depth of field, sharpness, dynamic range and sensor noise control is also that automatic exposure tends to come with a lot of flickering, as it constantly tries to adjust your exposure to the changing lighting conditions.
Underwater, that can result in constant automatic changes due to waves and light reflection, changing lighting conditions from clouds, tilting or panning with your camera or the movement of your subjects.
A few other things you should know: depth of field, dynamic range and sensor noise is also contributed to sensor size. Meaning that larger sensors have less depth of field (and more background blur) and generally better dynamic range and less sensor noise than smaller sensors.
Just in case you were looking for more reasons to upgrade your rig…also, not all cameras will allow you to shoot full manual video!
Focus

Although it’s very important to stay focused while diving, I’m rather talking about the focus of your camera.
This is truly one of the most important camera skills to master, because it doesn’t matter how well your image is exposed or how good the color is. If it’s out of focus, it’s pretty much unusable.
So let’s look at a few different ways of focusing and the advantages and disadvantages of each.
Continuous automatic focus
The ultimate dream is to not have to worry about focus at all!
Cameras are massively improving and there are better and better autofocusing systems coming out from various brands. Currently, the most respected autofocus systems for video come from Sony, Canon and Olympus.
But while these focus systems truly excel at capturing video on land, underwater it can be quite challenging.
Conditions underwater are just so different! Things like floating particles and distracting marine life can affect the focus system, making it lose focus on your subject. Another problem can be focus hunting or pulsing, where the camera can lose track of your subject and display distracting focusing behaviour to try and regain lock.
In other words, the way focus systems currently stand, I feel it’s a bit of a gamble whether any camera will be able to focus correctly in various situations.
Even if it gets it right most of the time, you will have shots and moments potentially ruined. But for certain shot types, for example if you’re moving in and out and want to keep the subject perfectly in focus, this is the only real way to do so underwater.
One push focus
Another way of focusing underwater is to use one push focus. This will not track your subject or focus by itself, but requires you to point your camera towards something and push a button to make sure that area of the image is in focus. The good thing about one push focus is that most any camera can accurately do so!
The challenging bit is that once you have your focus set, you better make sure that your subject stays at that distance, or else you’ll need to refocus and this will ofcourse show up as focus hunting in your shot.
So in other words, using this focus method heavily affects your shooting style and the kinds of shots you are able to capture.
Manual focus

Very few shooters will rely on manual focus underwater, the exception being for macro.
Using it on moving subjects while keeping your camera rig steady is very, very challenging and not recommended.
Many housing manufacturers also won’t allow you to adjust both focus and zoom, meaning you have to choose one of them. However, manual focus can be very useful for close up work, especially macro work with a diopter – autofocus often has a very difficult time in this scenario.
Focus video tips
So which way of focusing is right for you? Well it depends on your camera system and shooting style. If you’re set up with a decent autofocus camera system, you could just let the camera do the job and simply deal with some shots coming out with hunting or focus issues.
Personally, I mostly use one push focus, and here’s how.
If I’m approaching a subject and want to end up in focus, I will pre-focus the camera to a certain distance before starting the shot. Then as I’m approaching, I’ll need to stop at the right distance from the subject, leaving it in focus. If done right it looks really cool, as the subject gradually comes into focus.
Another great tip for most camera systems is to focus your camera to about 2-3 meters away after each completed shot.
This is to be ready for anything. Most unexpected action will happen no closer than a few meters away. So, by focusing on something in that general range, you’re ready to start shooting without having to worry about focus. If the situation does not require quick reaction you can ofcourse redo your focus before you hit record.
Framing & Composition

Framing
If you’ve watched a fair share of underwater videos you might have noticed that certain angles tend to repeat themselves. And they are often a result of limitation.
For example, there’s a lot of footage out there filmed from a top down position. And generally speaking these shots are perhaps not the most interesting, with the exception of animals that look good this way like whale sharks, turtles or big rays.
The reason there’s so much underwater footage from this angle is that a lot of it is captured either by snorkelers not able to freedive down or scuba divers filming subjects very close to the reef.
So what happens if you as a shooter decide to take a different approach?
Wildlife is of course unpredictable, and we don’t always get to choose our angles. But oftentimes using different framing can help make our shots much more interesting depending on our subject.
Filming animals at eye level lets us see their face and eyes, which helps the viewer form a connection to the subject. You can also shoot closeups, wide shots, silhouette shots against the sun and so forth. But choosing the best angle and framing for your subject can have a profound effect on the outcome of your image.
Composition
Learning about composition is tricky, as there’s so many techniques and information out there. But I find that following three specific techniques have helped me a lot in creating more interesting images, and I’m gonna share these with you next.
Just be aware that there are many more compositional tips out there, and I do recommend you go learn about them. Even if you don’t feel the need to use them yourself, knowing about them will help you understand the work of other shooters and understand the choices that they make.
Because in the end, composition and framing is all about making choices. And while they don’t need to be conscious choices (“This looks good” is a perfectly valid reason to hit record) the more you learn about composition the more you will affect those choices and it will help you shape your own style.
Rule of thirds

This very basic and simple rule is heavily used by photographers and videographers all over the world, and for good reason. If you divide a frame with 2 horizontal and 2 vertical lines placed at equal distance from another, you end up with some interesting intersecting points in your frame.
Our eyes are naturally drawn to these intersecting points in particular, and they are heavily used in films all over the world.
The next time you watch a Hollywood dialogue scene you might pick up on it, and once you see it you can’t unsee it!
These lines can be used in many different ways, and let’s start with the horizontal lines. On land, these lines are commonly used to divide the image into 1/3 portions, where you will often find the horizon line placed on either the upper or lower line to create a strong visual composition.
Underwater, we can do the same with the sea floor or the surface of the ocean, depending on our shot. Generally we want to see as much as possible of the most interesting part of the image.
So if it’s a beautiful reef, perhaps place the upper line on the seafloor. But rather if there’s a turtle swimming above the reef, perhaps place the sea floor on the lower line.
With the intersecting points, you can make interesting choices in for example portrait shots. But with underwater videography you can also use it in different ways. It’s important to remember that for video, composition is a fluid thing that can change during your shot.
So, let’s say our subject is swimming from left to right in front of us.
In terms of story, do we want to focus on where our subject has been? Or rather where it’s going? If it’s a turtle swimming towards another turtle, the interesting part of the image is where it’s going, hence we can place in on our left vertical line, while placing its eyes on the intersecting point for a double effect. Then we can simply track the subject this way, moving our camera at the same speed as our subject.
Center composition
With some subjects, it just makes sense to place them more in the center of our frame. This can be for various reasons, such as creating a strong focus on our subject or perhaps it just works better with its setting.
Regardless, it can help create a powerful look, perhaps for subjects that are hiding and you want your viewers eyes to be drawn past any distractions that may exist in frame.

Center composition can also be a good idea with certain moving subjects. If you are tracking something that is behaving unpredictable, giving yourself space to move with the subject can help with your shot (say a school of fish that might turn in any direction).
It can also work really well for the same reasons with any subject that is approaching you. Again you can’t be sure which direction it might break away to, and giving yourself space to track the subject is easier in these situations.
Fluid Composition
As mentioned, one of the beautiful things about video is that we can change compositions at any time. And doing this in a way that makes sense can be challenging, and hence knowledge again is key.
Being aware of various compositional techniques is very important for this to work. As the wildlife that we shoot tends to have a mind of its own, changing your composition as your subject moves can be a powerful technique to work on.
You can, for example, add motion to your camera, and go from an upper line composition to a lower line composition while swimming over a reef, transitioning into an interesting subject that is located above the reef. Or you can let a subject drift away from a transecting line composition to a center composition as it comes closer. The possibilities here are truly endless!
The most important thing to take away from this is again, make a choice. It can be a split second decision (it very often is!) as a subject approaches you, or a well thought out idea. Regardless, try out new things and see how you like them. Composition IS subjective, so make your own choices and as long as you’re happy with them, that’s all that matters.
Get steady

Without a doubt the most difficult challenge for any underwater shooter is to perform various shot types while keeping the camera still.
Static shots are not too difficult to pull off but there are so many cool camera moves you can do underwater, and motion is king!
And, being able to pull off steady shots while in motion is really the greatest challenge of underwater shooting in my opinion. But how you might ask?
Buoyancy
First and foremost, getting steady is about mastering buoyancy.
You need to be in full control of your body at any depth and in any situation, be that currents, surges or waves. This requires a lot of practice for most people, so don’t feel bad if you’re still struggling. The good news however is that you can practice buoyancy anytime you go diving! And if you are diving with a buddy that has more experience than you, they might even be able to teach you a few tricks.
Steady hands
Once you are in control of your buoyancy and breathing, it’s time to look at your body motion. If you are able to hold the camera still while hovering but not while swimming, we can assume that your hands are shaking due to the motion of your body. Finning, inhaling, exhaling, currents, waves and surges can all create unwanted motion in your body.
Let’s start with the largest source of motion, finning.
Our legs propel us underwater and in doing so creates a lot of movement, going up through our hips and into our torso, shoulders and arms. The easiest way of combating this is to stop as much of the motion in your hips. Basically you want to loosen up and reduce any excessive motion in your thighs and instead let your knees do more of the work.
Also just being aware of this will help you contain more of the motion to the lower part of your body.
But some of it will most likely make its way towards your upper body. To further help reduce shaky hands it’s important to keep your elbows bent almost at a 90 degree angle. This will help you reduce any motion coming down from your shoulders, which also includes inhales and exhales.
Dealing with nature
When it comes to dealing with your surroundings, be that currents, waves or surges, my best advice is to simply go with it! Trying to fight nature usually doesn’t end up well. Instead try to use those natural forces in your shots.
A current can push you gently towards or away from an area, meaning you can achieve motion shots without doing any finning! Which of course is much easier to keep steady. You can do the same with surges, letting them lift or push you towards parts of the reef.
In both instances being aware of your surroundings and the strength of the current or surge is very important, both for your own safety and the well being of any marine life that might be in your way.
Air consumption
Generally speaking, diving with a camera means using more air. We just tend to be more focused on getting our shots right! In turn this means that unless we want to be doing 30 minute dives and miss out on valuable dive time, we need to get real good with air consumption, even when we’re using our lungs to help stabilize our shots. And while we all have different sized lungs and use various amounts of air, there’s always room for improvement!
Shallow breathing
If you want to use less air, the best way is to consume less! I know, fairly obvious. But let’s look at a few techniques that can help us in doing so.
I always tell my students that diving is more like meditation than a sport. It’s not about speed but rather getting to where you’re going using as little energy and effort as possible. This helps us keep our pulse in check and our muscles needing less oxygen.
One breathing technique that tends to work for most people is 1 in, 2 out. If inhaling takes you 5 seconds, exhale for 10.
This will help you slow down your exhales and simply reduce the amount of time you spend inhaling. Some divers even push this towards a 3 times exhale.
Just remember to be careful with your buoyancy while doing this and also not to completely empty your lungs.
If you are descending on exhales with empty lungs, the pressure could potentially cause a lung to collapse, although you’d have to descend pretty quickly for this to happen.
Also don’t forget that doing full inhales on ascension can cause lung over-expansion injuries.
Body motion
Going back to your body, it’s important to have good motion techniques for air consumption as well. Any excess use of energy will require more oxygen.
Having very good finning techniques is key, and also avoid using your arms in any way for swimming. Try out various techniques and find the ones most efficient for various conditions. For example, you might want to use a variation of frog kicking, or perhaps flutter kicks work better for you.
This is also connected to the dive gear that you use.
Having the right type of fins for your body type and leg strength can have a huge impact on the amount of energy spent. The same goes for your regulator. It should provide you with enough air, but not too much. Most regulators will allow you to adjust the pressure from your 2nd stage, and this can help you reduce your air consumption as well.
Finally, I would say simply having a calm mindset can help a lot of people too. Not feeling like you’re in a rush or in need of getting somewhere quickly. Just relax and enjoy your time underwater! After all, this is what diving is all about.
Now you might be thinking, haven’t we missed a pretty important part of this article? What about color?? We already published an article a while back, teaching you all you need to know about how to get great colors out of your underwater video footage. So go read that next here!

- Backscatter MW-4300 Video light Review and Video – December 31, 2023
- Quick Color Correction for Underwater Video Using Adobe Premiere Pro – March 7, 2022
- Top Buoyancy Tips for Underwater Shooters (Diver and Rig Buoyancy) – December 8, 2021
1 comment
Ben fatto, molto utile e interessante. Grazie