
 CAD
CAD
How to Photograph People Underwater: Beginner Guide to Underwater Portraits
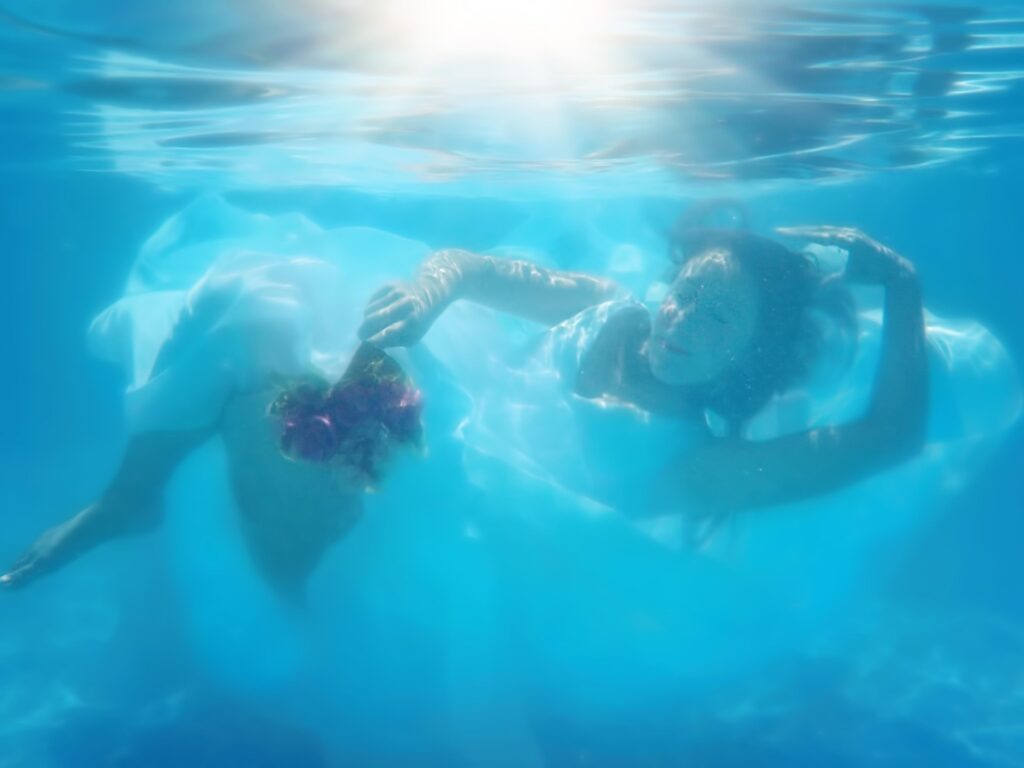
How Do You Photograph People Underwater?
To photograph people underwater, start in a clean, calm pool or shallow ocean location with good visibility. Choose a subject who feels comfortable in the water, explain the pose before each attempt, and keep every underwater session short.
Use a wide-angle lens, shoot RAW when possible, stay close to your subject, and use natural light, strobes, or video lights depending on the scene. Ask the subject to relax their face, move slowly, and hold one simple pose at a time.
Safety matters more than the photo. Stay shallow with beginners, take regular breaks, avoid pushing breath-holding limits, and never ask inexperienced subjects to do anything that makes them uncomfortable.
Safety Comes First
Underwater portrait photography should always be planned around the comfort and safety of the person being photographed. A good image is never worth panic, overexertion, cold stress, or unsafe behavior in the water.
- Start in shallow water, especially with beginners or children.
- Keep each underwater attempt short.
- Explain the pose before the subject goes underwater.
- Let the subject stop immediately if they feel uncomfortable.
- Use warm breaks, towels, robes, and drinking water between attempts.
- Avoid heavy props that can trap, pull, or restrict movement.
- Do not ask inexperienced divers to remove a regulator underwater.
- Use weights only with trained supervision and a safe release method.
The best underwater portraits usually come from calm, comfortable subjects. If the person feels rushed, cold, tense, or unsafe, it will show in their face, posture, and movement.
Why Photograph People Underwater?
Many underwater photographers only get to dive a few times a year. Between dive trips, pools can be a useful place to practice camera handling, lighting, composition, and subject direction. Photographing people underwater is also a creative way to use your underwater housing outside of regular dive travel.
You do not need a professional model or a full fashion production to start. A friend, family member, swimmer, diver, or comfortable subject can work well. The most important thing is that the person enjoys the water and feels relaxed below the surface.
Underwater portraits can be playful, dramatic, elegant, athletic, or documentary. Flowing fabric, natural light, bubbles, movement, and reflections can all create images that feel very different from regular portraits on land.
Best Places to Photograph People Underwater
Pools, oceans, lakes, and rivers can all work, but they are not equal. Your first decision should be based on safety, access, visibility, depth, temperature, and how comfortable your subject feels in that environment.
| Location | Best For | Main Advantage | Main Challenge |
|---|---|---|---|
| Pool | Beginners, portraits, controlled practice | Easy access, controlled depth, safer practice environment | Can look plain unless you use clothing, props, light, and composition well |
| Ocean | Divers, reef scenes, natural backgrounds | Beautiful setting, marine life, natural depth, and atmosphere | Current, visibility, waves, depth, and stronger safety planning |
| Lake | Creative portraits and moody scenes | Unique atmosphere and calm surface conditions | Lower visibility, colder water, darker tones |
| River | Advanced creative shoots | Movement, natural light patterns, and interesting backgrounds | Current, uneven bottom, visibility, and safety risk |
Pool Photography: What to Check Before the Shoot
A clean pool is usually the easiest place to learn underwater portrait photography. It gives you predictable depth, controlled access, and a calmer setting than the ocean.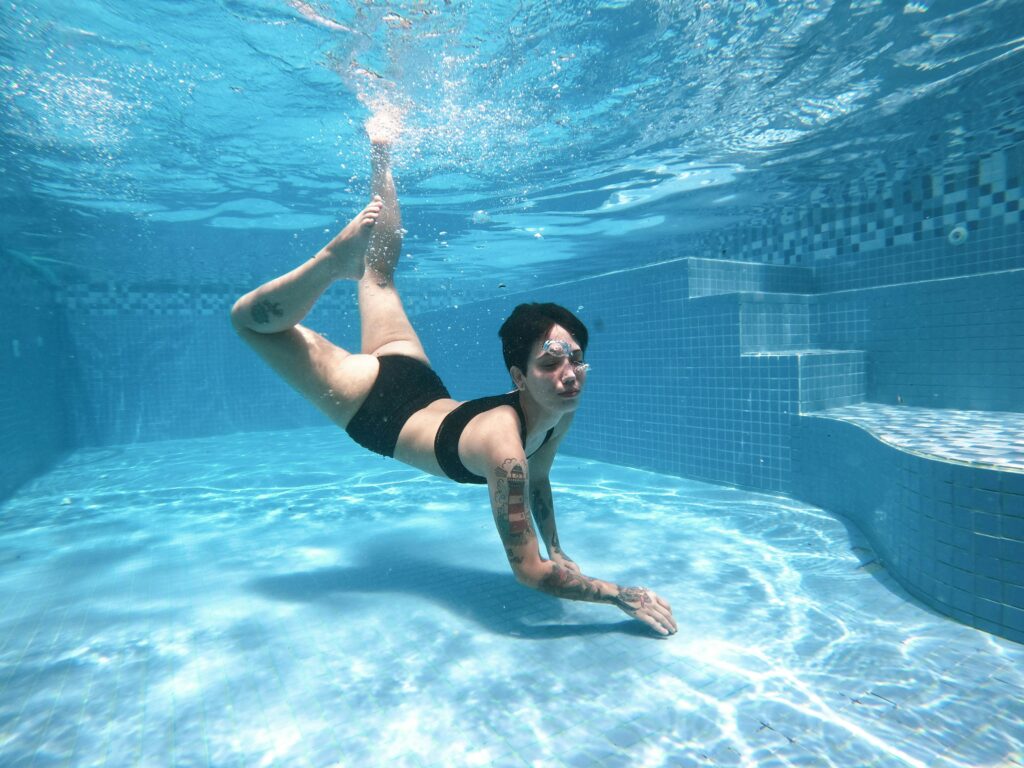
Before choosing a pool, check these details:
- Visibility: Clear water makes focusing, lighting, and skin tone correction much easier.
- Depth: A deeper pool gives more room for full-body poses, floating fabric, and wider compositions.
- Temperature: Cold water quickly affects the subject’s comfort and facial expression.
- Chemicals: Strong chlorine or unusual cleaning chemicals can irritate the eyes and make posing harder.
- Pool traffic: A busy pool can become cloudy after people swim in it for hours.
- Light direction: Sun position, pool tiles, shade, and reflections all affect the final look.
If possible, shoot before the pool gets busy. A pool that looks clean in the morning can become cloudy later in the day after many people have been swimming.
Ocean Photography: How to Photograph Divers and People Underwater
The ocean can give you a much more natural background than a pool. Reefs, sand, blue water, caves, rocks, wrecks, and marine life can all add context to the image.
The challenge is that the ocean gives you less control. Visibility can change, currents can move your subject, depth affects light and color, and safety planning becomes more important.
When photographing people in the ocean:
- Stay closer than you would on land.
- Use wide-angle lenses to include the person and the environment.
- Place the subject near interesting foreground elements, such as reef, rocks, or sand patterns.
- Use silhouettes when the person is above you and the light is behind them.
- Use strobes or video lights if you need better color and detail on the subject.
- Keep all posing natural and safe for the diver’s skill level.
If the subject is a scuba diver, do not pressure them to remove their regulator for a photo. Some experienced divers may choose to do this briefly in controlled conditions, but it should never be requested from new, nervous, or uncomfortable divers.
How to Choose and Prepare Your Subject
You do not need a professional model. You need someone who feels calm in water and is willing to repeat simple movements. Comfort matters more than posing experience.
Some people are comfortable swimming but still feel strange opening their eyes, relaxing their face, or moving slowly underwater. Give them time to adjust before expecting strong photos.
A good preparation process looks like this:
- Explain the idea before anyone enters the water.
- Show the subject the kind of pose or movement you want.
- Start with very simple poses near the surface or in shallow water.
- Let the subject see a few test images so they understand what works.
- Build gradually into more dramatic poses, movement, or accessories.
Keep your directions simple. Underwater, people cannot easily hear detailed instructions. One pose, one movement, or one expression per attempt works better than giving too many directions at once.
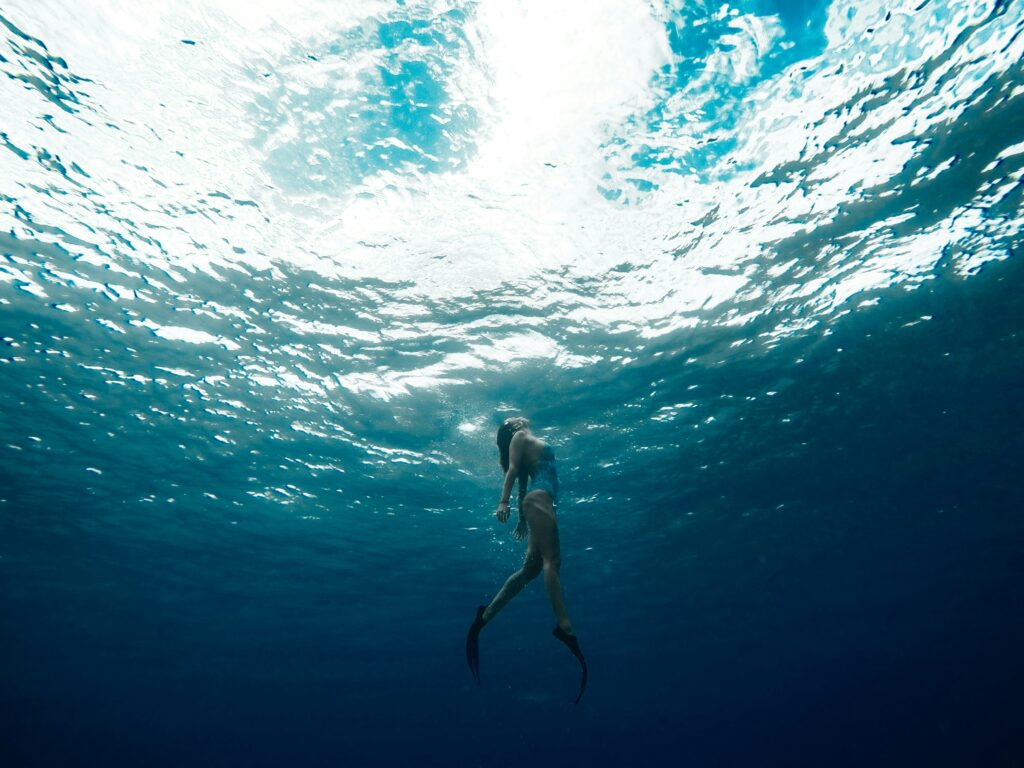
How to Guide Poses Underwater
The biggest posing issue underwater is tension. Many people instinctively hold their breath, tighten their face, close their eyes, bend awkwardly, or float out of position.
Ask your subject to focus on three simple things:
- Relax the face.
- Move slowly.
- Hold one pose at a time.
Hands, hair, fabric, and legs can look beautiful underwater when the movement is slow and controlled. Fast movement usually creates bubbles, awkward expressions, and motion blur.
For beginners, simple poses work best:
- Floating sideways with relaxed arms
- Looking toward the camera with soft expression
- Reaching toward the surface light
- Holding fabric that moves naturally in the water
- Swimming slowly across the frame
- Sitting or kneeling in very shallow water if the pool allows it safely

Best Props and Clothing for Underwater Portraits
Almost everything looks different underwater. Clothing, fabric, hair, bubbles, reflections, and movement can make a simple pool scene feel more creative.
Good underwater portrait props include:
- Lightweight flowing fabric
- Colorful dresses or shirts
- Swimwear with strong color or shape
- Sports accessories for action-style photos
- Simple masks or playful objects
- Safe floating props that do not restrict movement
Avoid anything sharp, heavy, fragile, dirty, toxic, or difficult to control underwater. Do not use props that can tangle around the subject’s neck, arms, legs, or dive gear.
Bright colors usually work better than dull colors because water reduces contrast and saturation. Red, orange, yellow, white, and strong patterned fabrics can stand out well in blue water.
Camera Gear for Underwater Portrait Photography
You can photograph people underwater with different types of cameras, from action cameras to mirrorless systems. The best setup depends on the quality you need, the depth, the lighting, and how much control you want.
| Camera Type | Best For | Main Benefit | Main Limitation |
|---|---|---|---|
| GoPro or action camera | Simple fun photos and video | Small, easy, and waterproof with housing | Less control over focus, lighting, and skin tones |
| Compact camera | Beginner and travel portraits | Good balance of size, quality, and control | Less flexible than a larger interchangeable-lens system |
| Mirrorless camera | Higher-quality portraits and creative shoots | Better image quality, lens options, autofocus, and RAW files | More expensive once housing, ports, lights, and accessories are added |
| DSLR camera | Photographers who already own a supported DSLR system | Strong image quality and proven lens choices | Older platform with less new camera development |
If you are using a mirrorless or DSLR camera, make sure the housing, lens, port, and lighting setup are compatible before the shoot. You can browse Mozaik’s underwater camera housings and camera and housing bundles to compare system options.
Best Lenses for Underwater Portraits
A wide-angle lens is usually the best choice for underwater portraits. It lets you stay close to the subject while still showing the full body, clothing, movement, and environment.
Staying close matters because water reduces sharpness, contrast, and color. The more water between the camera and the subject, the harder it is to get a clear image.
Good options include:
- Wide-angle lenses behind dome ports
- Fisheye lenses for dramatic full-body shots
- Compact cameras with wet wide-angle lenses
- Mirrorless systems with compatible wide-angle ports
If you are using a compact camera, a wet wide-angle lens can help improve the field of view. If you are using a mirrorless or DSLR system, make sure the lens and port combination is approved by the housing manufacturer.
You can browse Mozaik’s lenses and ports section for wet lenses, ports, and related accessories.
Best Camera Settings for Underwater Portraits
Your exact settings depend on the camera, depth, light, water clarity, and whether you use strobes. These starting points work for many beginner pool and shallow-water portrait sessions.
| Setting | Starting Point | Why It Helps |
|---|---|---|
| File Format | RAW | Gives more control over white balance, skin tones, and color correction |
| Lens | Wide-angle or wet wide lens | Lets you stay close while still showing the full body or environment |
| Aperture | f/5.6 to f/8 | Good balance of sharpness and depth of field |
| Shutter Speed | 1/125 to 1/250 | Helps freeze movement from the subject and water |
| ISO | As low as practical | Keeps the image cleaner, especially in bright pools |
| Focus | Continuous AF or pre-focus | Helps when the subject moves slightly during the pose |
| White Balance | Auto or custom, then correct in RAW | Helps control blue or green color casts during editing |
If your subject is moving quickly, raise your shutter speed. If the image is too dark, add light, open the aperture, or raise ISO carefully. If the water is bright and shallow, you may be able to use natural light very effectively.
Lighting: Natural Light, Strobes, and Video Lights
Light changes quickly underwater. Even in a pool, skin tones can become blue or green. In the ocean, color loss becomes stronger with depth and distance.
Natural Light
Natural light can work beautifully in shallow water, especially when the sun is high and the water is clear. It creates soft, realistic portraits and keeps the setup simple.
For natural light portraits, place the subject where the light hits the face or body cleanly. Watch for reflections, harsh patterns, and shadows from the pool wall or surface.
Strobes
Strobes are useful for freezing movement, restoring color, and adding contrast. They are especially helpful when you want better skin tones or a more polished underwater portrait.
Strobe placement matters. Aim the strobes carefully so the light reaches the subject without lighting too much floating debris in the water.
You can browse Mozaik’s underwater strobes or read the underwater strobe guide.
Video Lights
Video lights are easier to preview because they provide continuous light. What you see is close to what the camera sees. They can work well for video, close portraits, pool shoots, and creative lighting.
You can browse Mozaik’s underwater video lights or read the underwater video lights guide.
How to Photograph Scuba Divers Underwater
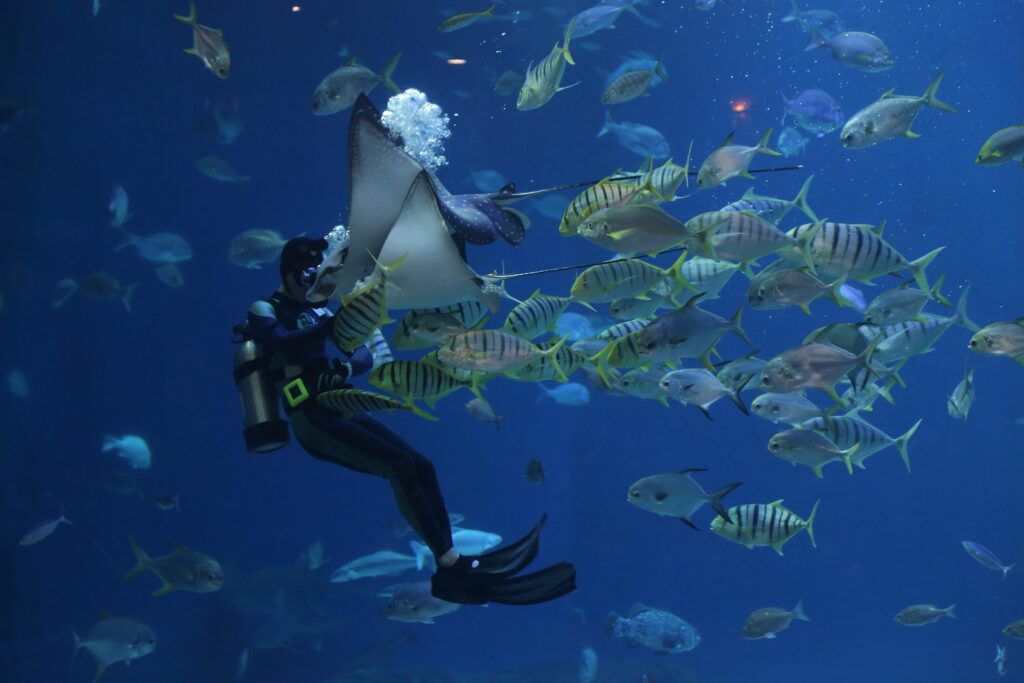
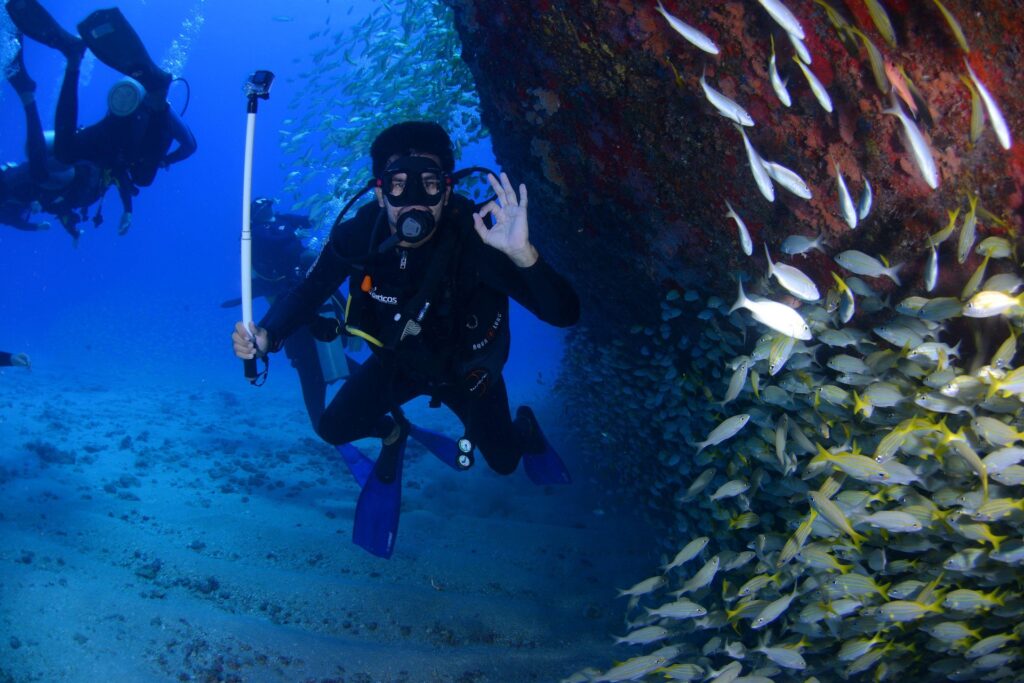
Photographing scuba divers has its own challenges. Regulators, masks, hoses, bubbles, and dive gear can make the image feel busy. At the same time, divers can add scale, story, and context to reef, wreck, cave, and blue-water scenes.
To photograph divers better:
- Get closer than you think you need to.
- Use the diver to show scale next to a reef, wreck, cave, or large marine animal.
- Place the diver slightly above the scene for a natural silhouette.
- Watch the bubbles so they do not block the face or subject.
- Use strobes or video lights when the diver is close enough for the light to be effective.
- Correct blue or green skin tones during editing if the face is visible.
Never prioritize a pose over dive safety. A natural, safe diver usually looks better than a forced pose.
Common Mistakes to Avoid
- Starting in difficult water. Begin in a calm, shallow, clean location before trying more complex ocean shoots.
- Giving too many instructions at once. Underwater direction should be simple and easy to remember.
- Standing too far away. Too much water between the camera and subject reduces sharpness, contrast, and color.
- Ignoring water clarity. Cloudy water makes focusing and lighting much harder.
- Letting the subject get cold. Cold subjects tense up quickly and lose energy.
- Using unsafe props. Props should never trap, pull, or restrict the subject.
- Forgetting RAW. RAW files make white balance and skin tone correction much easier.
- Overshooting without reviewing. Show the subject a few images so they understand what is working.
How to Edit Underwater Portraits
Editing is an important part of underwater portrait photography because water changes color, contrast, and skin tone. Shooting RAW gives you more room to correct these issues without damaging the image quality.
A simple editing workflow looks like this:
- Start with white balance correction.
- Adjust exposure and contrast.
- Correct blue or green color casts.
- Use selective adjustments on the subject’s skin tones.
- Add clarity carefully to bring back texture.
- Reduce distractions, bubbles, or floating particles only when needed.
- Crop out black corners or heavy vignetting if caused by the lens or housing.
- Apply lens correction if a fisheye lens distorts the subject too much.
Be careful with saturation and clarity. Too much editing can make skin look unnatural and water look artificial. The goal is to make the image feel clean, balanced, and believable.
Beginner Underwater Portrait Checklist
Use this checklist before your first underwater portrait shoot:
- Choose a clean, safe, shallow location.
- Confirm the subject is comfortable in water.
- Prepare simple poses before entering the water.
- Use safe clothing and lightweight props.
- Check housing seal, O-rings, battery, and memory card.
- Use a wide-angle lens or wet wide lens.
- Shoot RAW if your camera allows it.
- Test exposure and focus before the main poses.
- Keep each attempt short and relaxed.
- Take regular breaks for warmth and rest.
- Review images during the shoot and adjust.
- Stop immediately if the subject feels uncomfortable.
FAQ
What is the easiest place to photograph people underwater?
A clean, quiet pool is usually the easiest place to start. It gives you controlled depth, safer practice conditions, and fewer variables than the ocean.
Do I need a professional model for underwater portraits?
No. You need someone who feels calm and comfortable in the water. A relaxed subject will usually photograph better than someone who looks tense, even if they have modeling experience.
What lens is best for underwater portraits?
A wide-angle lens is usually best because it lets you stay close to the subject while still capturing the full body, clothing, movement, and background.
Should I use strobes for underwater portraits?
Strobes can help restore color, improve skin tones, and add contrast. In shallow pools or bright water, natural light can also work well if you position the subject carefully.
Can I photograph underwater portraits with a GoPro?
Yes. A GoPro can work for simple underwater portraits and video, especially in clear shallow water. For more control over focus, lighting, RAW files, and skin tones, a compact or mirrorless camera system is usually stronger.
How do I stop people from floating up during underwater portraits?
Keep the pose simple, stay shallow, and let the subject move naturally. If buoyancy is a problem, work with a trained professional and use safe methods only. Do not use weight systems casually with beginners.
How do I make underwater skin tones look natural?
Shoot RAW and adjust white balance during editing. You may also need to correct blue or green color casts and selectively warm the subject’s skin tones.
Can beginners remove their regulator for underwater photos?
No. Inexperienced divers should not remove their regulator for a photo. This should only be considered by trained, comfortable divers in safe conditions.
What should the subject wear for underwater portraits?
Bright clothing, flowing fabric, swimwear, or simple costume pieces can work well. Avoid heavy, sharp, restrictive, or unsafe clothing and props.
Why do my underwater portraits look blue?
Water absorbs color and changes the way light reaches your subject. Shooting RAW, using proper lighting, staying close, and correcting white balance during editing can help restore more natural color.
Final Tips
Good underwater portraits come from preparation, calm direction, simple posing, and safe conditions. Start in a clean pool, keep the subject comfortable, use a wide-angle lens, shoot RAW, and work close enough to keep the image sharp and colorful.
Once you understand the basics, you can experiment with fabric, movement, silhouettes, strobes, video lights, ocean backgrounds, and more dramatic compositions. The best results usually come from small improvements repeated over several attempts.
If you want to build or upgrade your underwater portrait setup, explore Mozaik’s underwater camera housings, lenses and ports, underwater strobes, and underwater video lights.
Mozaik Updates
Get underwater camera tips from Mozaik
Leave your email and we’ll send you useful underwater photography tips, setup guides, product updates, and Mozaik news.
Helpful updates from Mozaik, sent straight to your inbox.
About the Author
Mari Herrarte
Mari has been diving for 15 years and loves spending time in the ocean, surrounded by nature. She is also passionate about photography and capturing the beauty she discovers underwater.
- Cabo Pulmo Diving: A Beginner’s Guide – September 28, 2026
- How to Adjust Underwater Camera Settings as Conditions Change – September 22, 2026
- Why Your Underwater Photos Look Too Dark and How to Fix Them – September 16, 2026