
 CAD
CAD
How to Build Your First Underwater Mirrorless Camera System
Quick Answer: What Do You Need for Your First Underwater Mirrorless System?
To build your first underwater mirrorless or DSLR camera system, you usually need:
- A camera body and compatible lens
- An underwater housing made for that exact camera model
- A flat port for macro or a dome port for wide-angle lenses
- Port extensions, zoom gears, or focus gears when required
- One or two underwater strobes or video lights
- A tray, handles, ball-joint arms, and clamps
- Fiber optic cables, sync cords, or an electronic trigger for strobes
- A vacuum system or leak detection system
- Spare O-rings, port covers, lanyards, and basic maintenance tools
For most beginners moving beyond a GoPro, smartphone, or compact camera, a mirrorless system is usually the strongest long-term choice because it offers better image quality, better lens options, and more room to grow.

Who This Guide Is For
This guide is for divers and underwater photographers who feel limited by a phone, action camera, or compact camera and want to move into a more serious system. It is especially useful if you are trying to understand how the camera, housing, port, lens, lighting, arms, and accessories work together before spending money.
A mirrorless or DSLR system can produce excellent results underwater, but it also requires more planning. You cannot simply choose a camera body and assume everything else will work. Underwater photography depends heavily on compatibility. The housing must match the camera. The port must match the lens. The arms and lights must fit the way you shoot. The strobe trigger must work with the housing and camera.
Getting these parts right from the beginning can save money, reduce frustration, and make your system much easier to upgrade later.
Mirrorless vs DSLR vs Compact vs GoPro Underwater
Before building a full system, it helps to understand where mirrorless and DSLR cameras fit compared with smaller underwater options.
| System Type | Best For | Main Strength | Main Limitation |
|---|---|---|---|
| Mirrorless | Photographers who want long-term image quality and flexibility | Excellent image quality, autofocus, lens choice, and video features | Higher full-system cost once housing, ports, arms, and lighting are added |
| DSLR | Photographers who already own a supported DSLR system | Strong image quality and proven lens options | Older platform with less new camera development |
| Compact Camera | Travel divers and beginners who want a smaller setup | Smaller, simpler, and usually less expensive | Less flexibility than an interchangeable-lens system |
| GoPro or Action Camera | Simple video, travel clips, and casual diving | Small, easy, and durable | Limited low-light performance and less manual control |
| Smartphone Housing | Divers who want familiar controls and convenience | Easy to use with a phone you already own | Limited upgrade path compared with a dedicated camera system |
If you want casual dive footage, a GoPro or smartphone housing may be enough. If you want better image quality, stronger low-light performance, interchangeable lenses, and more creative control, mirrorless is usually the better long-term choice.
Browse Mozaik’s underwater camera and housing bundles if you want to compare ready-to-dive camera and housing combinations.
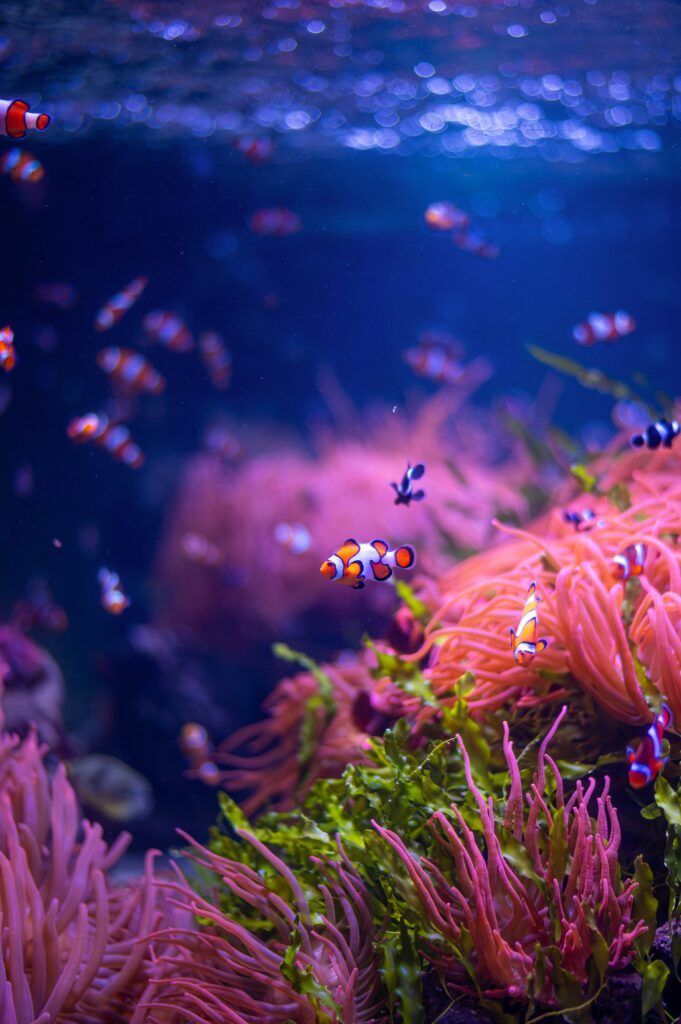
Step 1: Choose the Camera Body
The camera body matters, but it should not be chosen alone. Underwater, the best camera is the one that has strong housing support, good lens options, reliable autofocus, good low-light performance, and a system you can afford to complete.
Many divers make the mistake of buying a camera first and checking underwater housing options later. That can create problems. Some cameras have limited housing support. Some have fewer compatible ports. Some are harder to use underwater because of button placement, menu design, battery life, or lens limitations.
Before buying a camera body, check:
- Which housing brands support that exact camera model
- Which lenses are practical underwater
- Which ports and extensions are required
- Whether the housing supports optical or electronic strobe triggering
- Whether the system can grow into macro, wide angle, video, or travel setups
- Whether replacement parts and accessories are easy to find
If you already own a DSLR or mirrorless camera, you may be able to build around it. But if the camera is older, unsupported, or difficult to house, it may be smarter to choose a newer camera with stronger underwater support.
You can browse supported systems through Mozaik’s underwater camera housings category.
Step 2: Choose the Right Lens for Underwater Use
Not every lens that works well above water works well underwater. Travel zoom lenses such as 18-200mm or 18-105mm are usually too long and too limited behind underwater ports. Underwater photographers usually choose lenses based on two main shooting styles: macro and wide angle.
Macro Lenses
Macro lenses are used for small subjects such as nudibranchs, shrimp, small fish, textures, and close details. These lenses are usually paired with flat ports because flat ports work well for close-focus subjects.
Common macro setups may use lenses such as 60mm, 90mm, 100mm, or 105mm, depending on the camera system. Some photographers also add wet macro lenses later for extra magnification.
Wide-Angle Lenses
Wide-angle lenses are used for reefs, wrecks, divers, big animals, caves, and large underwater scenes. These lenses are usually paired with dome ports because dome ports help restore the lens’s wide field of view underwater.

Fisheye lenses and ultra-wide zooms are popular underwater because they allow you to get close to the subject while still showing the environment. Getting close matters because water
reduces contrast, color, and sharpness.
Do Not Force the Wrong Lens Underwater
A lens that is great for travel or everyday shooting may perform poorly underwater if there is no proper port, extension, or zoom gear combination. Before buying a lens for underwater use, check the housing manufacturer’s port chart.
Mozaik also has a dedicated lenses and ports category where you can browse wet lenses, ports, and related accessories.
Step 3: Choose a Compatible Underwater Housing

The underwater housing is the case that allows your camera to work safely underwater. It gives you access to the camera controls while protecting the body from pressure, saltwater, sand, and leaks.
Most quality mirrorless and DSLR housings are built for one exact camera model. A housing made for one camera usually will not fit another camera, even if the camera looks similar. Small differences in button placement, body size, grip shape, and dial position matter.
Popular underwater housing brands include Nauticam, Aquatica, Sea & Sea, Ikelite, Isotta, Fantasea, and Nimar. Each brand has a different balance of price, ergonomics, material, support, accessories, and port compatibility.
Aluminum vs Polycarbonate Housings
| Housing Material | Strengths | Tradeoffs |
|---|---|---|
| Aluminum | Strong, durable, premium feel, excellent ergonomics, often more compact | Usually more expensive |
| Polycarbonate | Good value, lighter price point, often clear enough to inspect the seal visually | Usually less premium feel and sometimes bulkier |
| Delrin or other engineered materials | Durable, rugged, and can sit between plastic and metal systems | Availability depends on the brand and camera model |
When choosing a housing, do not only compare the price of the housing shell. Check the total system cost. Ports, extensions, gears, vacuum valves, arms, strobes, cables, and accessories can significantly affect the final price.
Step 4: Choose the Right Port
The housing alone is not enough. You also need a lens port. The port is the front piece that covers the lens and completes the waterproof system.
There are two main types of ports:
- Flat ports: Usually used for macro lenses and some standard lenses.
- Dome ports: Usually used for wide-angle and fisheye lenses.
Some ports are made from glass. Others are made from acrylic. Glass is usually better optically and more scratch resistant, but it costs more. Acrylic is lighter, usually less expensive, and easier to polish if scratched.
Why Port Charts Matter
Every lens has a specific length, focusing behavior, and optical position. That is why the same housing may need different ports, extension rings, zoom gears, or focus gears for different lenses.
Before buying any lens or port, check the correct compatibility chart:
- Nauticam Port Charts
- Aquatica Ports and Lens Charts
- Sea & Sea System Charts
- Mozaik Port Chart Resource
If the chart is confusing, ask an underwater camera specialist before ordering. A small missing extension ring, zoom gear, or adapter can stop an entire system from working properly.
Step 5: Decide Between Native Lenses and Wet Lenses
Underwater photographers can build systems in two main ways. One option is to use native camera lenses behind dedicated ports. The other option is to use a flat port and add wet lenses outside the housing.
Native lenses are often used for the highest image quality and more specialized setups. Wet lenses are useful because they can be attached or removed underwater, giving you more flexibility during the dive.
| Lens Approach | Best For | Main Benefit | Main Limitation |
|---|---|---|---|
| Native lens with dedicated port | Photographers who want the strongest optical performance | Better matched to serious macro or wide-angle work | Less flexible during a single dive |
| Wet lenses | Divers who want flexibility underwater | Can switch between wide, macro, or standard views during the dive | Compatibility depends on the port, thread size, and lens design |
If you want to learn more, read Mozaik’s guide to native lenses vs wet lenses for underwater photography.
You can also browse Mozaik’s underwater wet lens guide for more detailed buying advice.
Step 6: Add Arms, Clamps, Tray, and Handles
Once you add lights or strobes, you need a stable way to mount and position them. Most mirrorless and DSLR underwater systems use a tray with handles, ball-joint arms, and clamps.
Ball-joint arms are popular because they are strong, adjustable, and easy to reposition underwater. A common setup includes two arm sections per side, connected by clamps. This lets you move your strobes close for macro or wider for reef and wide-angle scenes.
Arm position affects image quality. If your strobes are too close to the lens axis, you may create backscatter. If they are too far or angled poorly, the subject may look flat or unevenly lit.
For macro, strobes are usually closer to the housing and pointed carefully at the subject. For wide-angle scenes, strobes are often placed farther apart to cover a larger area and reduce particles in the water column.
Step 7: Choose Strobes or Video Lights

Lighting is one of the biggest upgrades in underwater photography. Water absorbs color and light quickly, so even an expensive camera can produce flat images without good lighting.
Strobes
Strobes are underwater flashes used for still photography. They fire a burst of light at the moment of exposure. Strobes are especially important for bringing back color, contrast, and detail in underwater photos.
Browse Mozaik’s underwater strobes category or read the ultimate underwater strobe guide.
Video Lights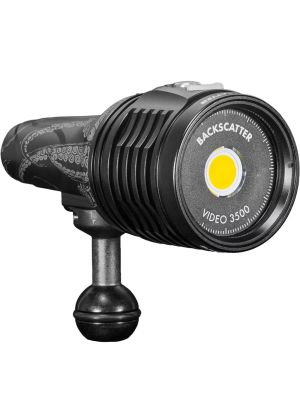
Video lights provide continuous light. They are easier to understand because what you see is what the camera sees. They are useful for video, close-range subjects, focus assist, and some compact or hybrid shooting styles.
Browse Mozaik’s underwater video lights category or read the ultimate underwater video lights guide.
Strobes vs Video Lights
| Lighting Type | Best For | Main Strength | Main Limitation |
|---|---|---|---|
| Strobes | Still photography | Powerful burst of light, strong color restoration, good for freezing motion | Requires sync method and more learning |
| Video Lights | Video, close subjects, and simple lighting | Continuous light, easier to aim, useful for video | Less effective than strobes for many still-photo situations |
Step 8: Check Strobe Triggering and Sync Compatibility
Before buying a strobe, check how it will be triggered. Strobes usually connect through one of these methods:
- Fiber optic cables: Common and simple when the housing supports optical triggering.
- Sync cords: Used with electronic bulkheads and compatible strobes.
- LED flash triggers: Used in many mirrorless housings to trigger strobes optically without relying on a camera pop-up flash.
You should also check whether your system supports manual flash only or TTL. TTL can automatically control flash output, but compatibility depends on the camera, housing, trigger, cable, and strobe combination.
Manual strobe control is very common among underwater photographers because it gives direct control over lighting. TTL can be helpful for fast-moving situations or beginners, but it is not required for strong underwater photos.
Step 9: Add Safety and Maintenance Accessories
Once you build a complete underwater system, you need to protect it. A housing leak can damage expensive camera gear quickly, so small maintenance habits matter.
Vacuum System
A vacuum system lets you test whether the housing seal is holding before entering the water. It does not guarantee that a leak can never happen, but it gives much more confidence before a dive.
The usual process is simple. You close the housing, pump air out, and wait to see if the vacuum holds. If the vacuum does not hold, you know there may be an issue with the seal, O-ring, port, or housing closure.
O-Ring Care
Always inspect the O-ring and sealing surface before closing the housing. Look for hair, sand, salt, dust, lint, or small particles. A tiny piece of debris can create a leak path.
Port Covers and Lanyards
Neoprene port covers help protect expensive glass or acrylic ports from scratches. A lanyard helps secure the system so you do not drop it while entering the water, passing it to a boat crew member, or handling it during a dive.
Beginner Setup Examples
The best underwater system depends on what you want to shoot. Here are a few simple examples.
Beginner Macro Photo Setup
- Mirrorless camera body
- Compatible underwater housing
- Macro lens
- Flat port
- One or two strobes
- Tray, handles, arms, and clamps
- Optional wet macro lens for extra magnification
This setup is good for small subjects, controlled lighting, and learning strobe placement.
Beginner Wide-Angle Reef Setup
- Mirrorless camera body
- Compatible underwater housing
- Fisheye or ultra-wide lens
- Dome port
- Two strobes
- Longer arm sections for wider strobe placement
- Vacuum system and port cover
This setup is better for reefs, wrecks, divers, and large underwater scenes.
Beginner Video Setup
- Mirrorless camera with strong video features
- Compatible housing
- Wide lens or wet wide lens
- One or two video lights
- Stable tray and handles
- Optional external monitor for easier framing
This setup is better for divers who care more about underwater video than still photography.
Common Mistakes to Avoid
- Buying the camera before checking housing support. Always check housing availability first.
- Using the wrong lens underwater. Many topside lenses are not practical behind underwater ports.
- Ignoring port charts. Ports, extensions, and gears must match the lens and housing system.
- Underestimating lighting. Strobes or video lights are often what make the system truly useful underwater.
- Forgetting small accessories. Missing clamps, gears, cables, or adapters can stop a system from being dive-ready.
- Skipping vacuum and O-ring checks. Careful maintenance protects the most expensive parts of your setup.
- Choosing based only on price. A cheaper part can become expensive if it limits future upgrades.
Recommended Buying Order
If you are building your first serious underwater system, use this order:
- Decide what you want to shoot most: macro, wide angle, video, or mixed use.
- Choose a camera body with strong underwater housing support.
- Choose your main underwater lens.
- Confirm the correct housing, port, extension, and gear combination.
- Add a tray, handles, arms, and clamps.
- Choose strobes or video lights based on your shooting style.
- Confirm cables, triggers, and sync compatibility.
- Add safety accessories such as vacuum system, port covers, spare O-rings, and lanyards.
- Test the full system above water before traveling.
- Practice camera controls before your first dive with the system.
FAQ
Is mirrorless better than DSLR for underwater photography?
For most new buyers, mirrorless is the better long-term choice because most new camera development, housing support, autofocus improvements, and video features are now focused on mirrorless systems. DSLR systems can still be excellent if you already own a supported camera and lens setup.
What is the most important part of an underwater camera system?
The housing and port system are just as important as the camera body. A great camera will not perform well underwater if the housing, lens port, lighting, and sync method are poorly matched.
Do I need strobes for underwater photography?
If you want strong color, contrast, and detail underwater, strobes are one of the most important upgrades. Water absorbs light and color quickly, so external lighting makes a major difference.
Should beginners start with one strobe or two?
One strobe is easier to learn and costs less. Two strobes give better coverage for wide-angle scenes and more balanced lighting, but they also add cost, size, and setup complexity.
Can I use the same port for every lens?
No. Most underwater lenses require a specific port, extension, or zoom gear combination. Always check the housing manufacturer’s port chart before buying.
Is a vacuum system worth it?
Yes. A vacuum system helps confirm that the housing is sealed before the dive. It does not replace careful O-ring maintenance, but it greatly reduces the risk of entering the water with a bad seal.
Can I use video lights instead of strobes?
You can use video lights for video and close-range work, but strobes are usually more effective for still photography. Strobes produce a powerful burst of light that helps restore color and detail in underwater photos.
What should I buy first for an underwater mirrorless setup?
Start by choosing the camera and lens combination, then confirm housing and port compatibility before buying. After that, choose lighting, arms, clamps, sync cables, and safety accessories.
Why are underwater housings so expensive?
Underwater housings must protect expensive camera equipment from pressure, saltwater, impact, and leaks while still giving access to camera controls. They are built for specific camera models and require precise engineering, reliable sealing, and durable materials.
Can I build a system slowly over time?
Yes. Many photographers start with the housing, port, one lens, tray, arms, and one light or strobe. Then they add a second strobe, wet lenses, extra ports, monitor, viewfinder, or more specialized accessories later.
Final Recommendation
Your first underwater mirrorless or DSLR system should be built around compatibility, long-term use, and the type of images you want to create. The camera body matters, but the housing, port, lens, arms, lighting, and safety accessories matter just as much.
If you mostly shoot macro, your setup will look different from someone focused on wide-angle reef scenes, large animals, wrecks, or underwater video. Before buying, confirm the housing support, port chart, lens compatibility, strobe triggering method, and accessory mounting options.
A good underwater system is an investment. Getting the parts matched correctly from the beginning can save money, avoid frustration, and make your first serious underwater setup much easier to grow over time.
If you are unsure which parts fit together, contact Mozaik’s team before ordering. A few minutes of compatibility checking can prevent missing parts, wrong ports, and expensive mistakes.
Need help building your first underwater mirrorless system? Browse underwater camera housings, lenses and ports, underwater strobes, and underwater video lights, or reach out for help matching the right system to your camera, lens, and dive style.
Mozaik Updates
Get underwater camera tips from Mozaik
Leave your email and we’ll send you useful underwater photography tips, setup guides, product updates, and Mozaik news.
Helpful updates from Mozaik, sent straight to your inbox.
About the Author
Mari Herrarte
Mari has been diving for 15 years and loves spending time in the ocean, surrounded by nature. She is also passionate about photography and capturing the beauty she discovers underwater.
- Cabo Pulmo Diving: A Beginner’s Guide – September 28, 2026
- How to Adjust Underwater Camera Settings as Conditions Change – September 22, 2026
- Why Your Underwater Photos Look Too Dark and How to Fix Them – September 16, 2026