
 CAD
CADSony A6500 Underwater Review with Fantasea FA6500 Housing
Fantasea entered the mirrorless market with a bang, choosing one of the best mirrorless cameras to date as their first design.
The A6500 is Sony’s leading APS-C sensor mirrorless camera and one of the top choices among land and underwater photographers alike. The Sony A6500 is a step up from the a6300, adding a touch screen and better image stabilization, as well as deeper buffers and an easier menu to navigate through.
Top highlights of the Sony A6500 include:
- 24.2-megapixel Exmor® CMOS sensor.
- Lightning fast AF with 425 phase-detection AF points
- Built-in 5-axis image stabilization
- BIONZ X™ image processing engine for superior detail reproduction.
- 4K movie recording.
- 1/4000s maximum shutter speed
Overall Sony has done an incredible job on this camera, offering pretty much everything the user needs, with cutting edge technology and excellent image quality.
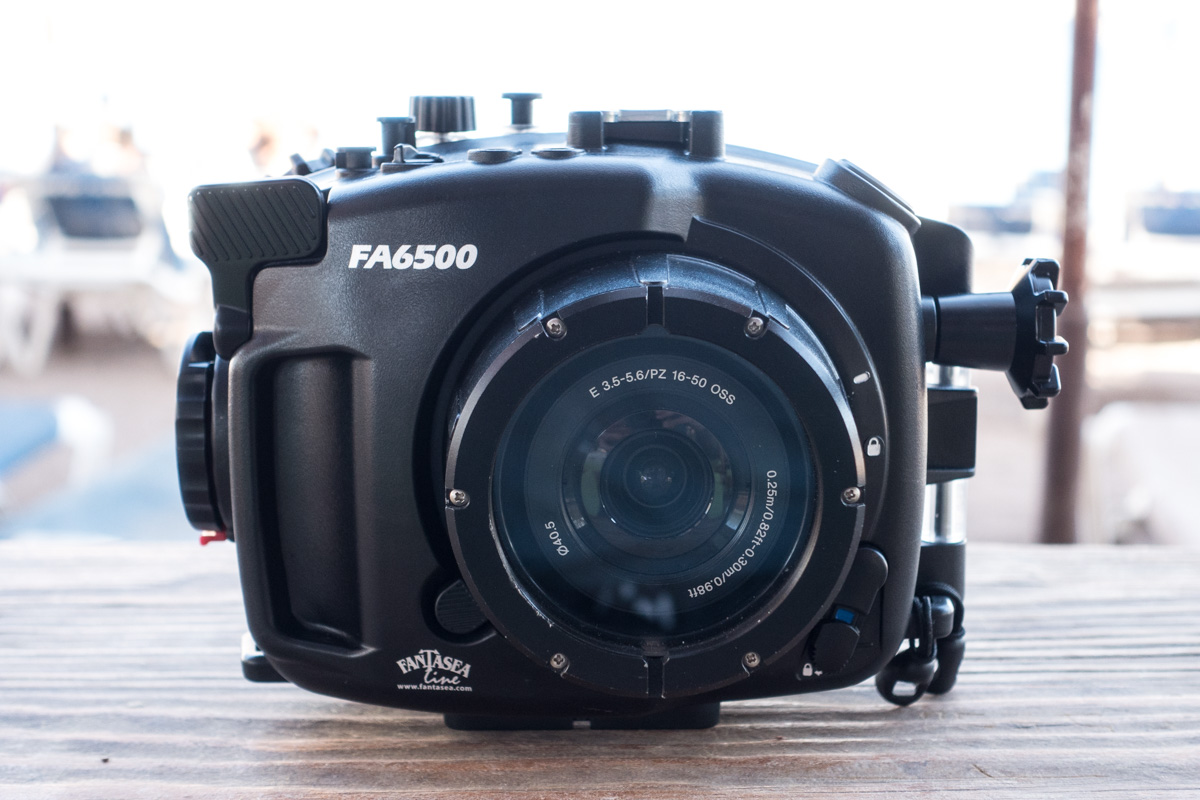
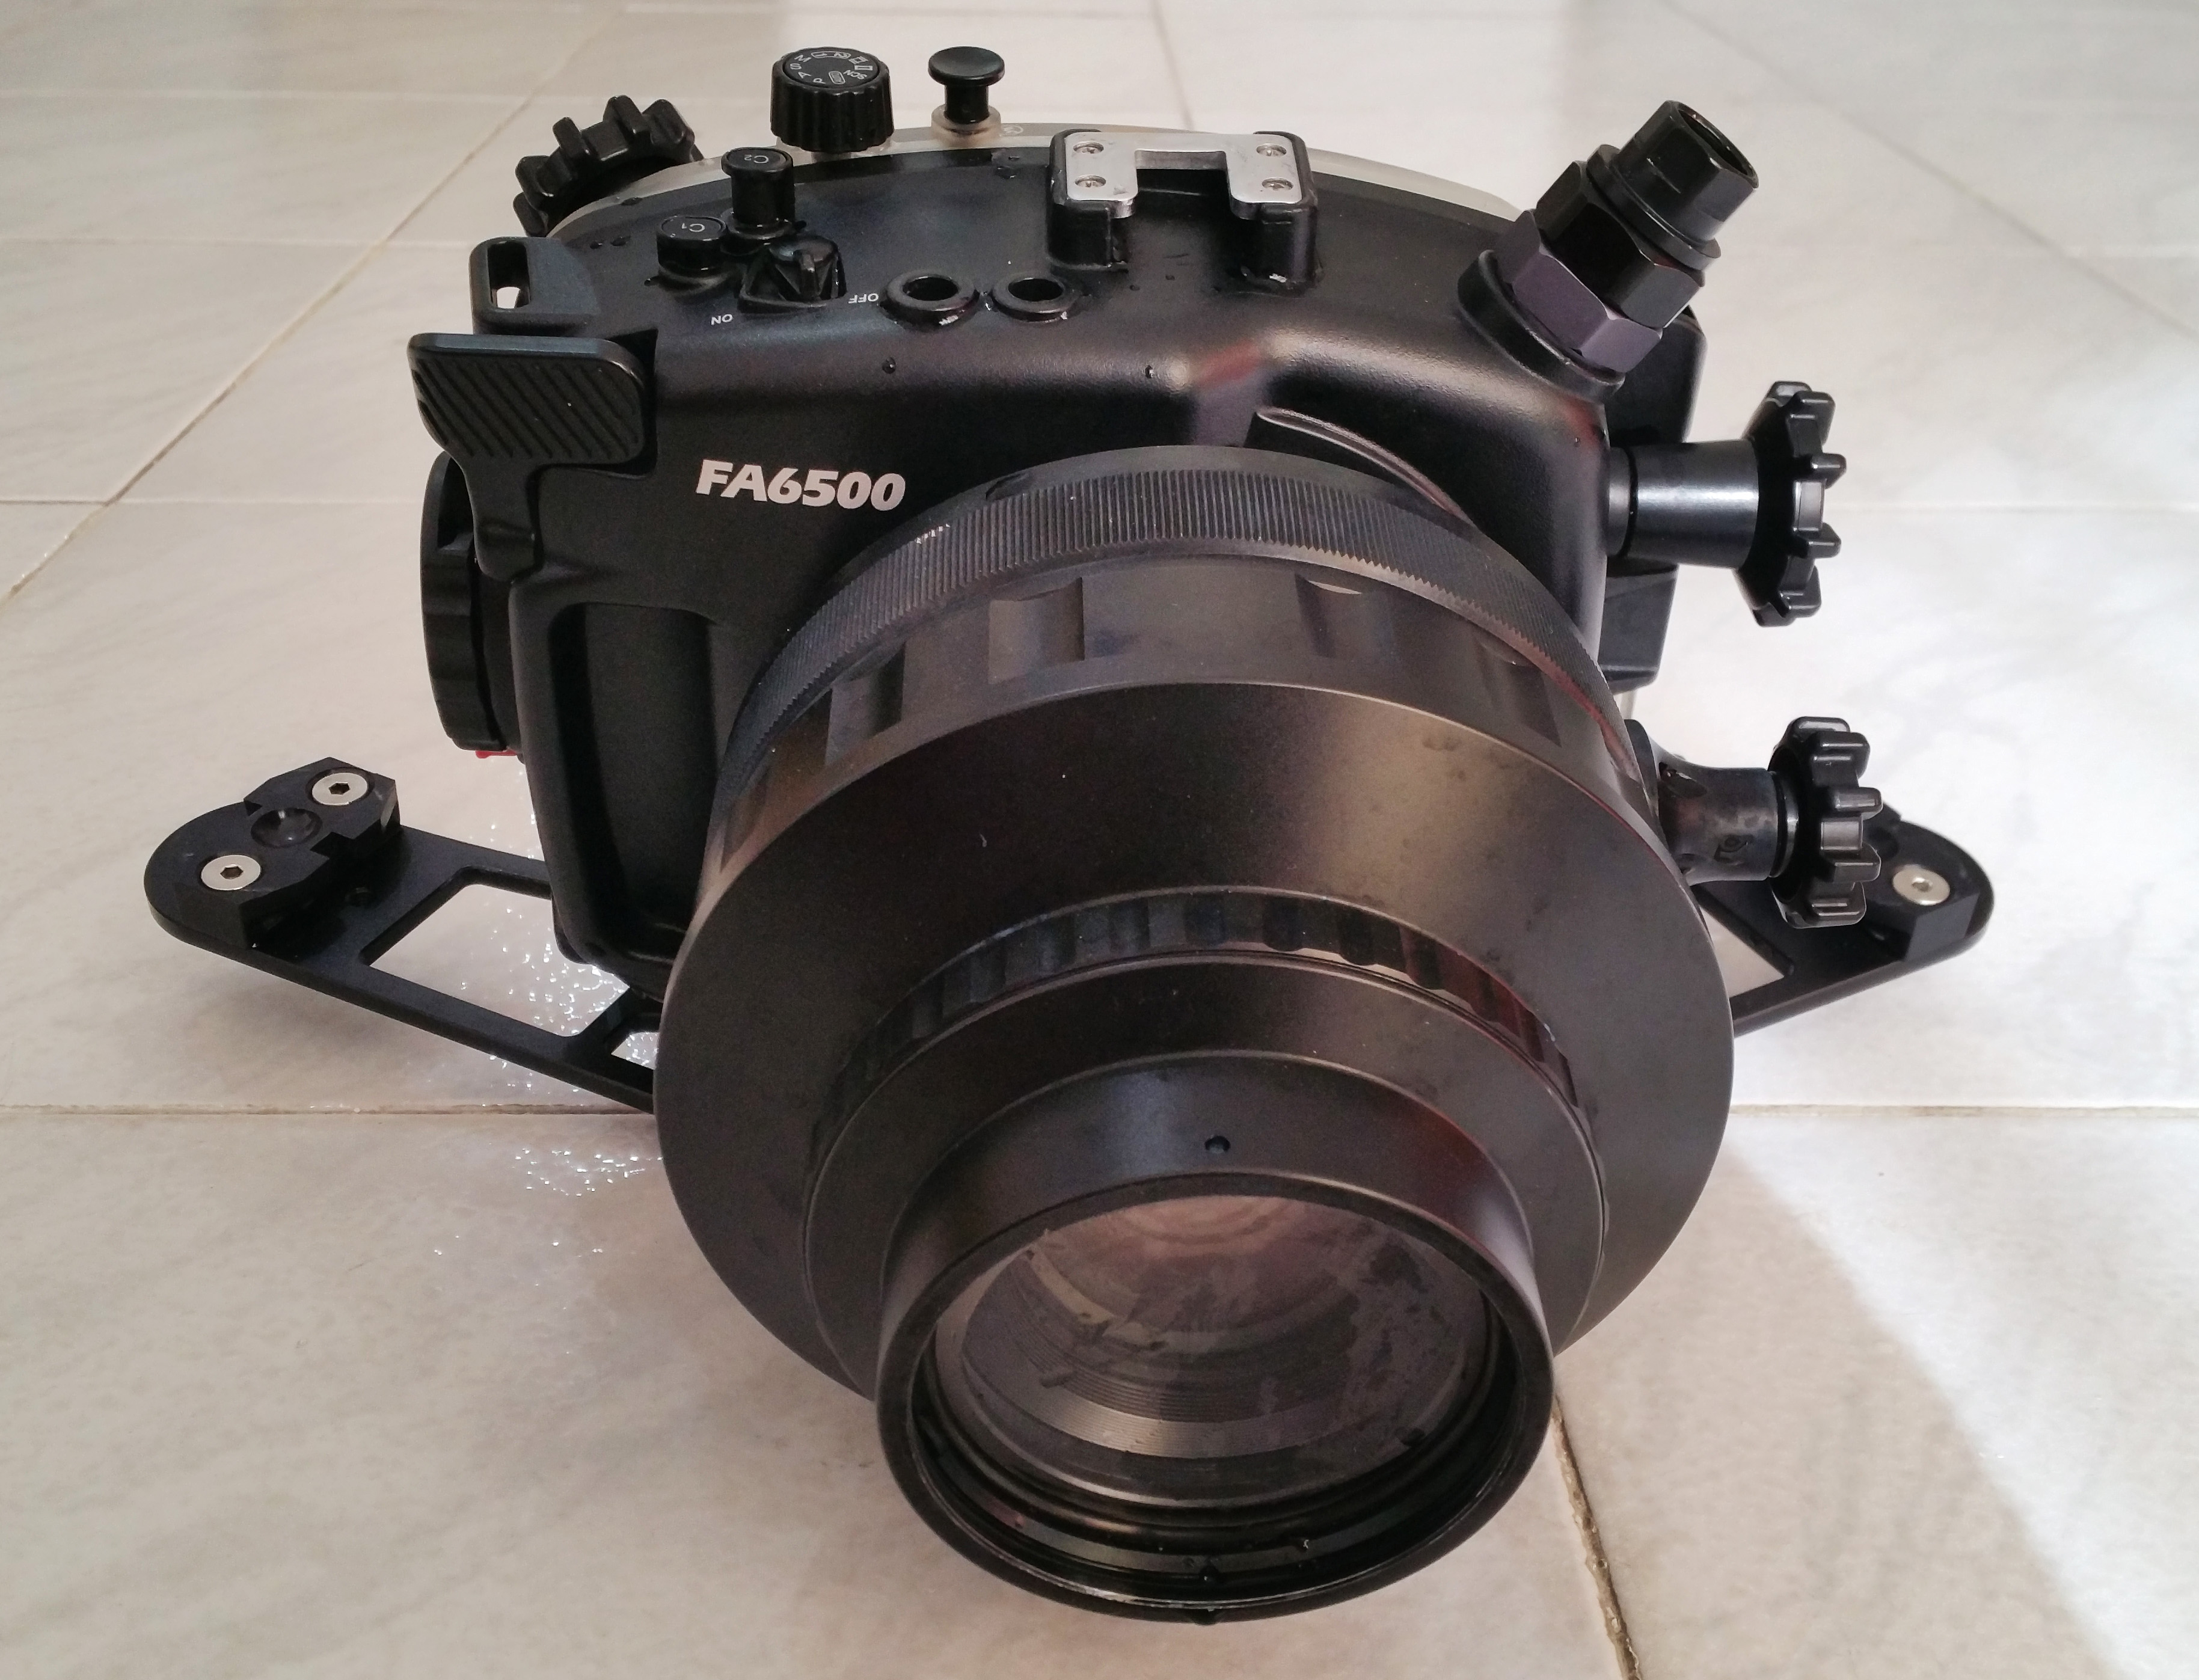
The Fantasea FA6500 Housing
Fantasea are very well known for their excellent value compact camera housings, which have gained immense popularity over the past few years, supporting popular camera models among divers, such as the Canon G15, G16, G7X Mark I / II and the Sony RX100 series.
Stepping into the mirrorless realm was a bold move, but very natural as their new housing for the Sony A6500 / A6300 is based upon the previous popular models, but with significant improvements and an interchangeable port system.
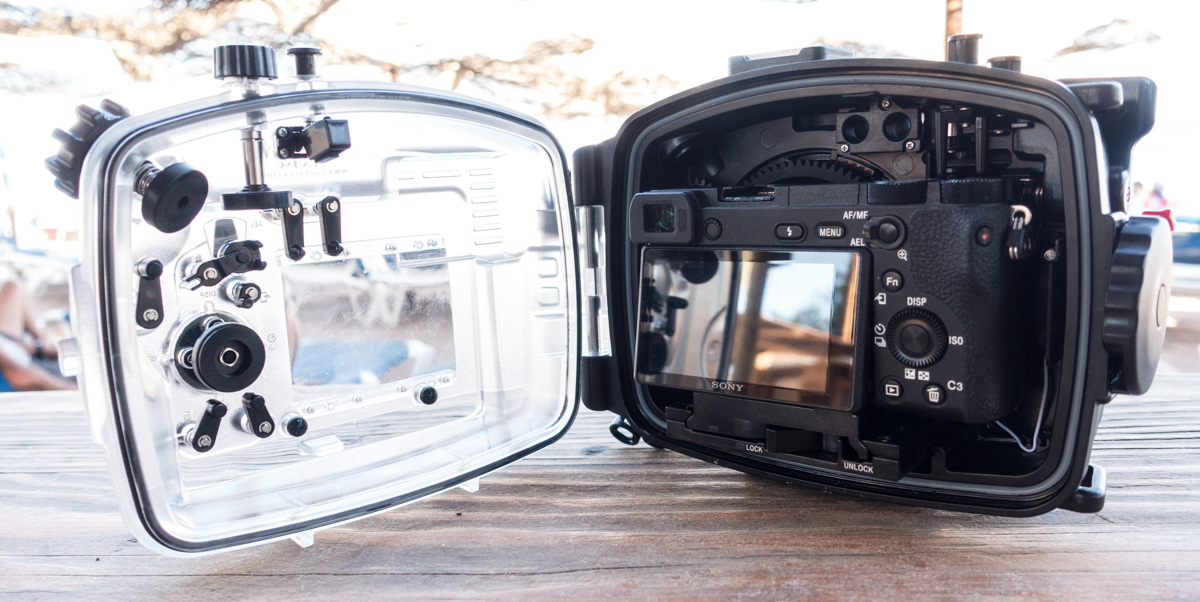
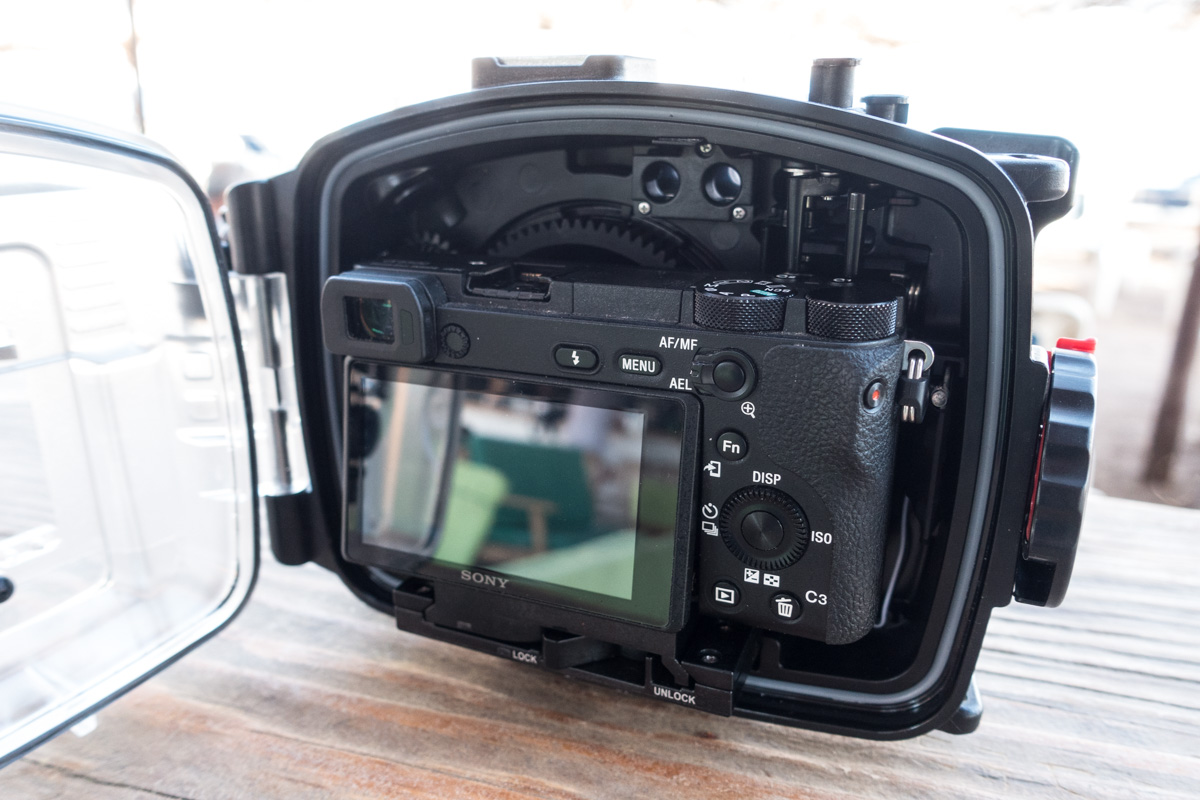
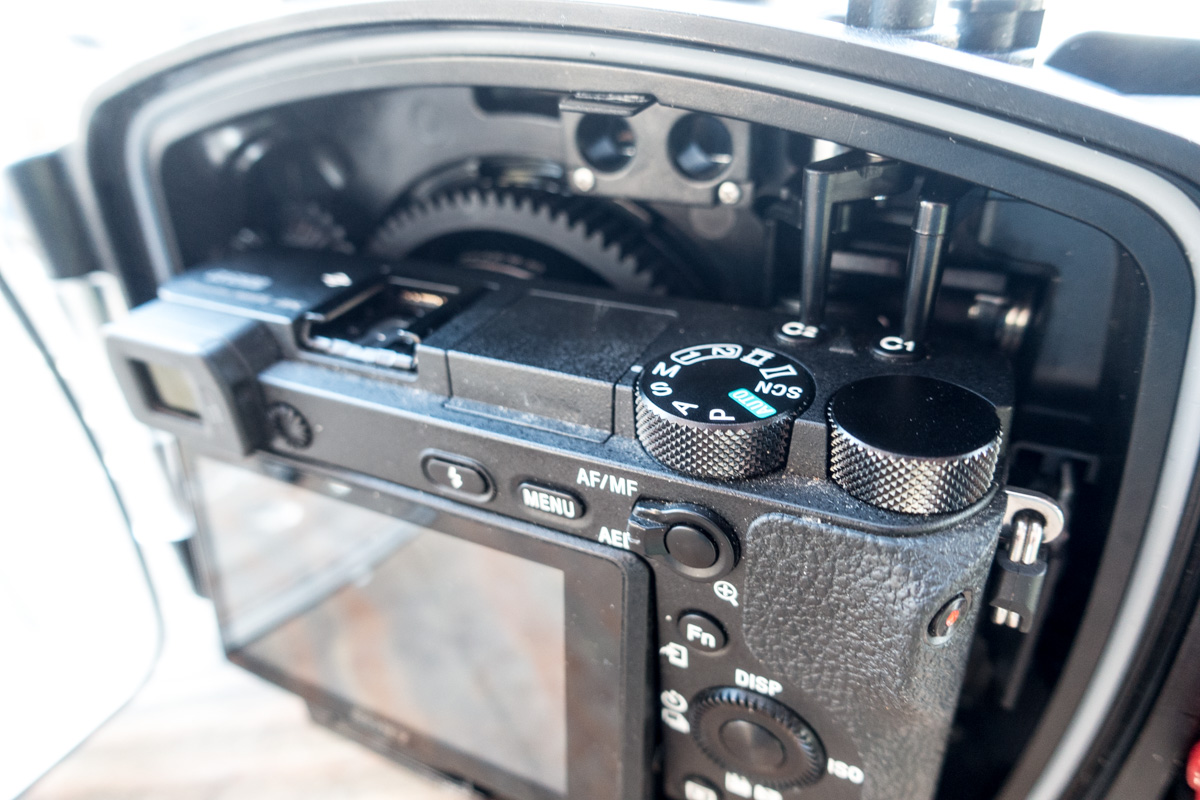
The FA6500 has been meticulously designed to fit the A6500 like a glove, with no valuable space wasted and every control thoroughly planned out and tested for perfect fit at the hands of any diver.
The housing is made of high grade polycarbonate, features double o-rings for perfect watertight seal, with a leak detector included and dual fiber optic cable support. An optional bulkhead is also available for sync cord strobe connection via hotshoe.
All the controls are clearly labeled so that you don’t have to remember anything underwater and button position makes perfect sense, with all controls within reach.
I liked the grip on the housing, as well as the thumb rest, all positioned and designed to fit your hand in a natural, ergonomic way which complements the camera and feels very comfortable whether using a tray with lights or just freediving / snorkeling with the housing. To further minimize the strain on your wrist, get the optional hand strap!

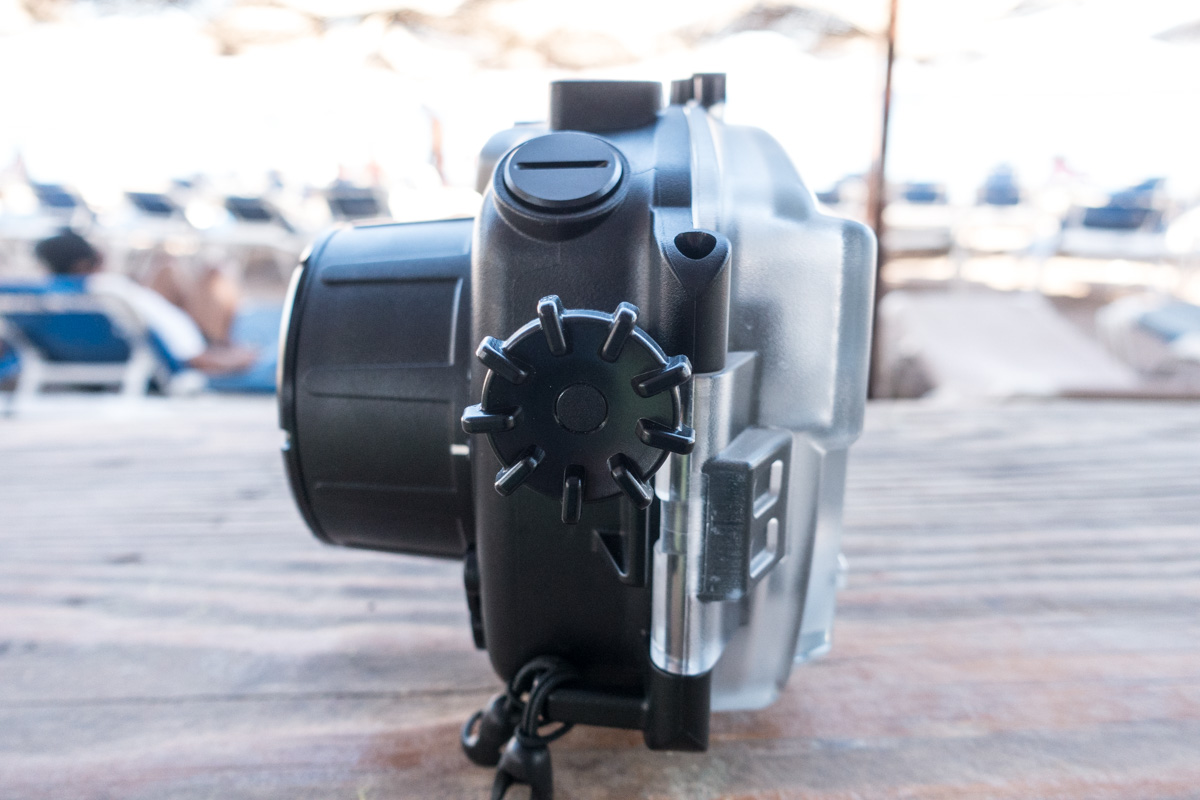
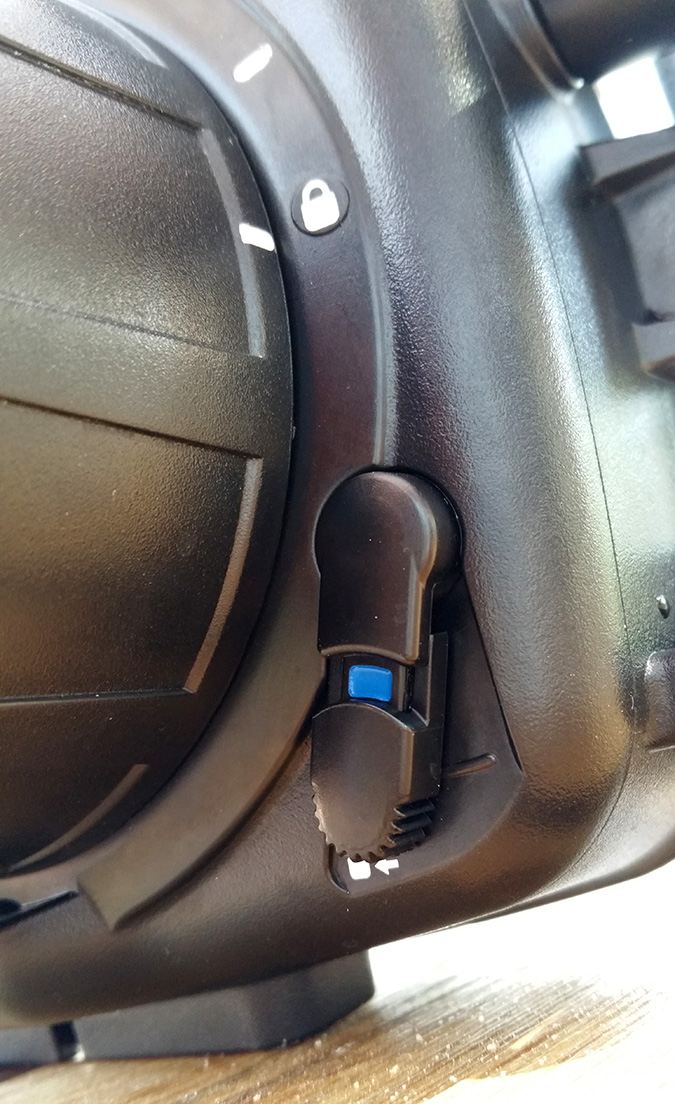
The port lock mechanism is easy and secure, leaving no room for costly mistakes.
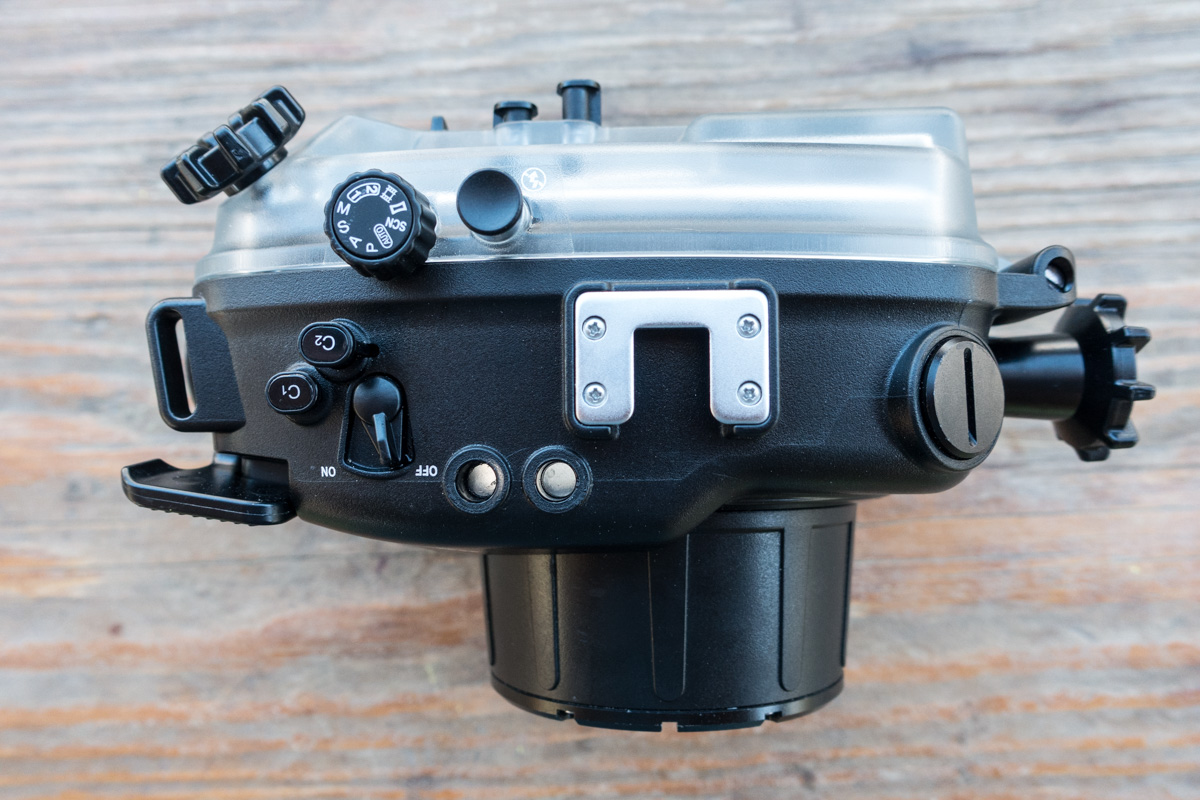
Fantasea have done a great job on the shutter lever. Instead of a top-press design, they decided to position the shutter lever on the front, which feels surprisingly natural when shooting and prevents strain on your wrist during the dive.
To insert the camera into the housing, simply mount the dedicated tray on the tripod mount, slide the camera in place and lock the tray. Make sure the pop-up flash is closed and the mode dial on the housing is slightly pulled up.
Speaking of the pop-up flash, the housing also includes a button to pop down the flash if needed. Remember to press that button very firmly, otherwise it will pop back up. Anyway you can also easily turn off the flash in the settings.
The same twist-type locking mechanism is installed on this housing as well, similar to the previous compact models. Very secure and “idiot-proof”.


Turn on CC (Subtitles) to view the notes on the video below!
Accessories
The FA6500 was designed to serve as a base component of a larger system. There are plenty of accessories which will be become available in the very near future. The housing features an M16 port for a variety of connections, including HDMI, vacuum valve or electronic strobe triggering bulkheads. It also leaves enough space above the camera for an LED trigger which will be announced soon. The LED trigger will help conserve battery power (no need to fire the pop-up flash) as well as speed up your continuous shooting with strobes, since you don’t have to wait for the flash to recycle.
Note that the A6500 does NOT offer a manual flash mode, which is helpful when using external strobe.
I found the recycle time of the pop-up flash rather slow, even when compensating it down to -3, so the LED flash trigger will be a huge help.
For a full list of accessories visit Fantasea’s SonyDive.com website and check out the Accessory Chart.
A standard cold shoe mount is included for adding a focus light or GoPro on the top. The housing comes bundled with an extended shutter trigger, which is incredibly useful when shooting with a tray and arms, so that you can leave your right hand on the grip and easily reach the shutter with your finger.
Fantasea have also included their signature LCD hood to prevent glare on the back screen when diving in strong sunlight.
For those of you with a bit of eye sight trouble (no shame in that! We all get there at some point…), Fantasea has a great LCD magnifier planned which fits perfectly on the back of the housing and makes it much easier to shoot macro and actually see if your subject is in focus. The UMG-02 magnifier will be announced soon according to the accessory chart.

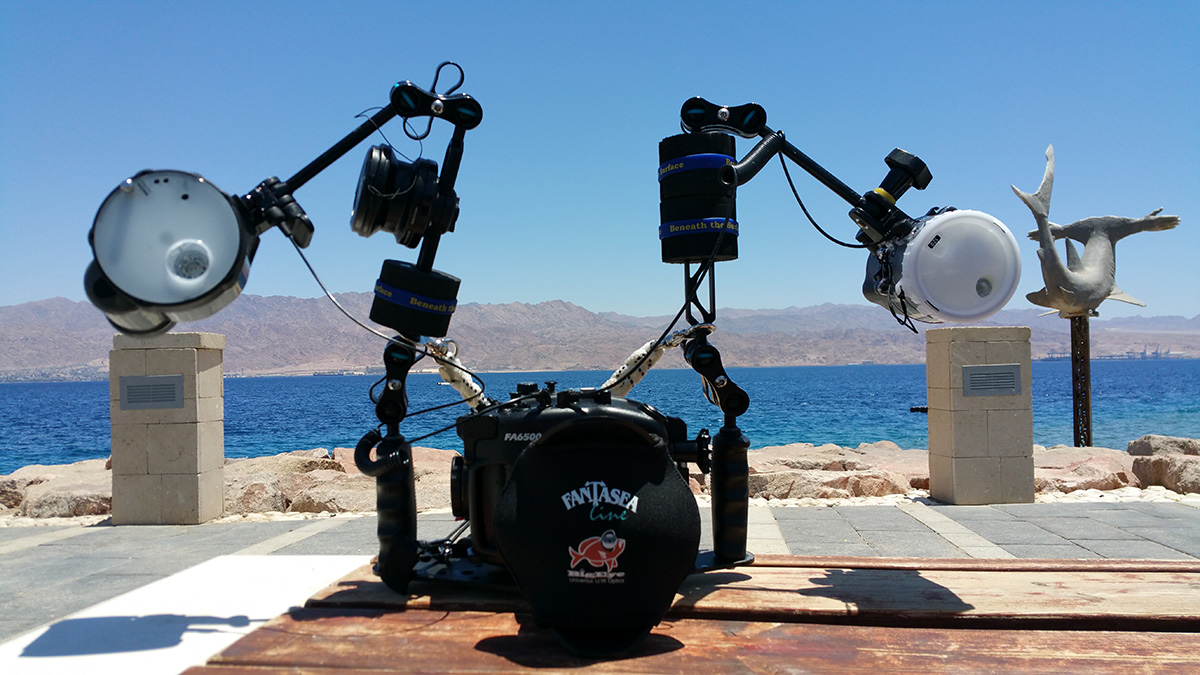
Naturally, I would recommend getting some lighting for your set-up. As I mentioned before, the housing includes two fiber optic ports for triggering strobes and will offer an optional bulkhead for sync cord triggering later on. Three standard 1/4″-20 threads on the bottom of the housing allow you to mount it on any tray, whether you fancy flex arm / locline style or ball & joint. If you still can’t decide between the two, read this comparison.
To choose the best strobe for your needs, visit our Ultimate Strobe Guide or if you’re more into video, check out our Ultimate Video Light Guide.
If you’re wondering which setup I was diving with, it was pretty much this. Only I had one YS-D2 and one Z-240 strobes instead of dual Z-240.
Ports and Lens support
At the time of the review, I only had the standard flat port for the 16-50mm kit lens. This will be the most popular port – affordable, versatile and easy to mount external wet lenses with the integrated 67mm thread on the front.
This port can also fit the Sony SEL30M35 macro lens. Fantasea have released an initial port chart so that we know which ports to expect and we hope to see them released very soon.
UPDATE Dec 20th: Fantasea published an updated Port Chart for the FML port system.
In the next month Fantasea plans to release a Dome Lens Port designed for wide angle lenses such as the Sony E-mount 16mm F2.8 lens and the VCL-ECF2 Fisheye converter as well as a Lens Port Extension Ring designed to help accommodate longer lenses such as the Sony E-mount 10 – 18 mm Zoom lens.
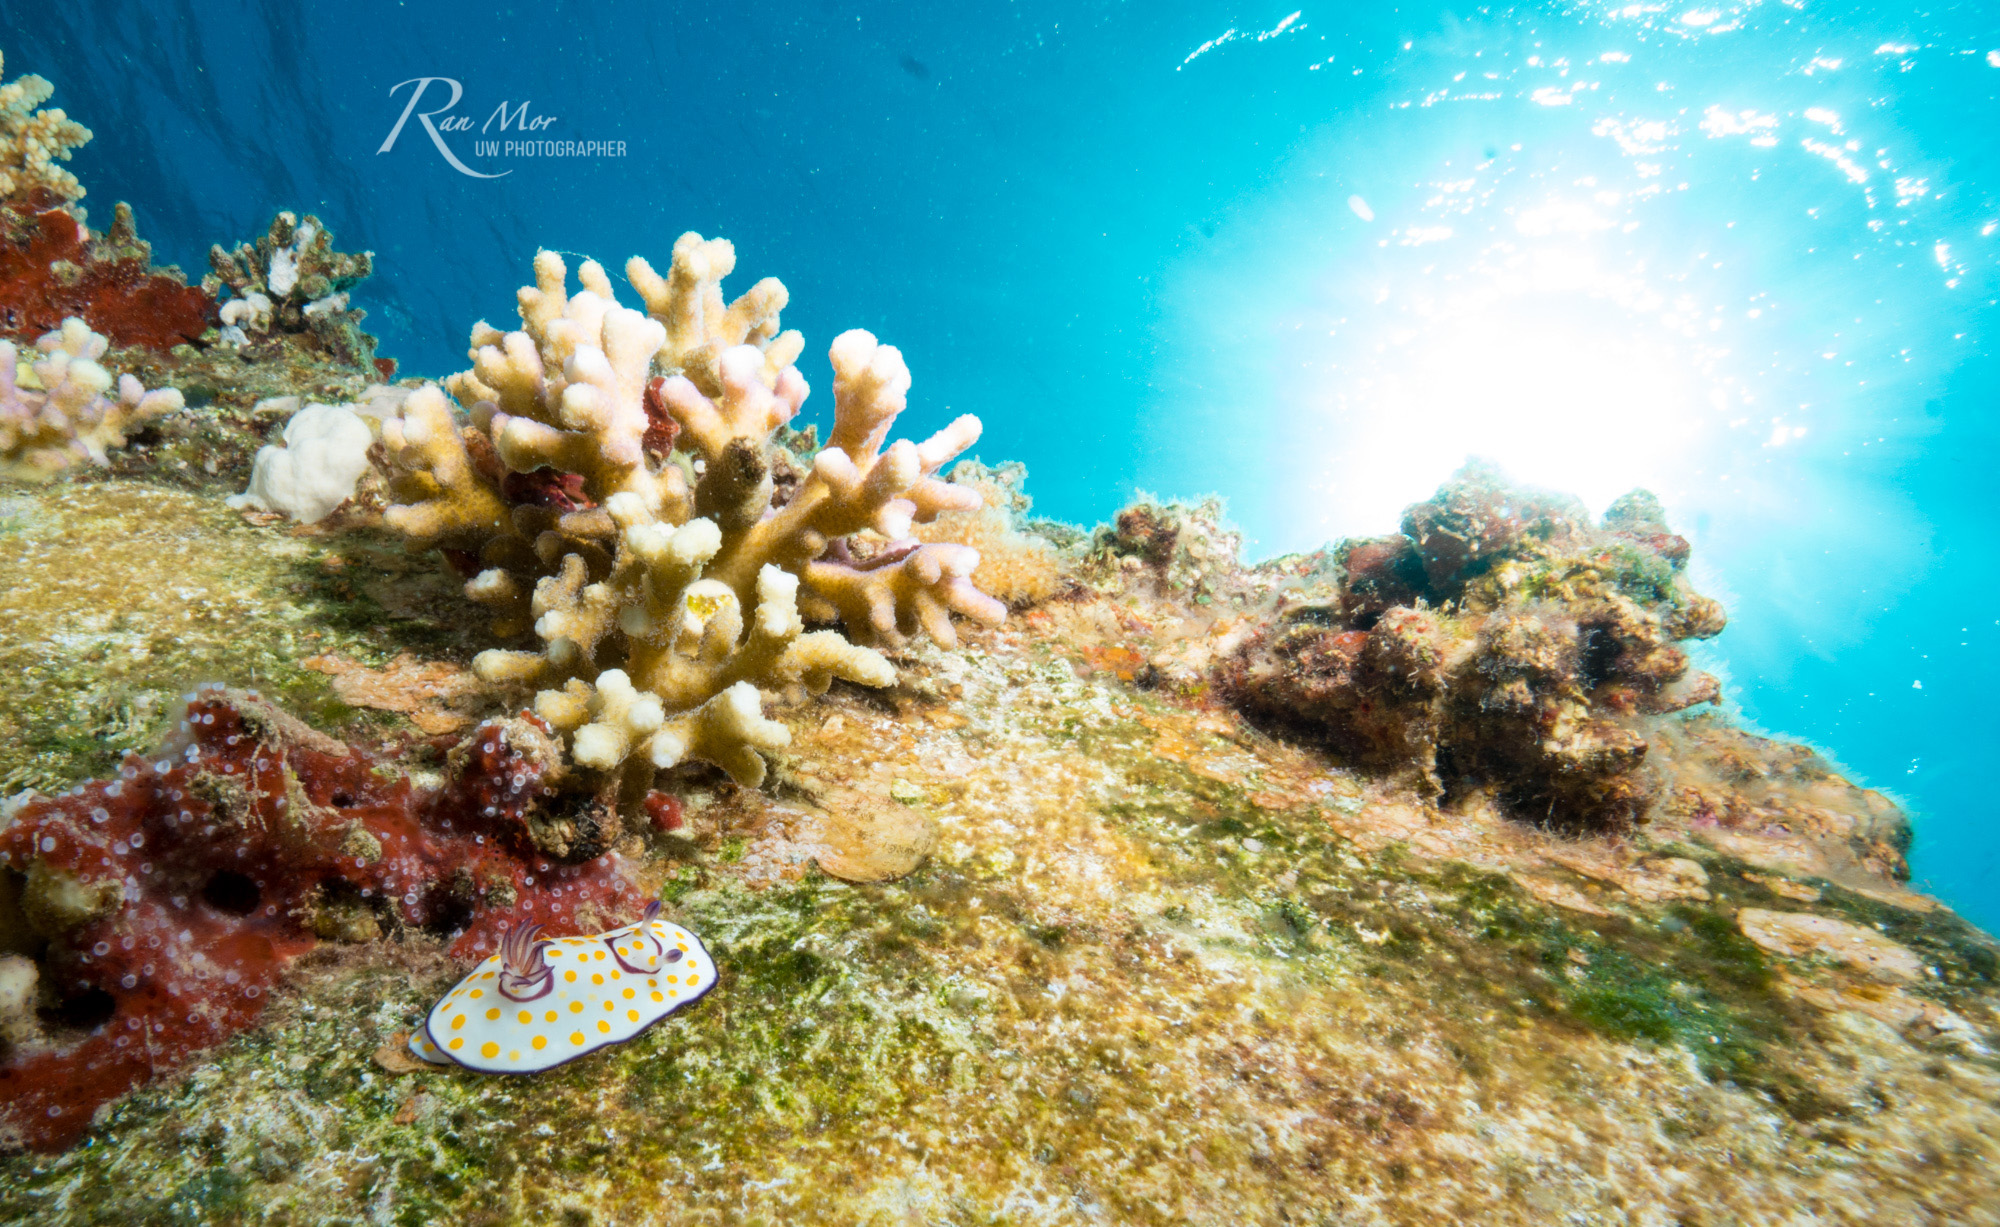
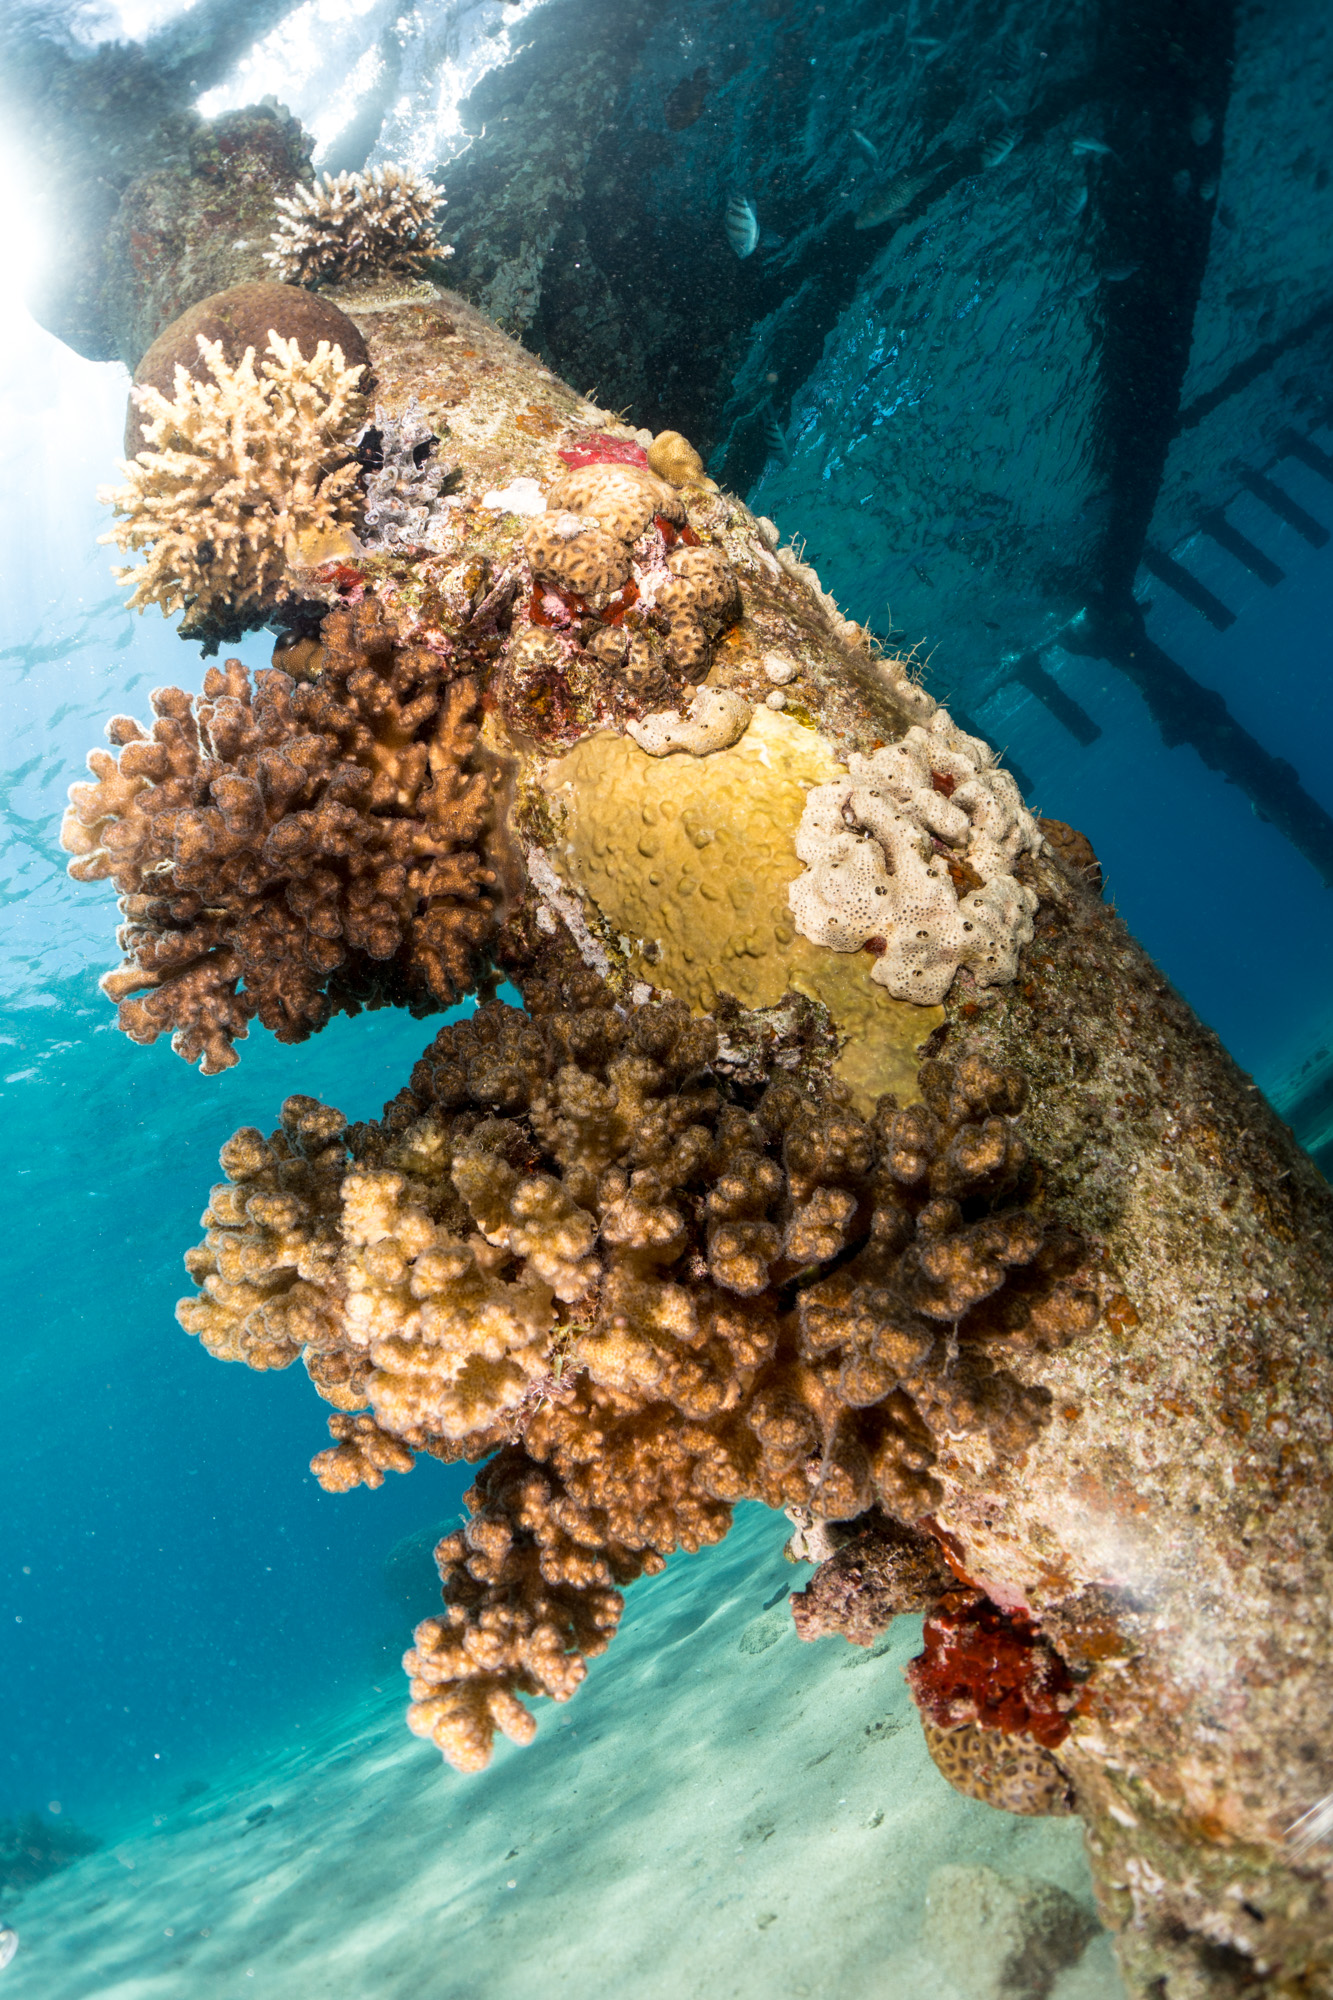
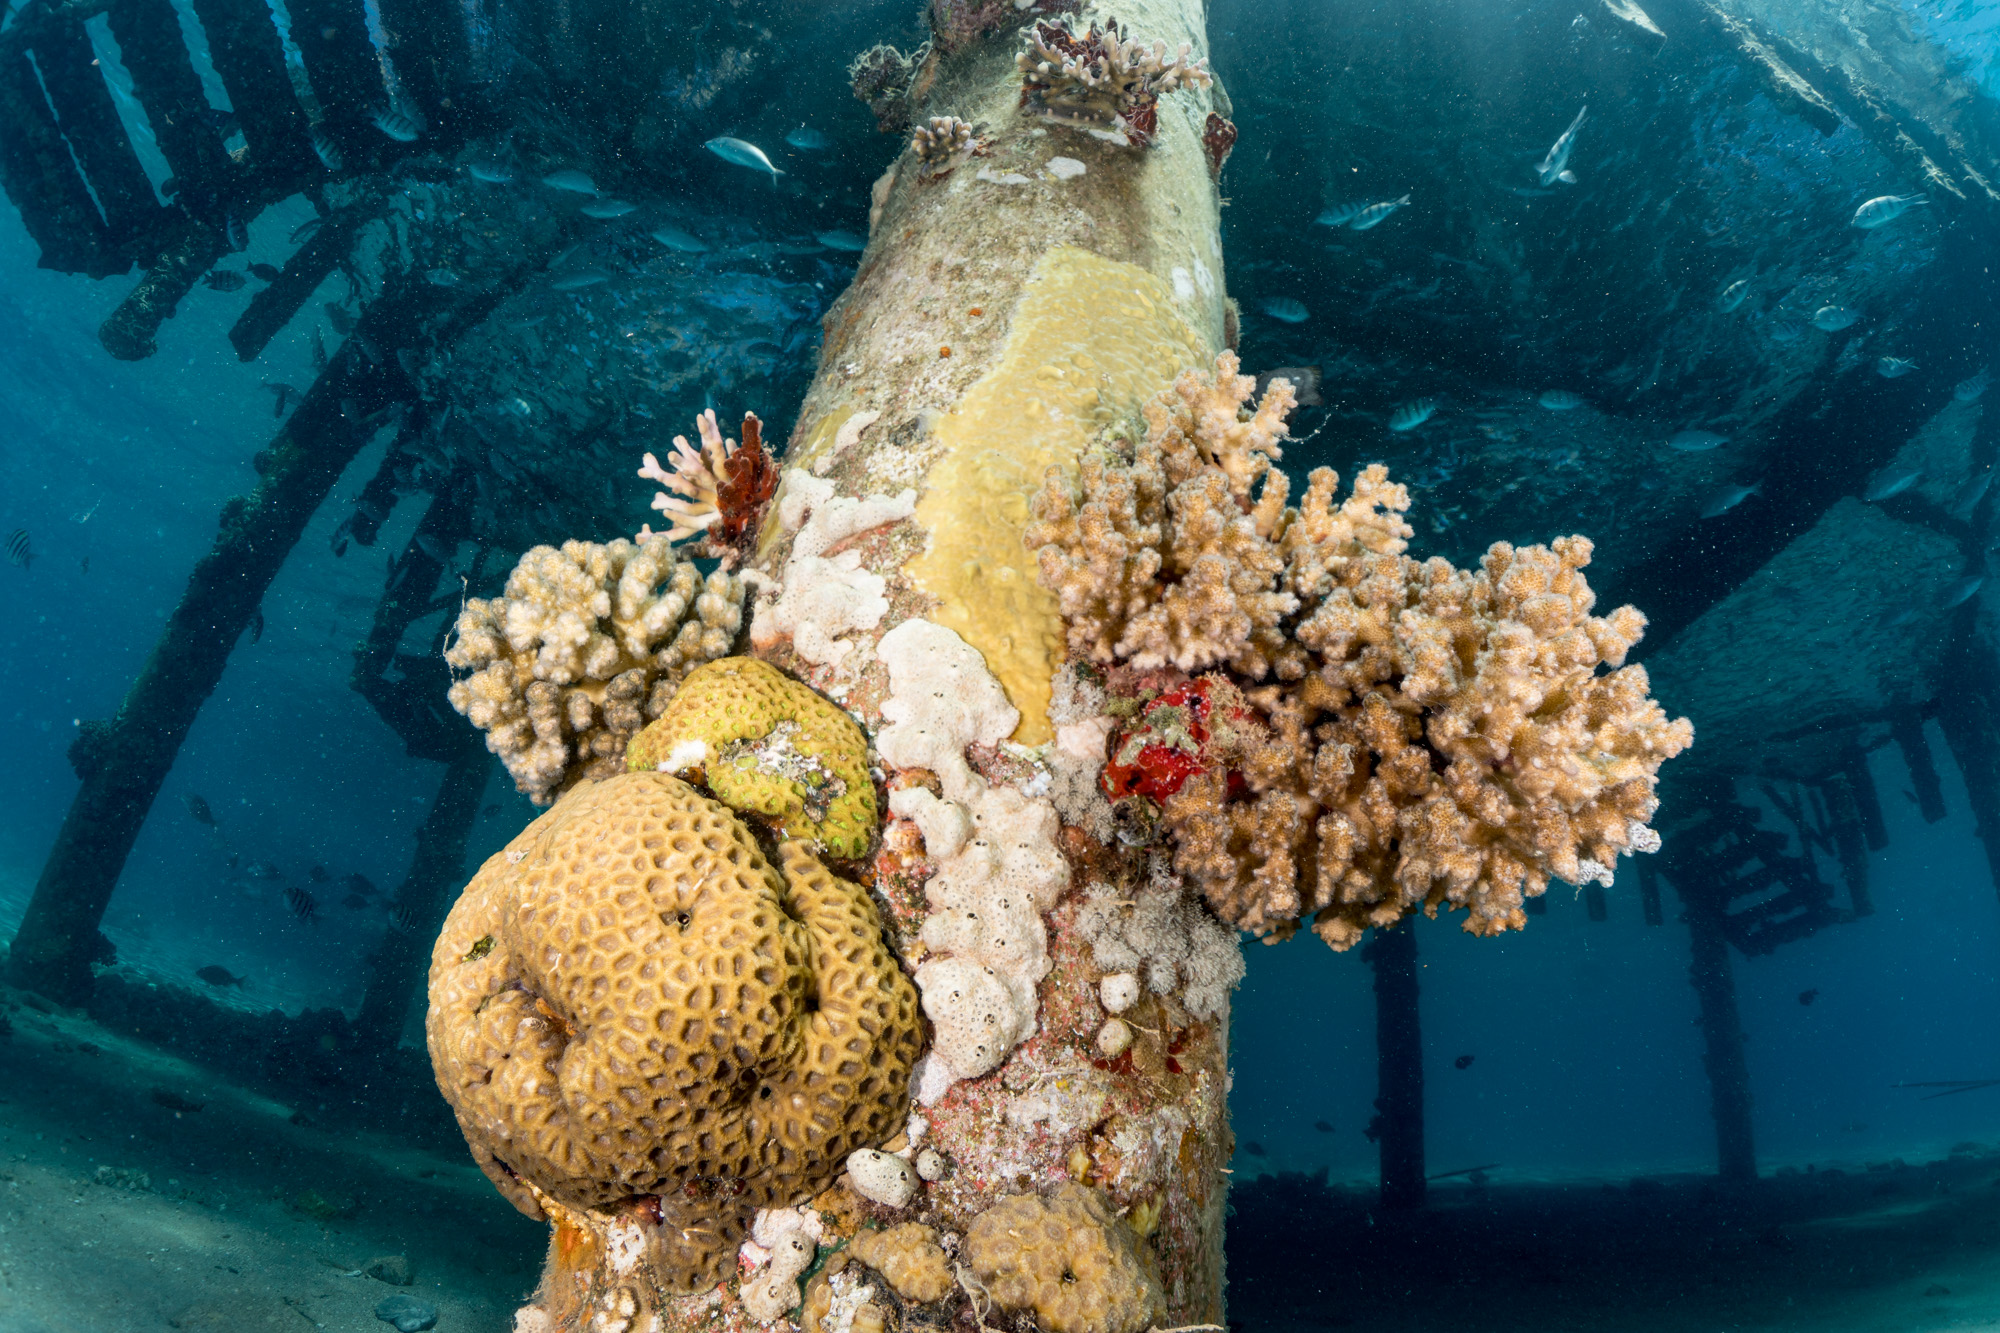
The FML Flat Port 34 allowed me to easily mount both the UWL-09F wide angle lens and the UCL-05LF close up lens.
Both lenses performed beautifully underwater and I was happy to have the entire range of photos on one dive – wide angle fisheye, medium shots and macro!
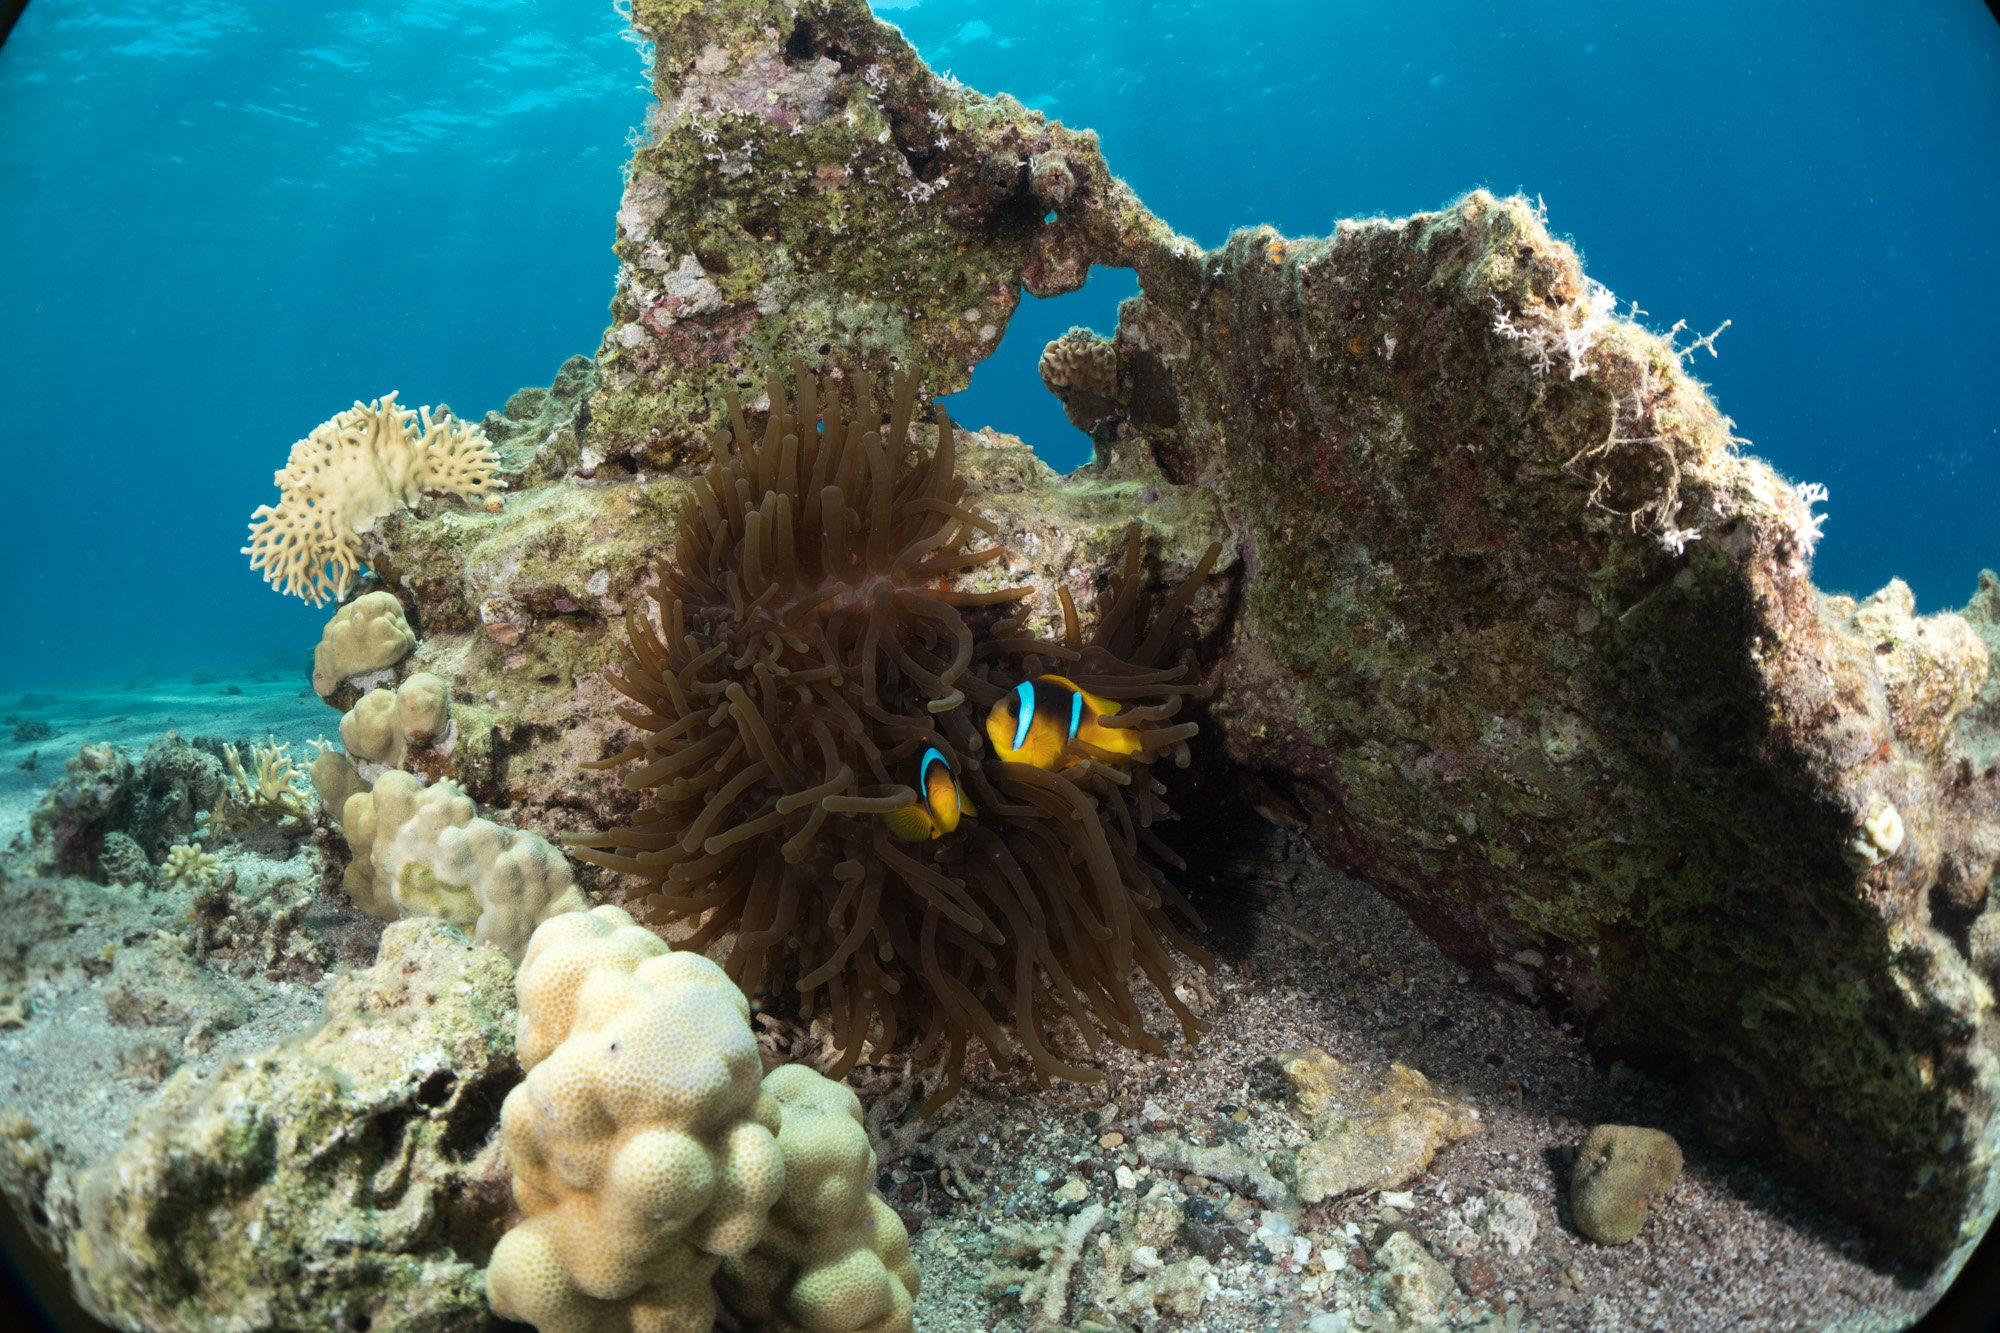
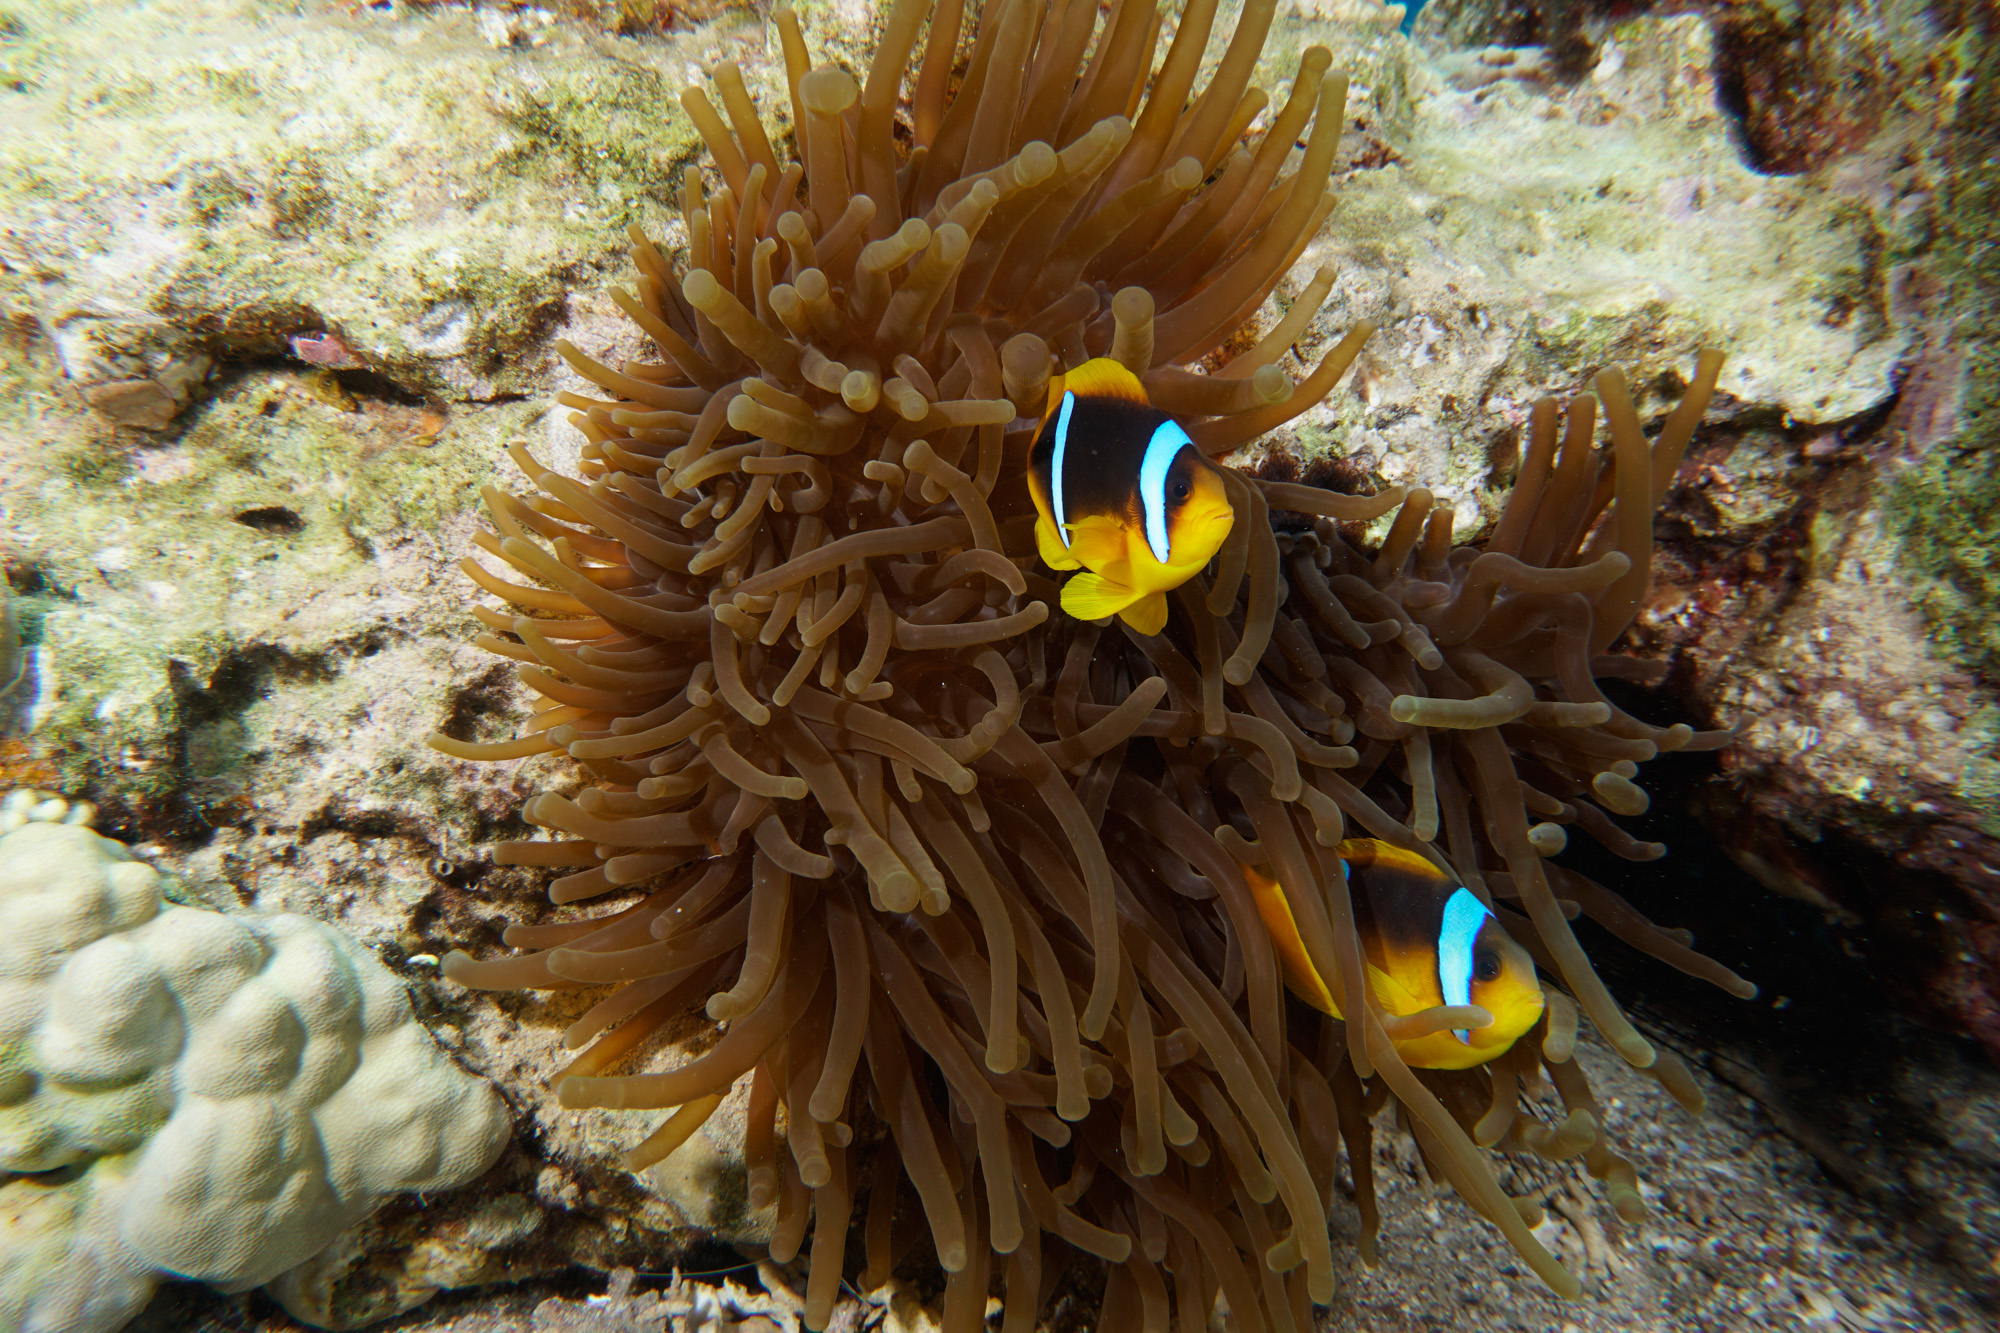


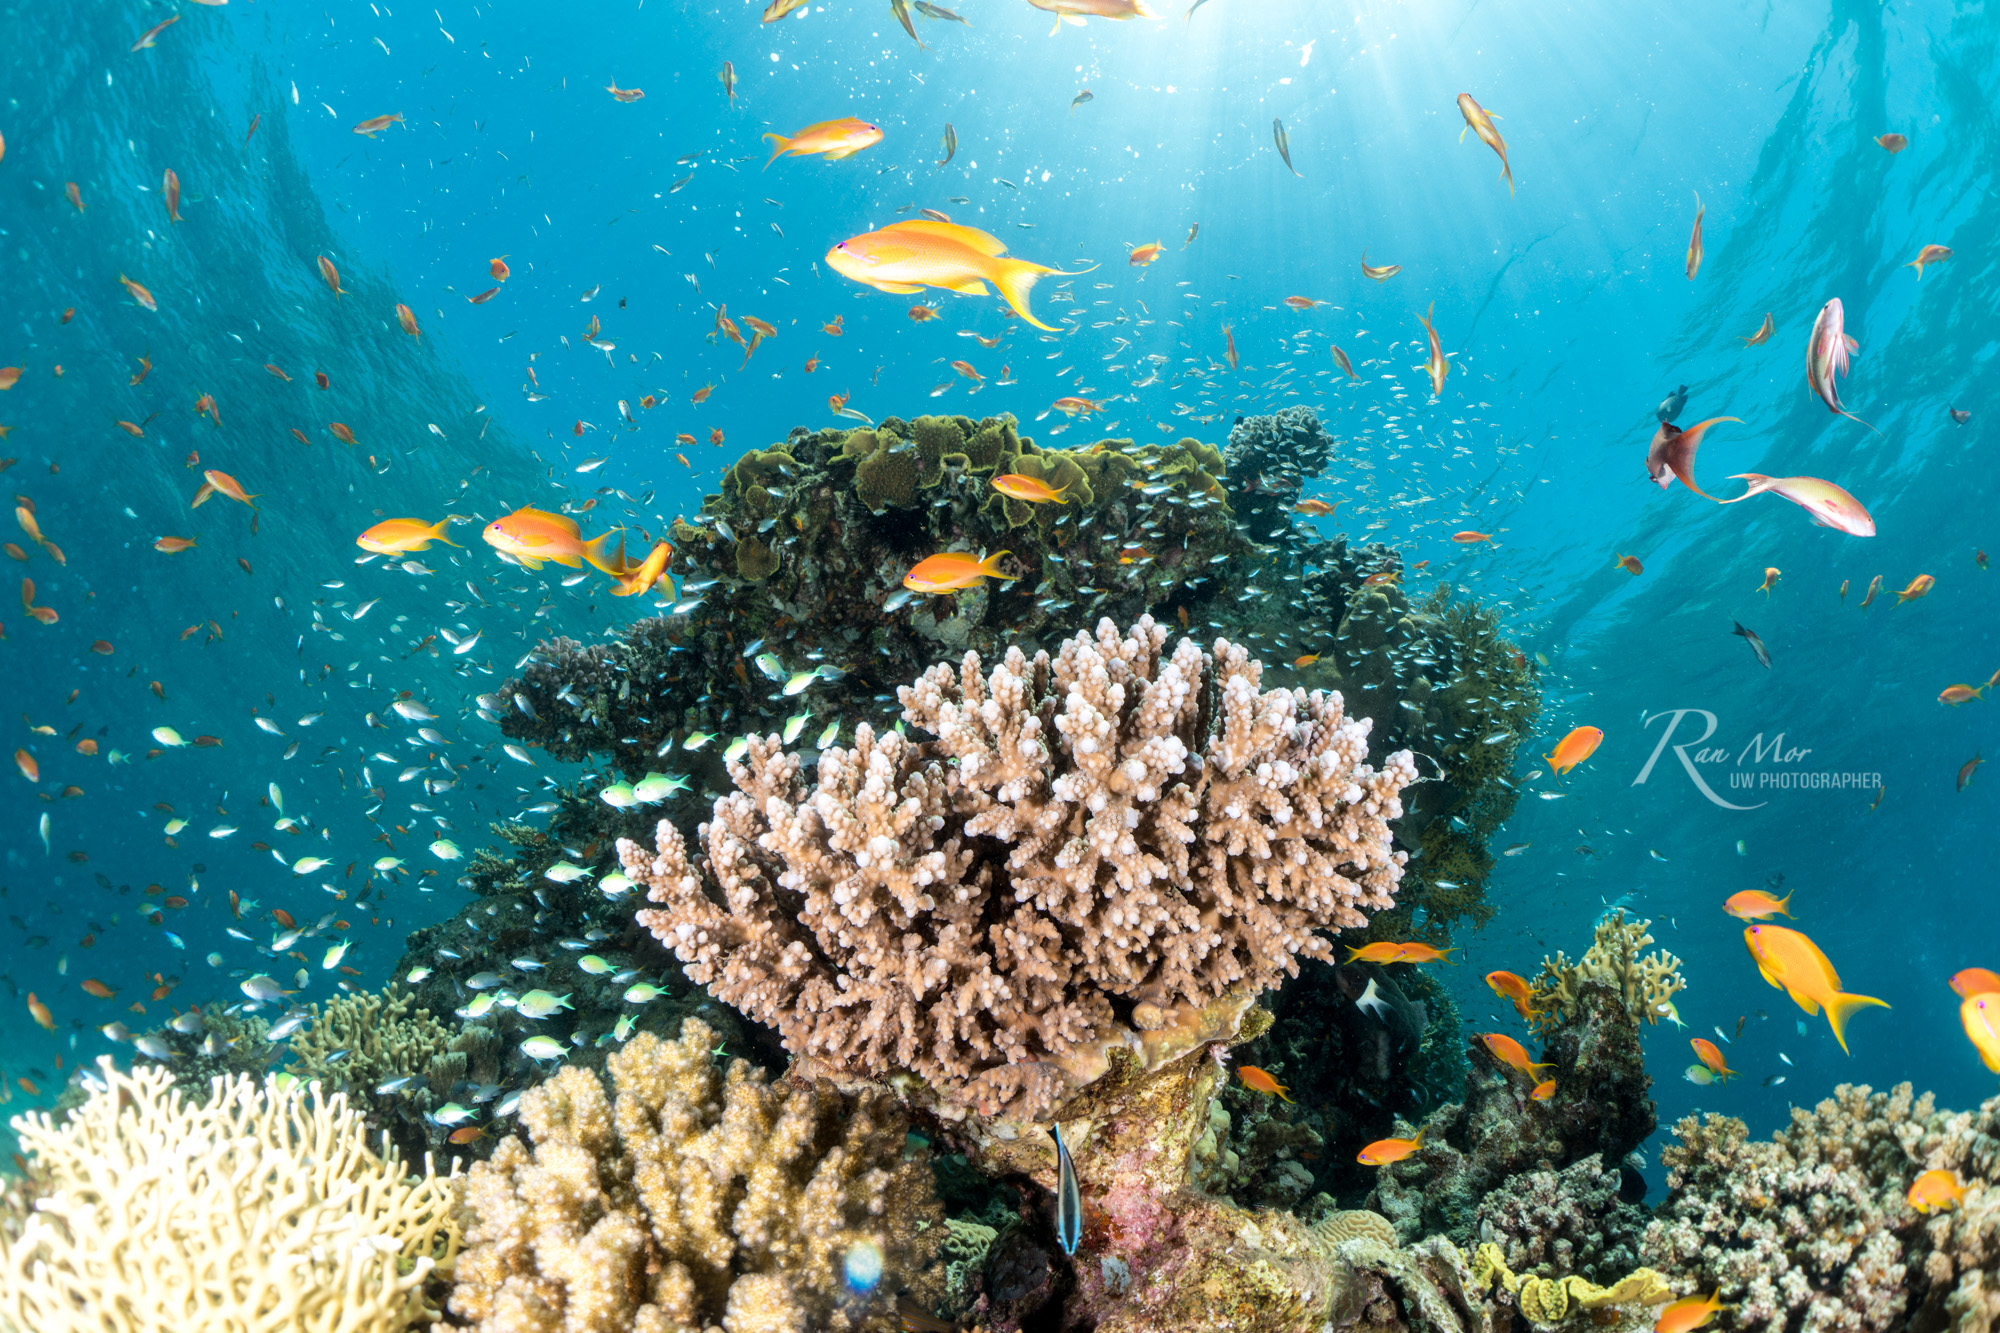
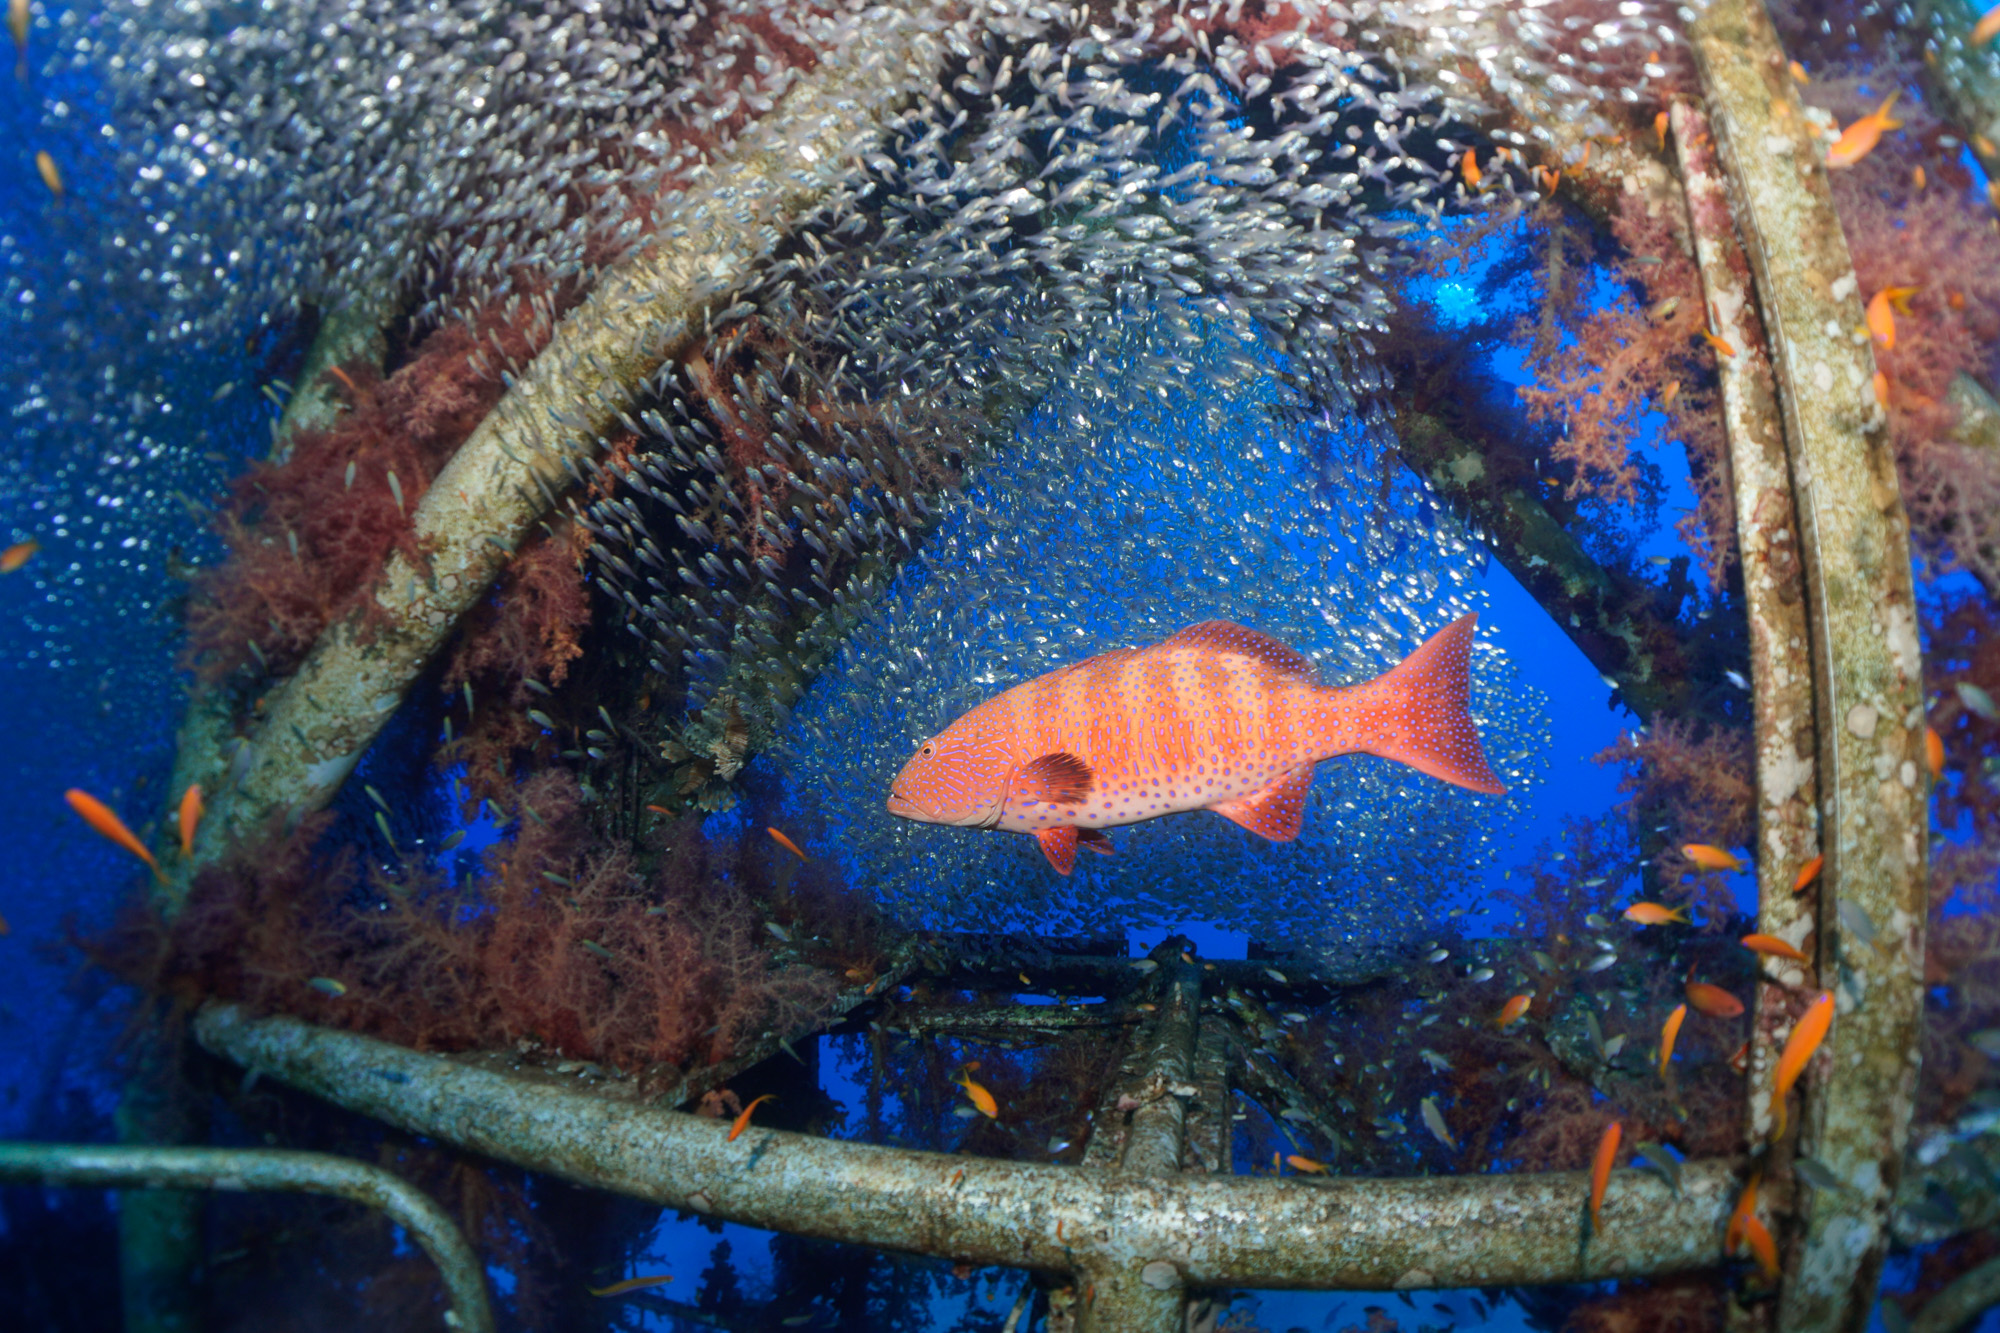
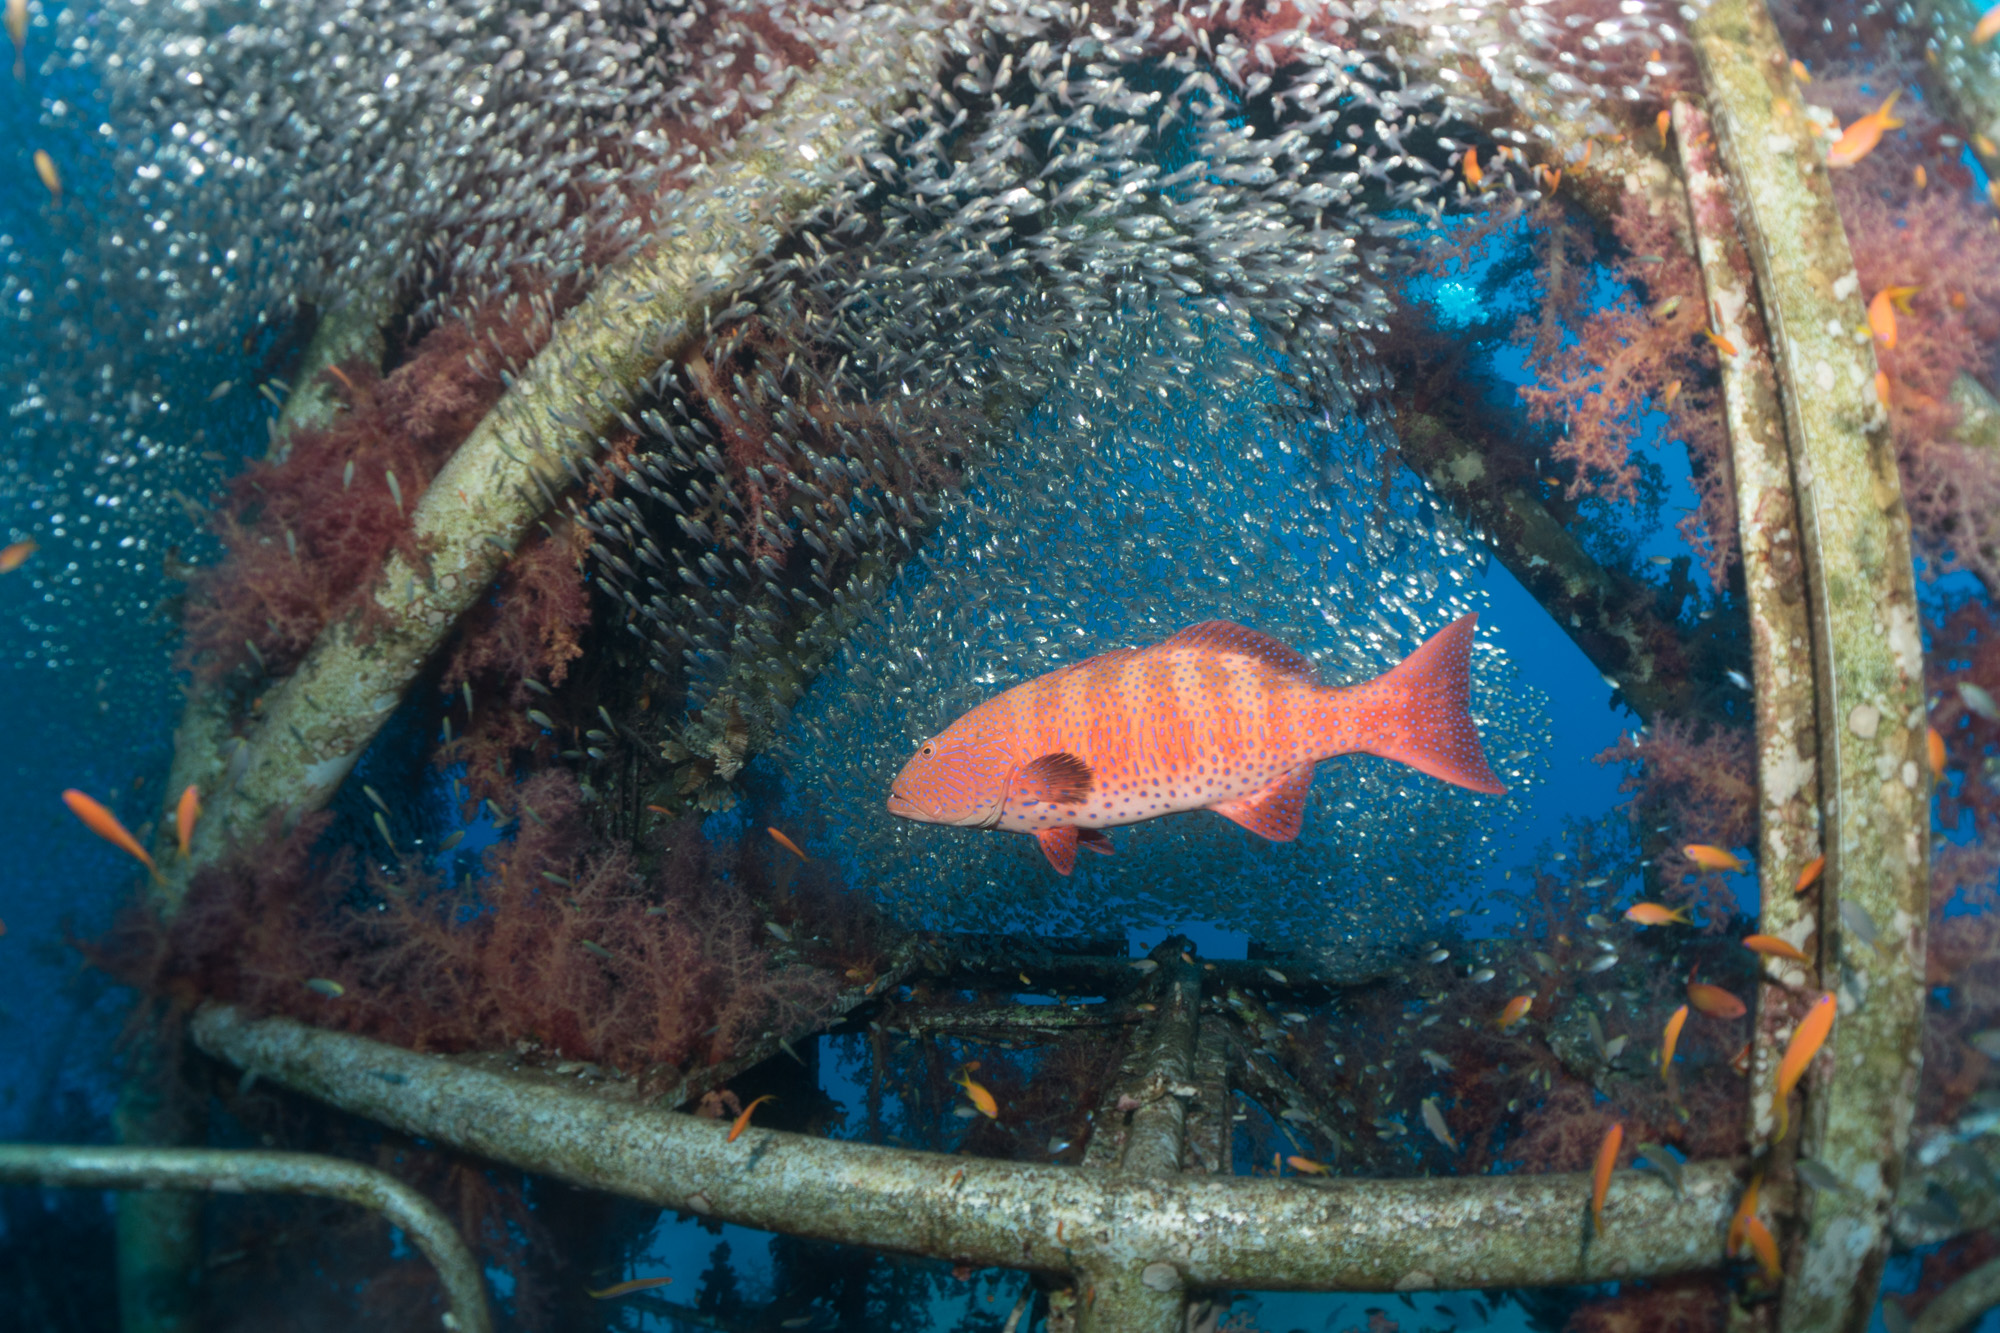
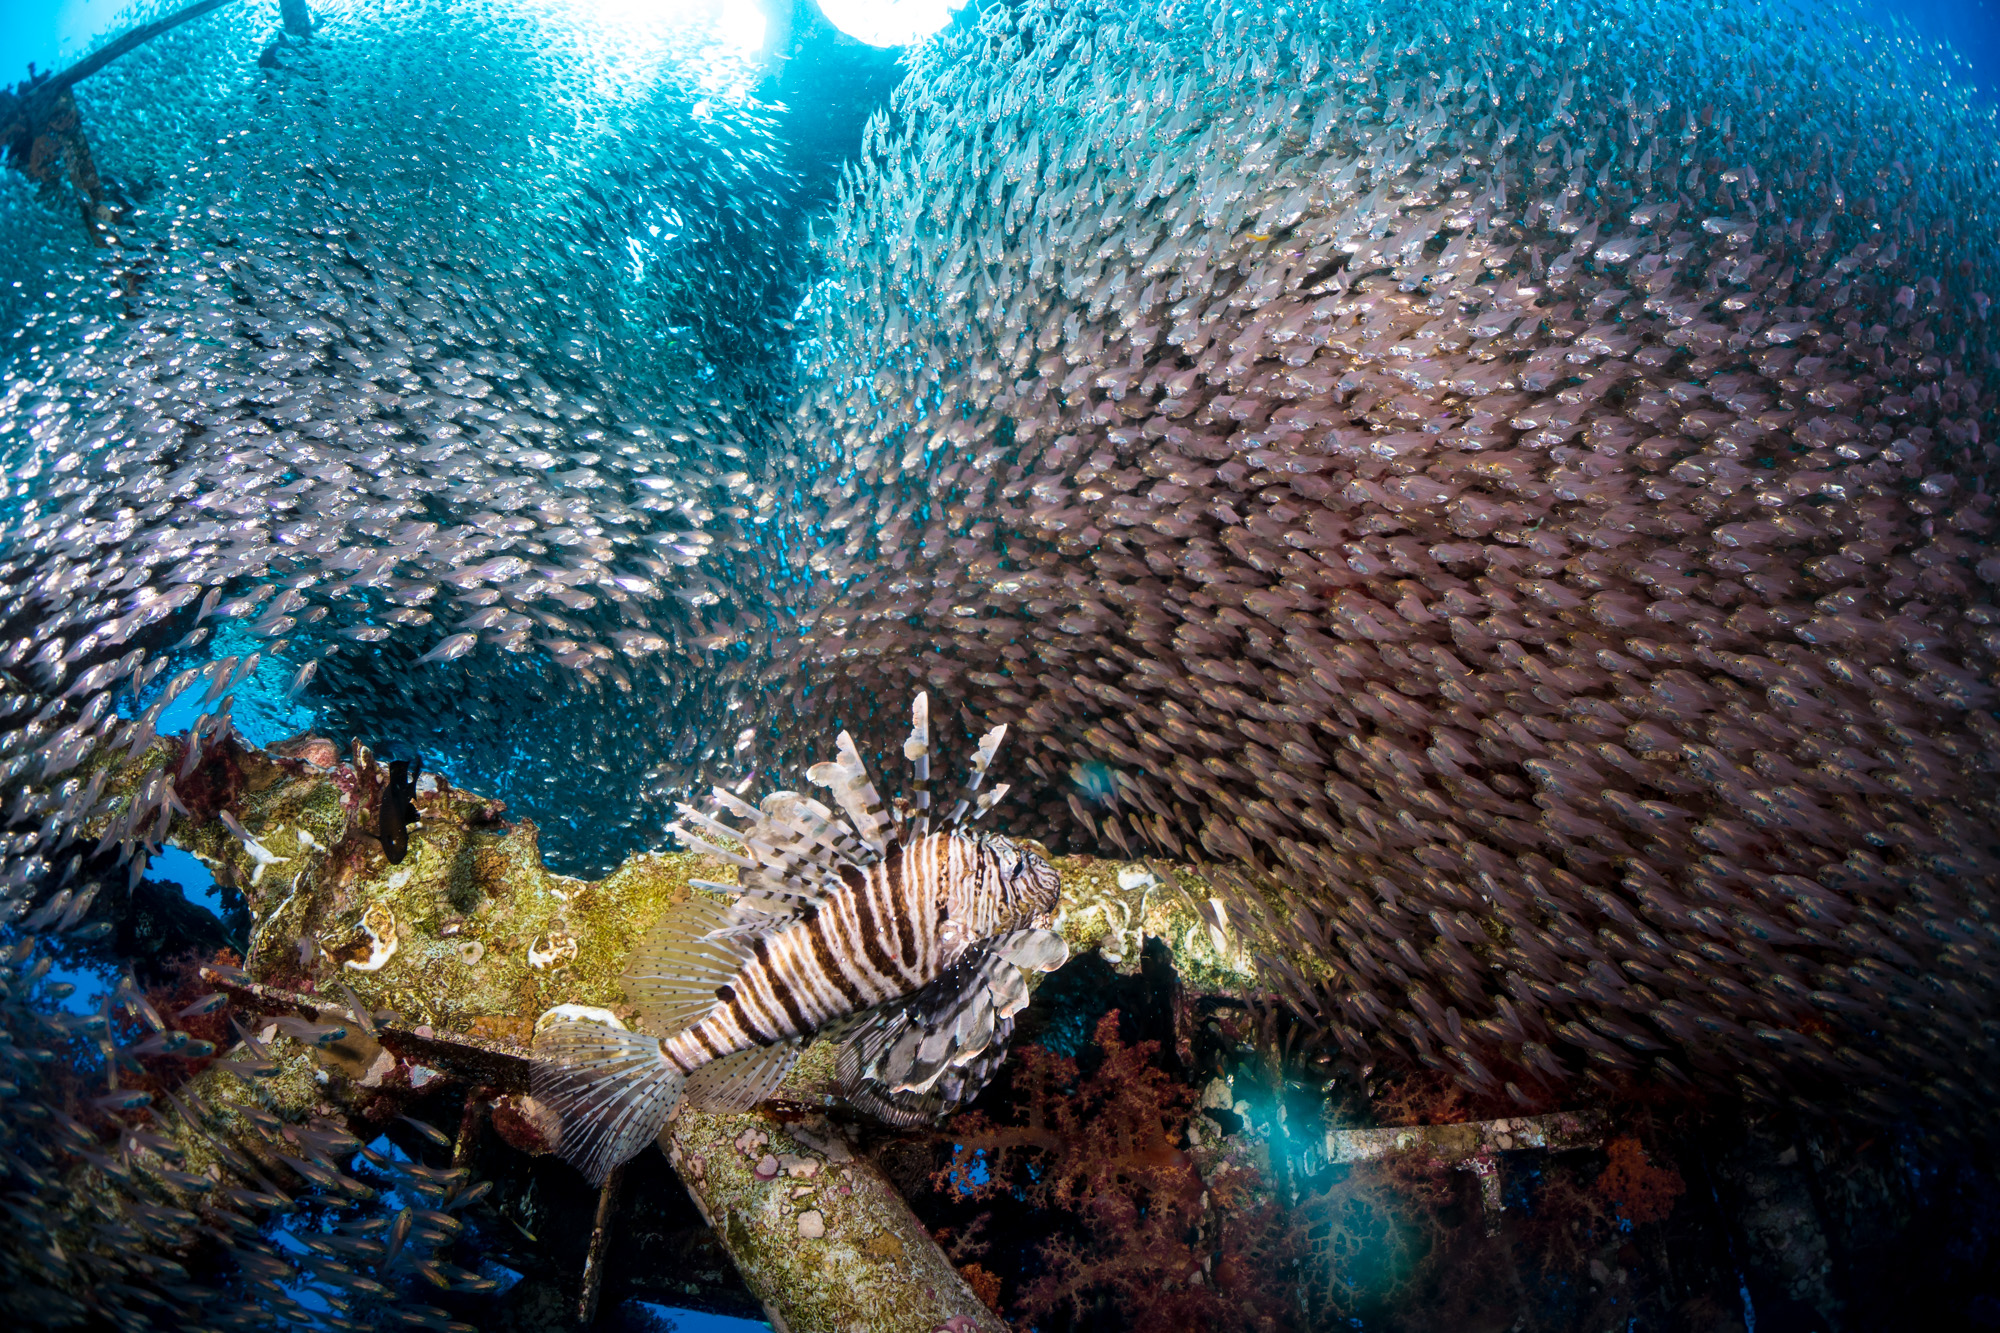
My favorite was by far the UWL-09F combination. I’m a sucker for wide angle frames, so I just couldn’t help myself.
I was very pleased with the compatibility of the wide angle lens with this housing! It sits very snug and close to the lens itself, which means minimum vignetting and maximum field of view. It’s important to remember that when using wide angle wet lenses, you must use a narrow aperture, to improve corner sharpness. I would shoot with at least f8 or higher. During daylight dives that still leaves you with more than enough light, and if you feel the need to, don’t be afraid bump up the ISO. You won’t see any noise on the A6500 at least until ISO 1600!


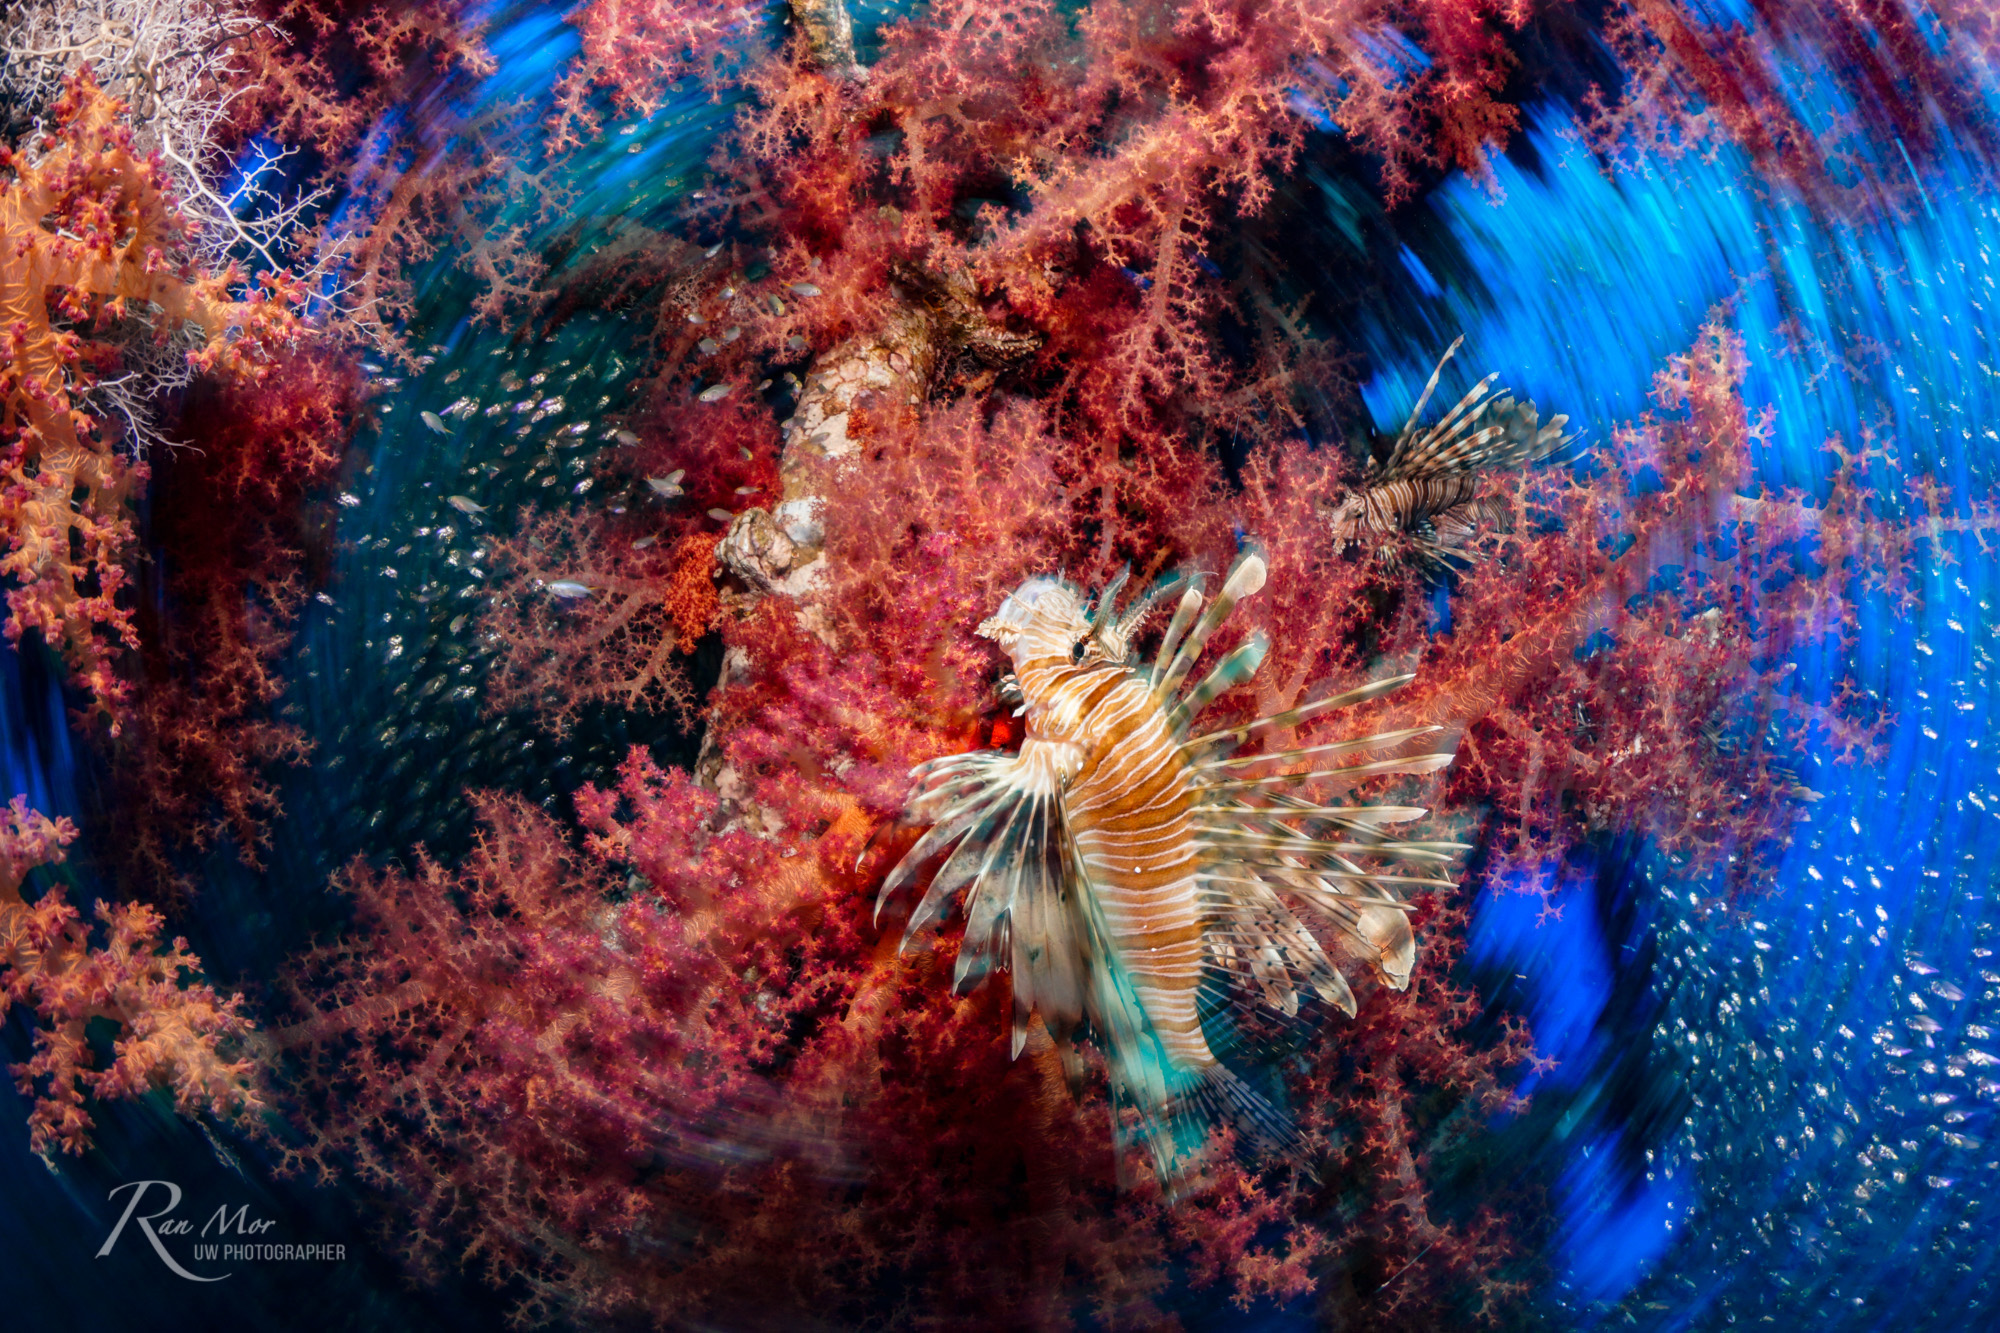

UPDATE: Testing the Sony 10-18mm and 16mm + VCL-ECF2 Fisheye Converter
I recently got a chance to do some more testing with two more lenses, under the Fantasea FML dome. I was extremely happy with the results.


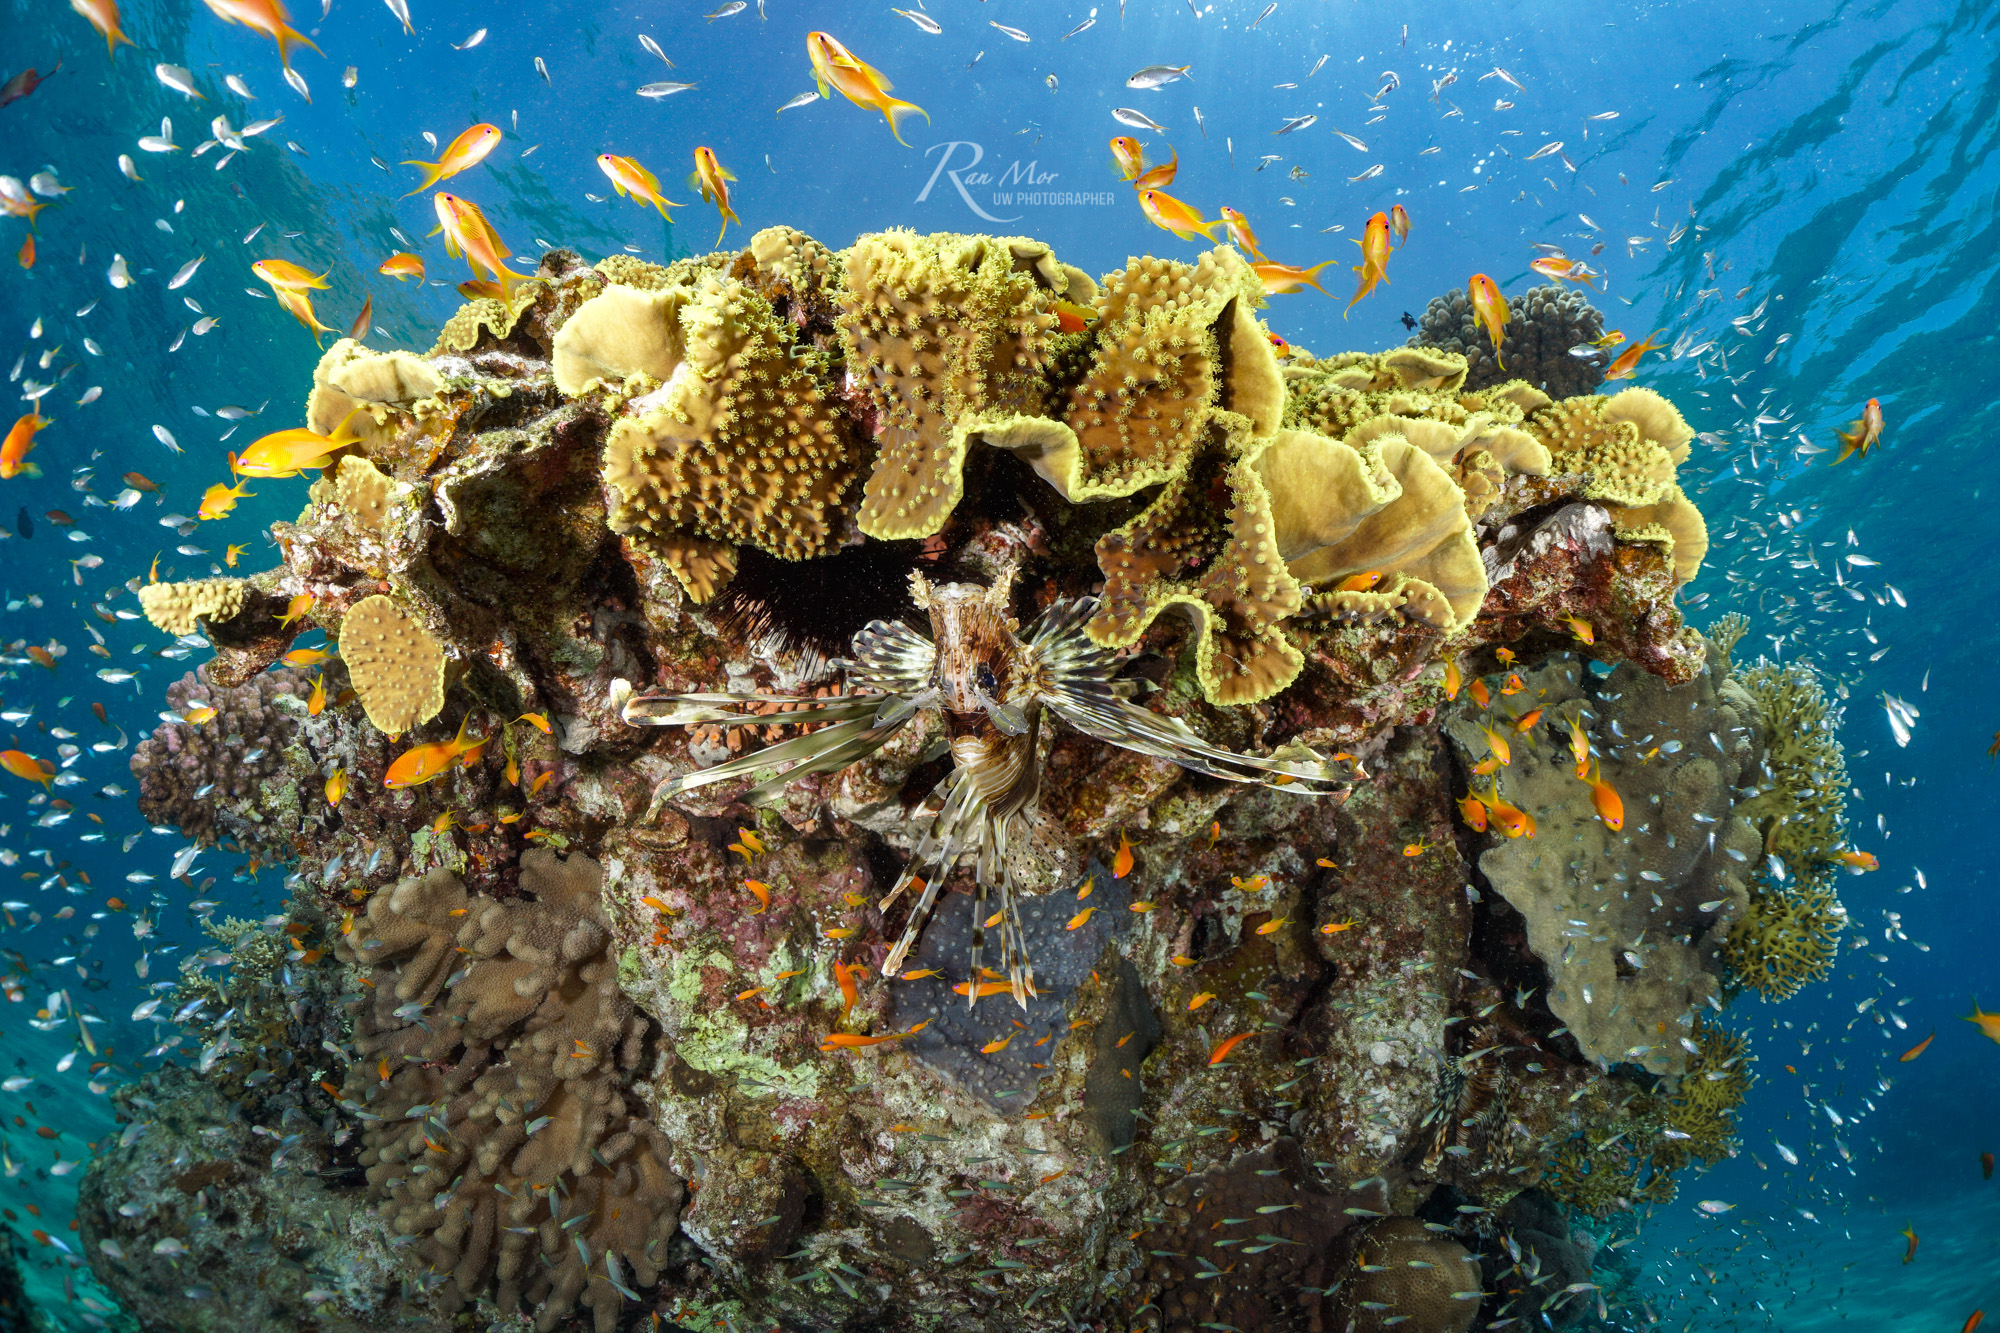
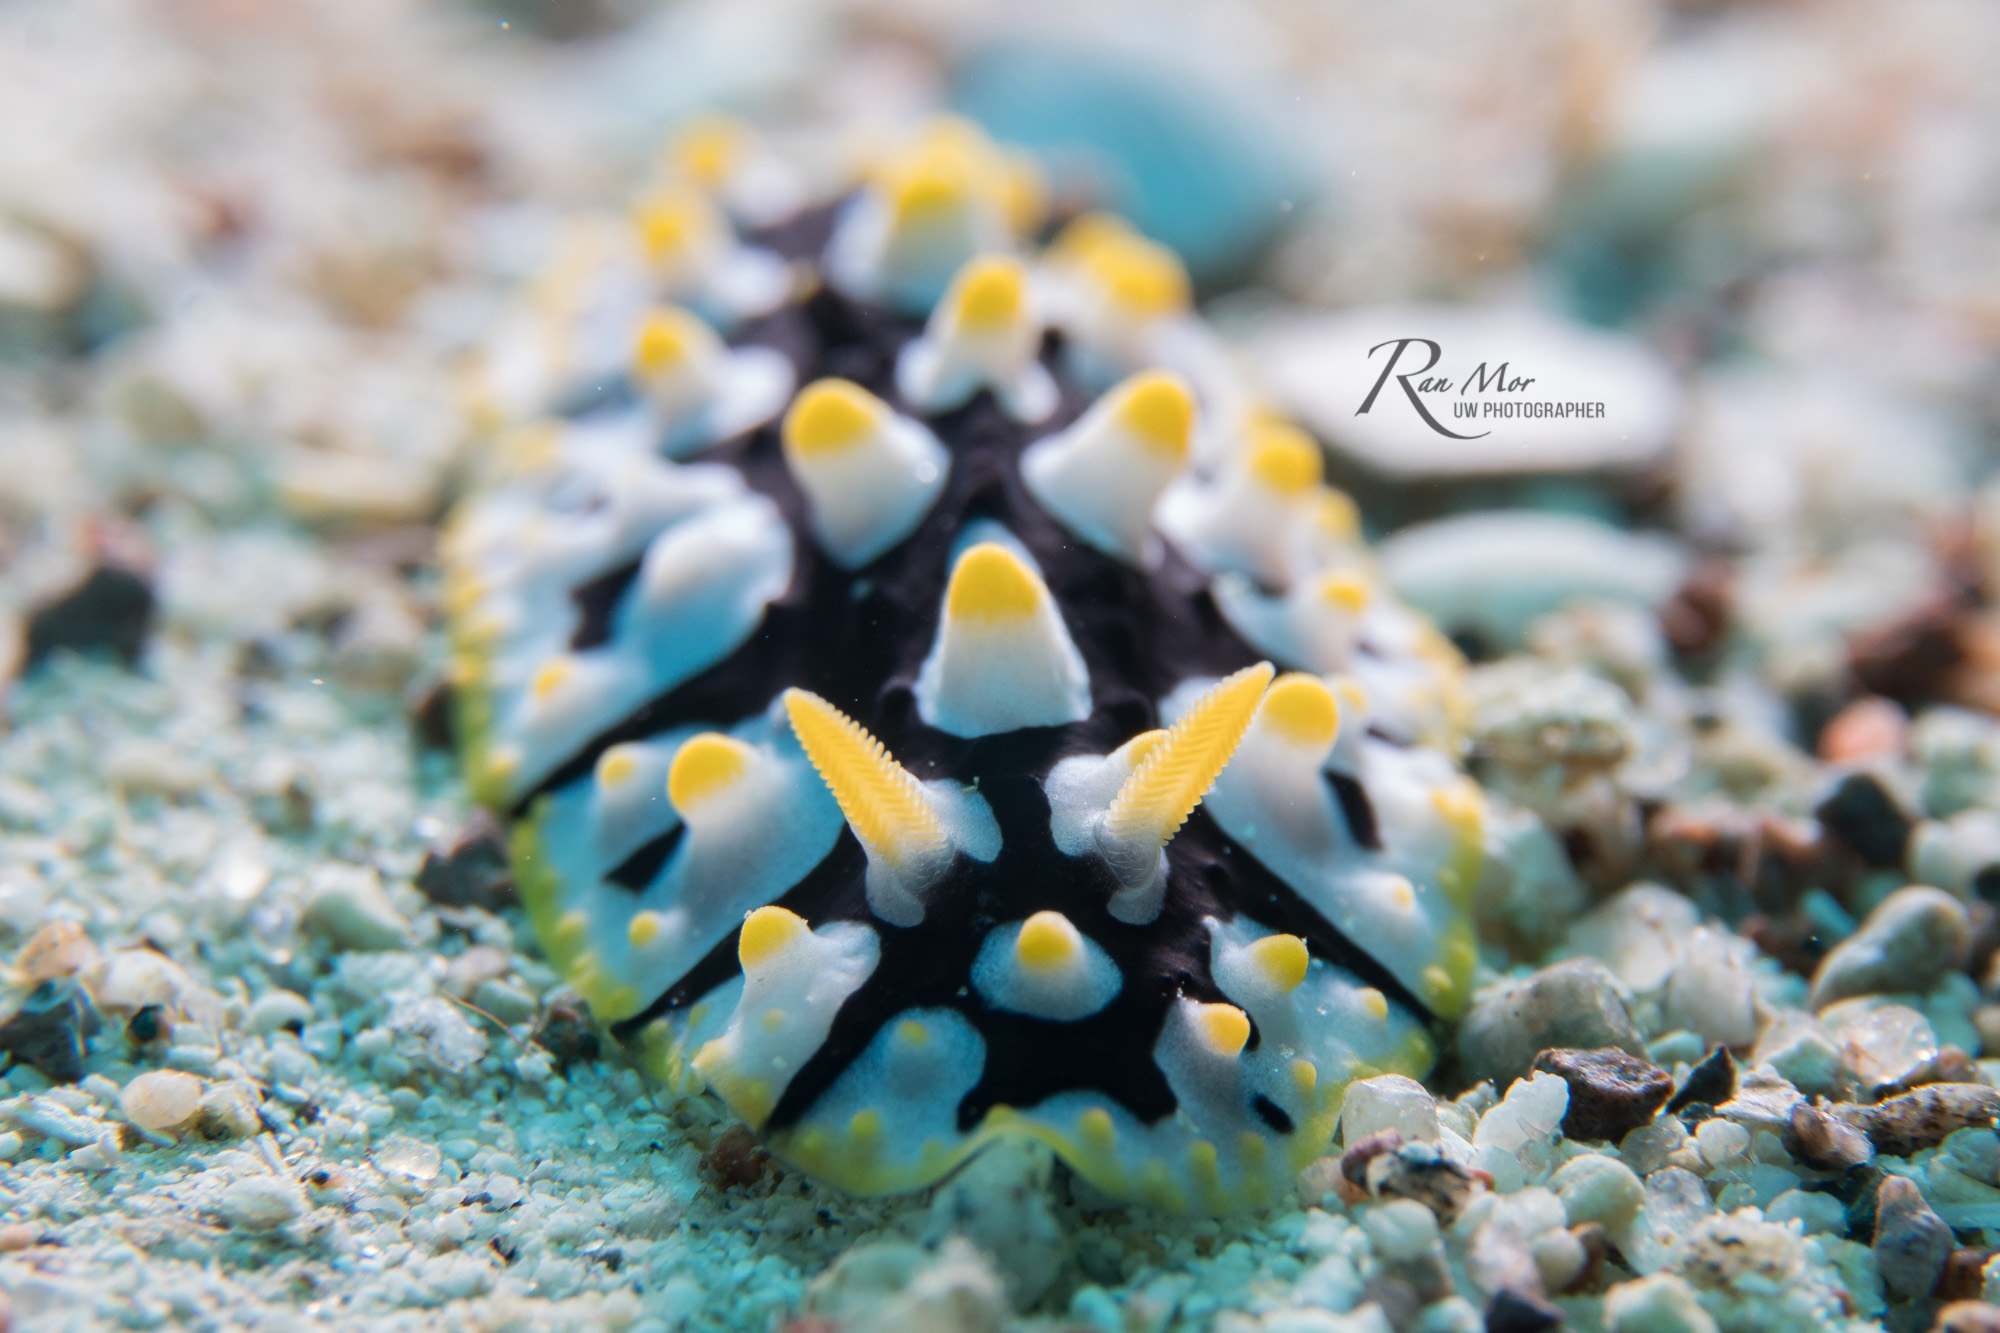
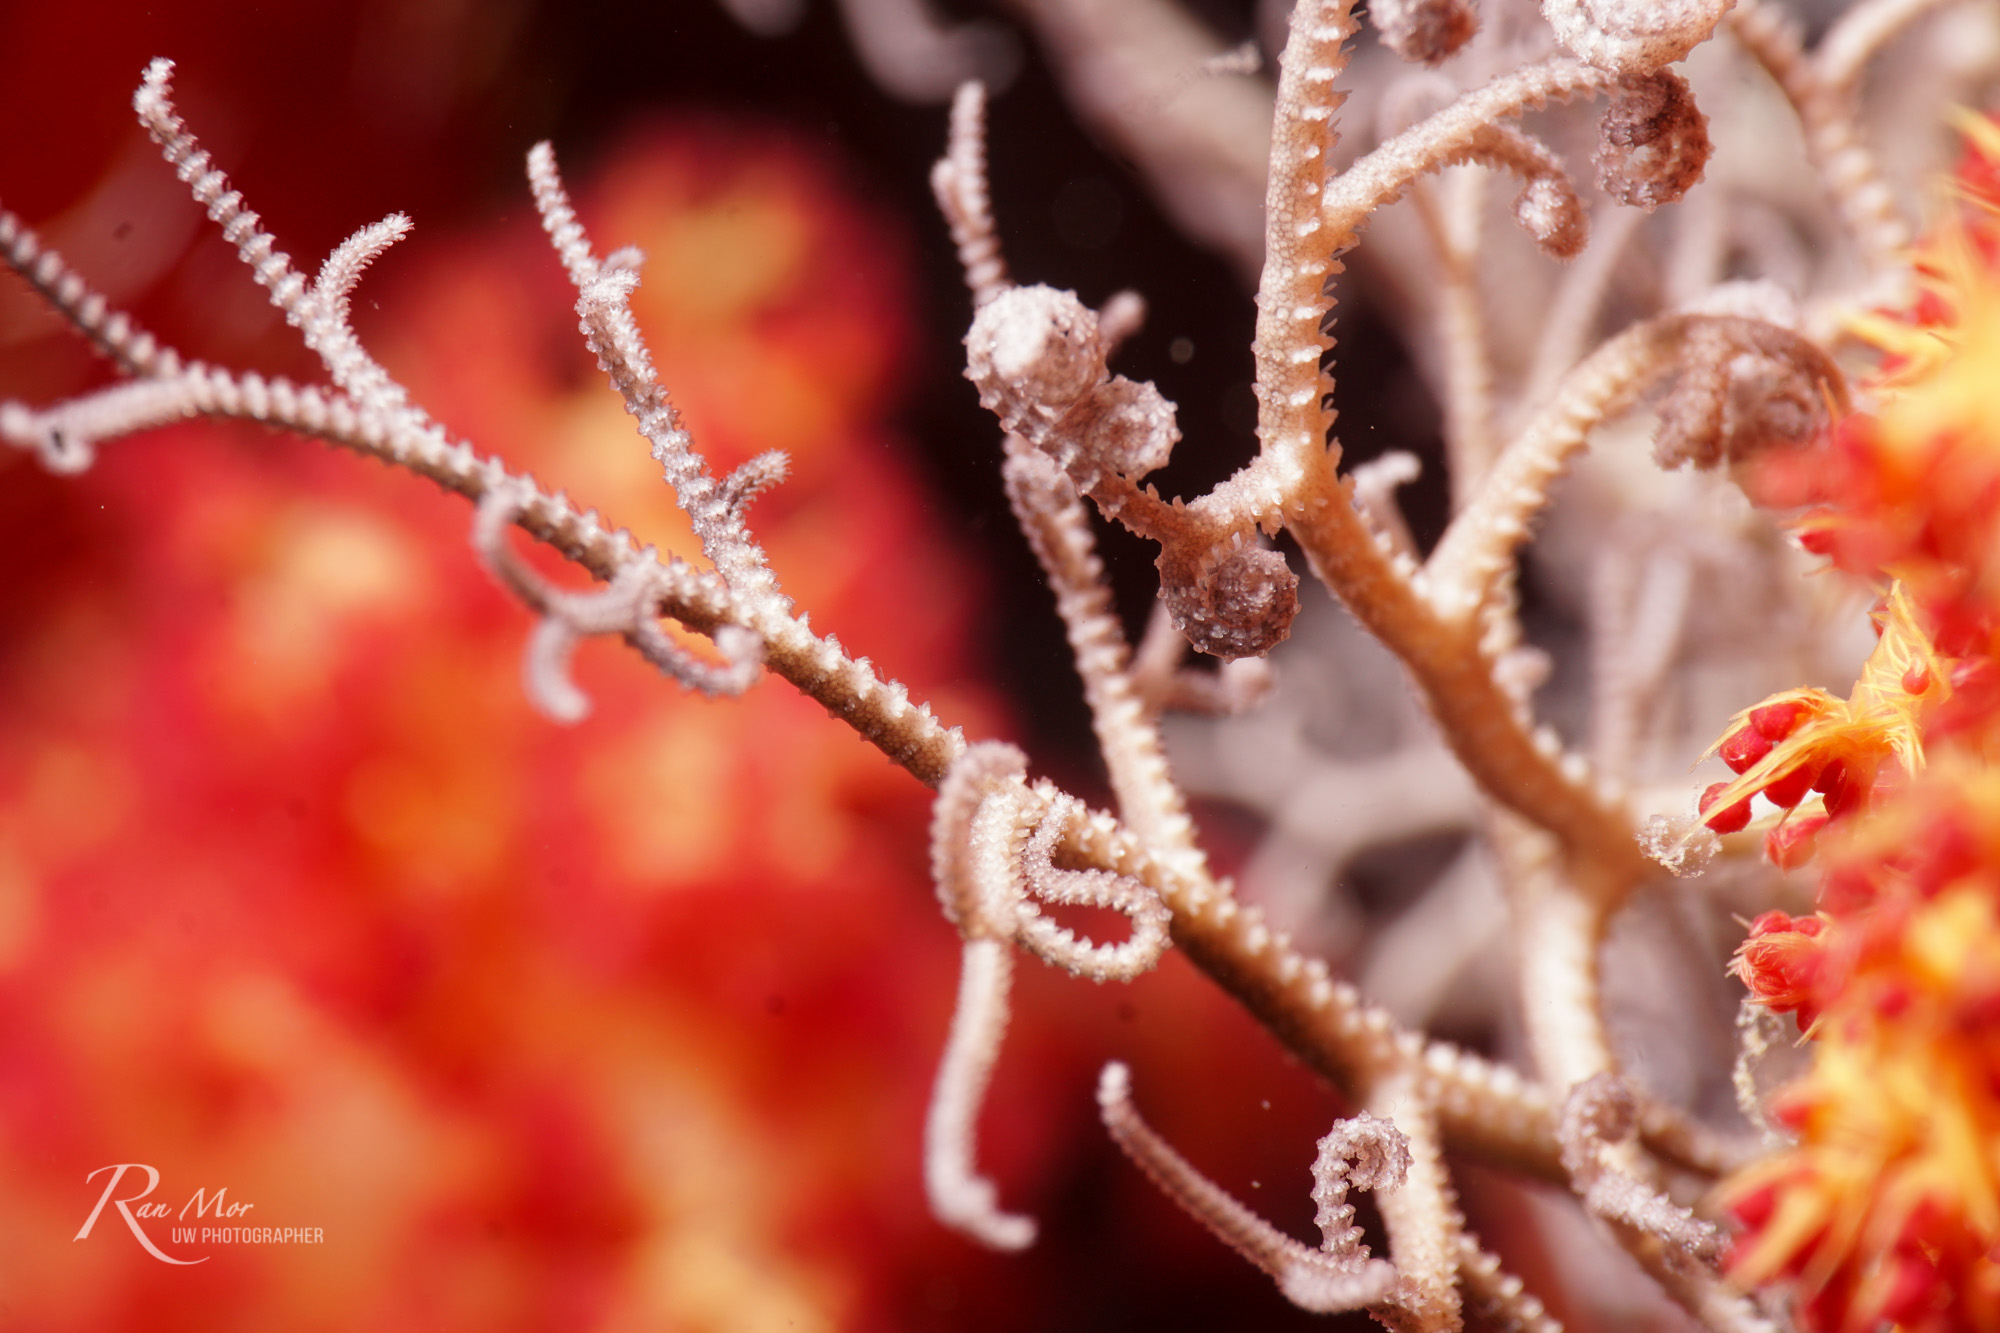
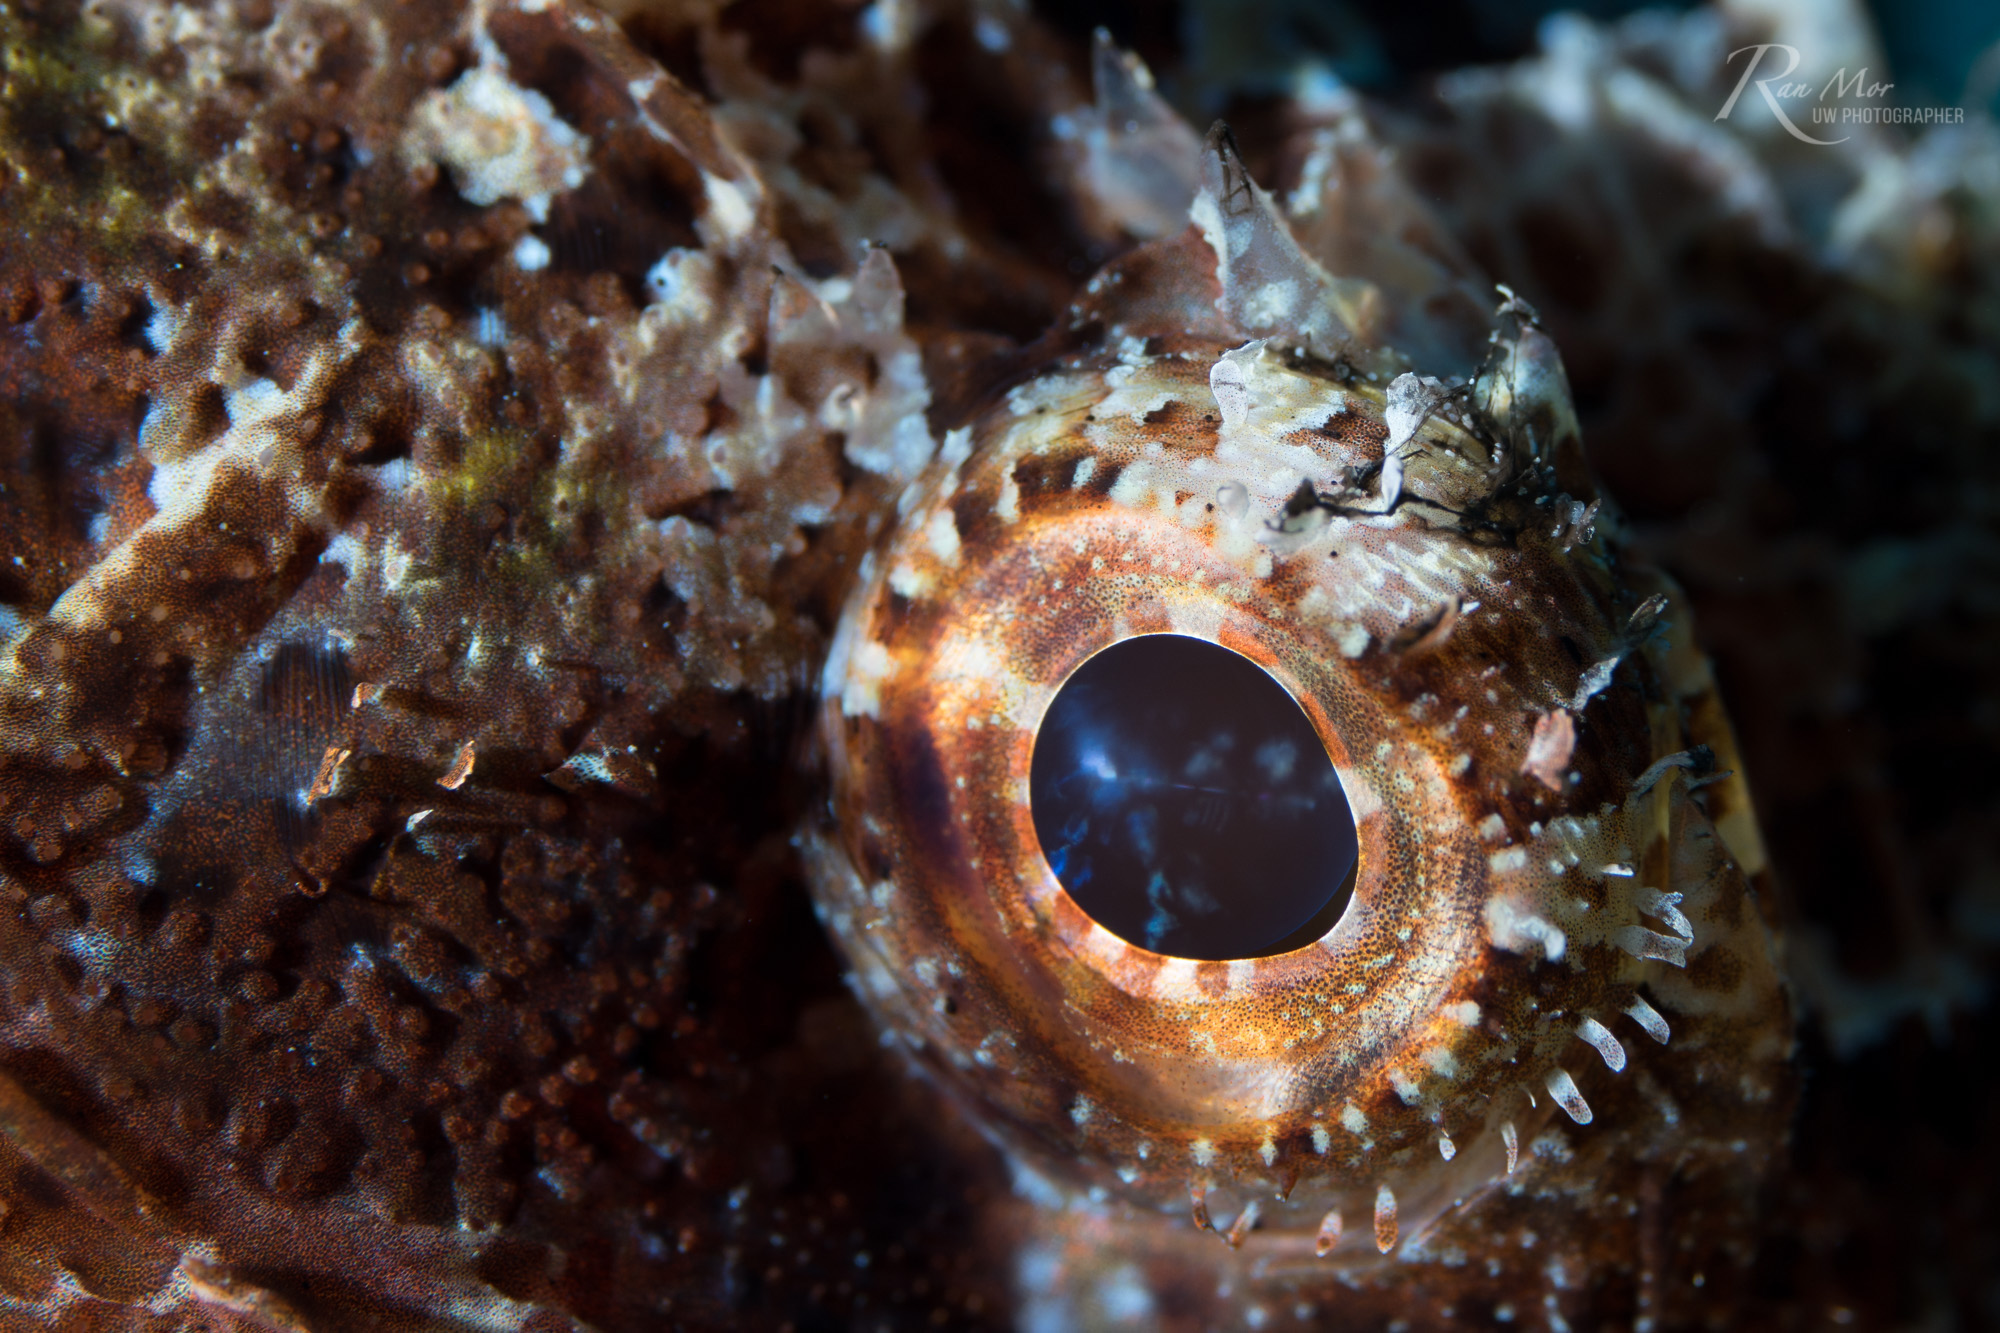
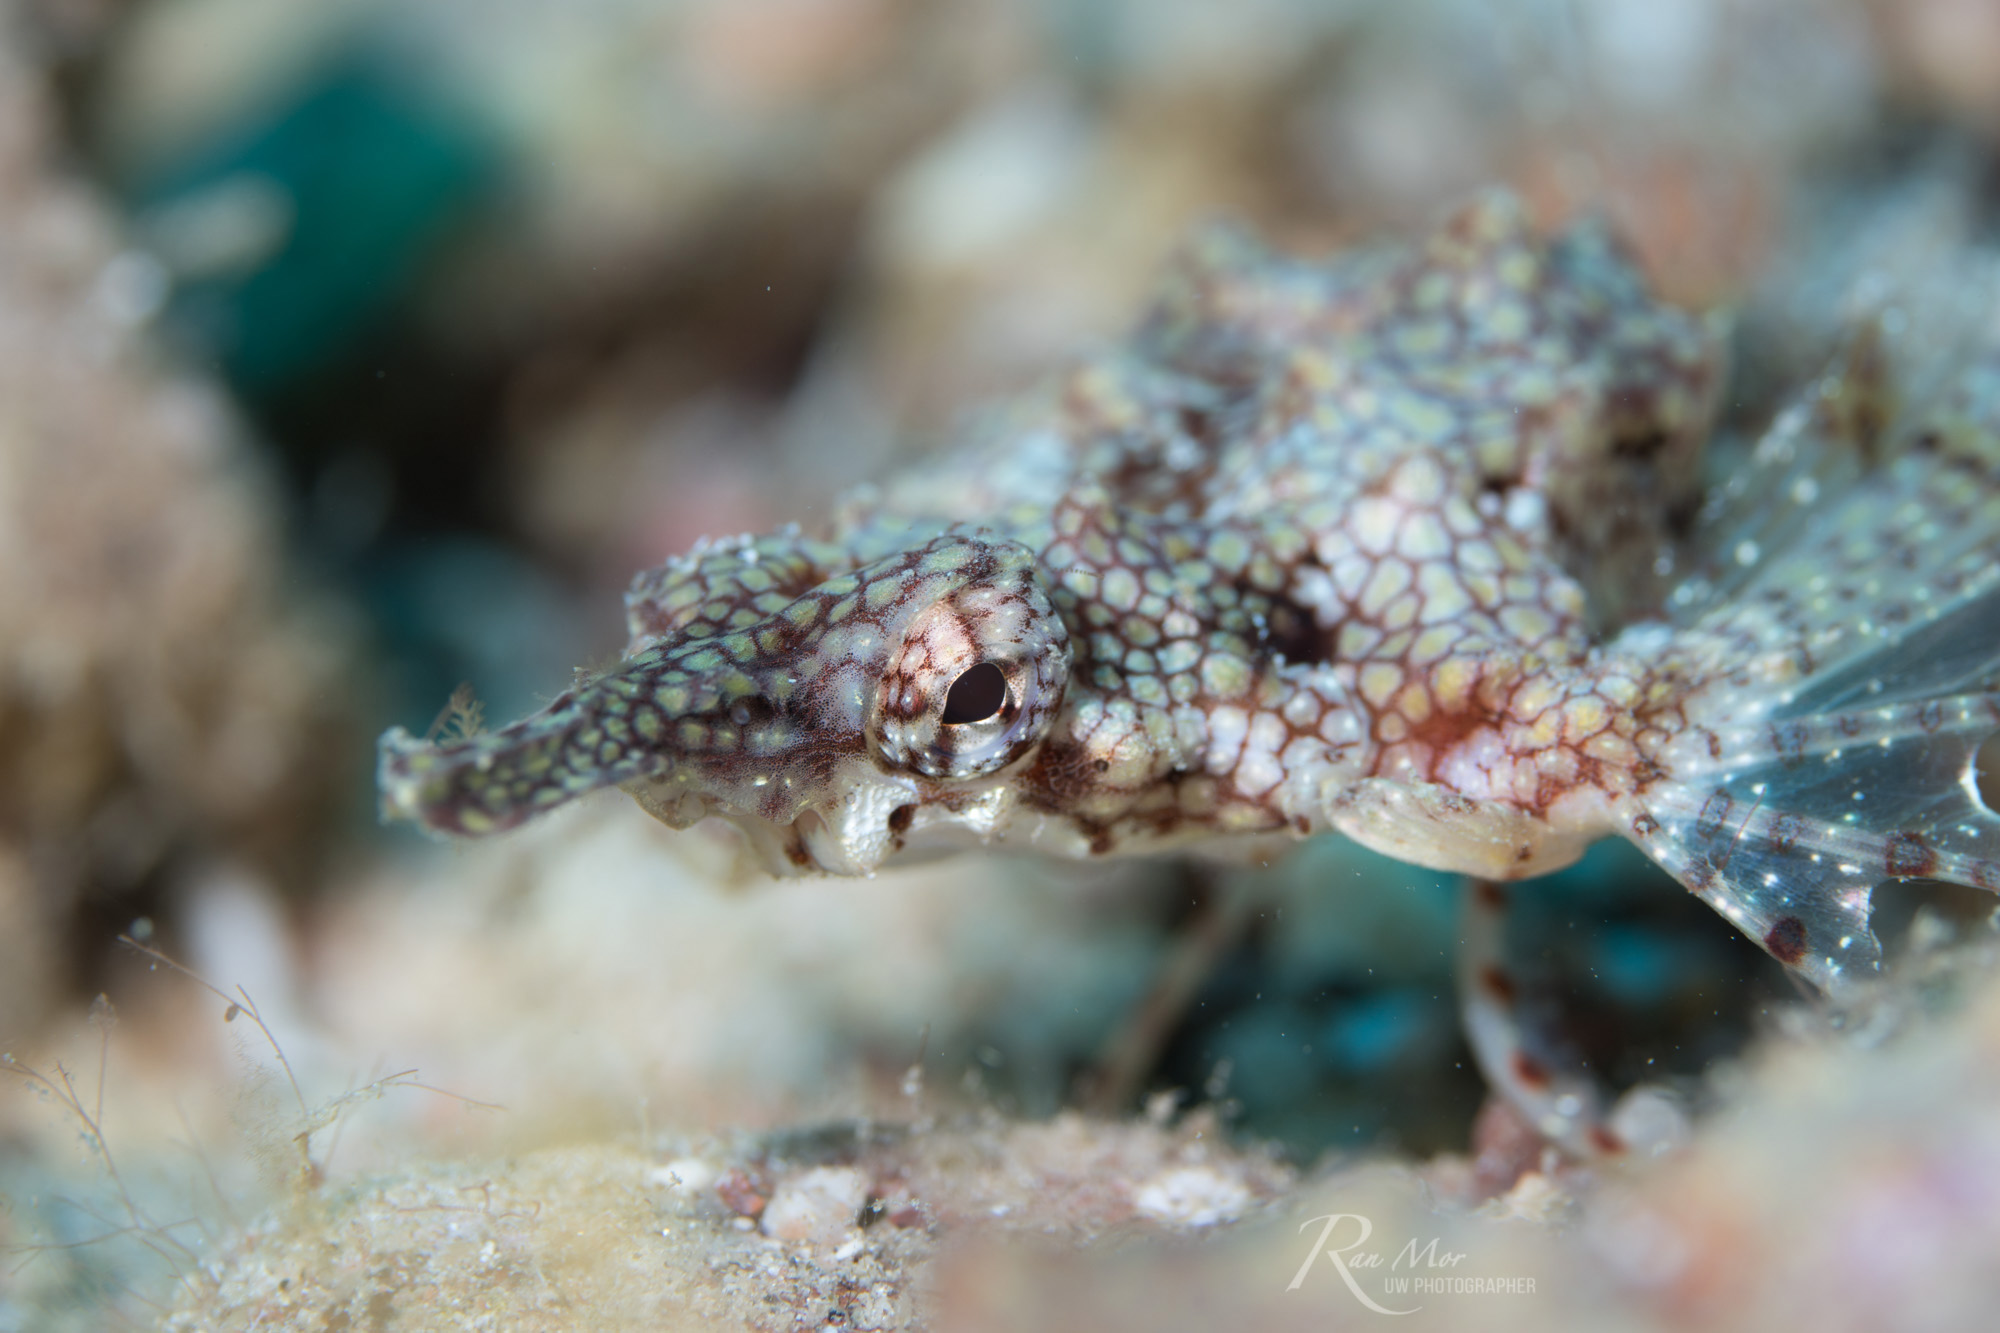
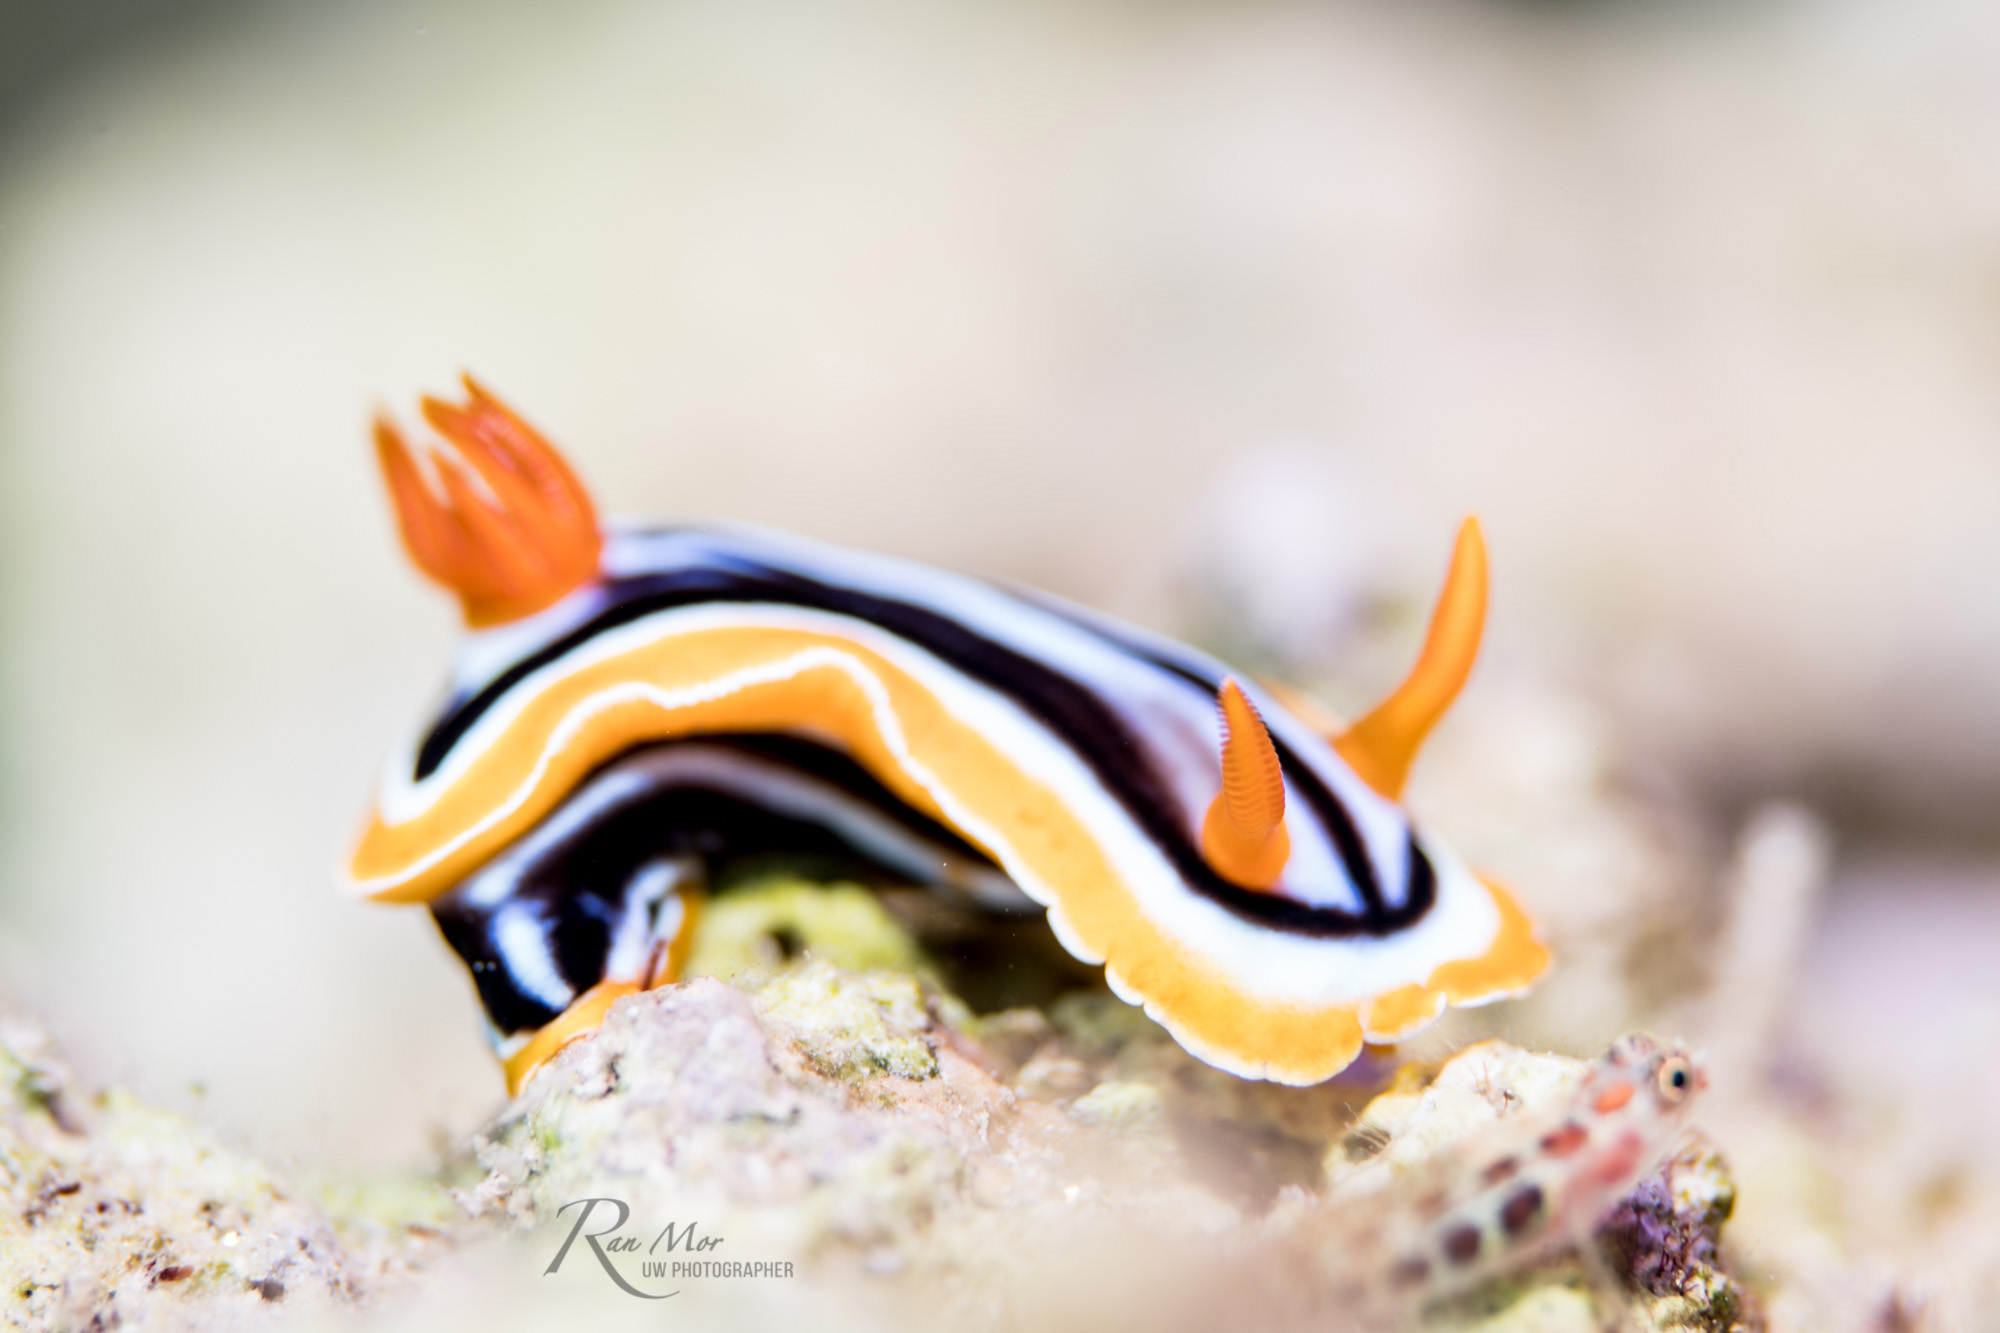
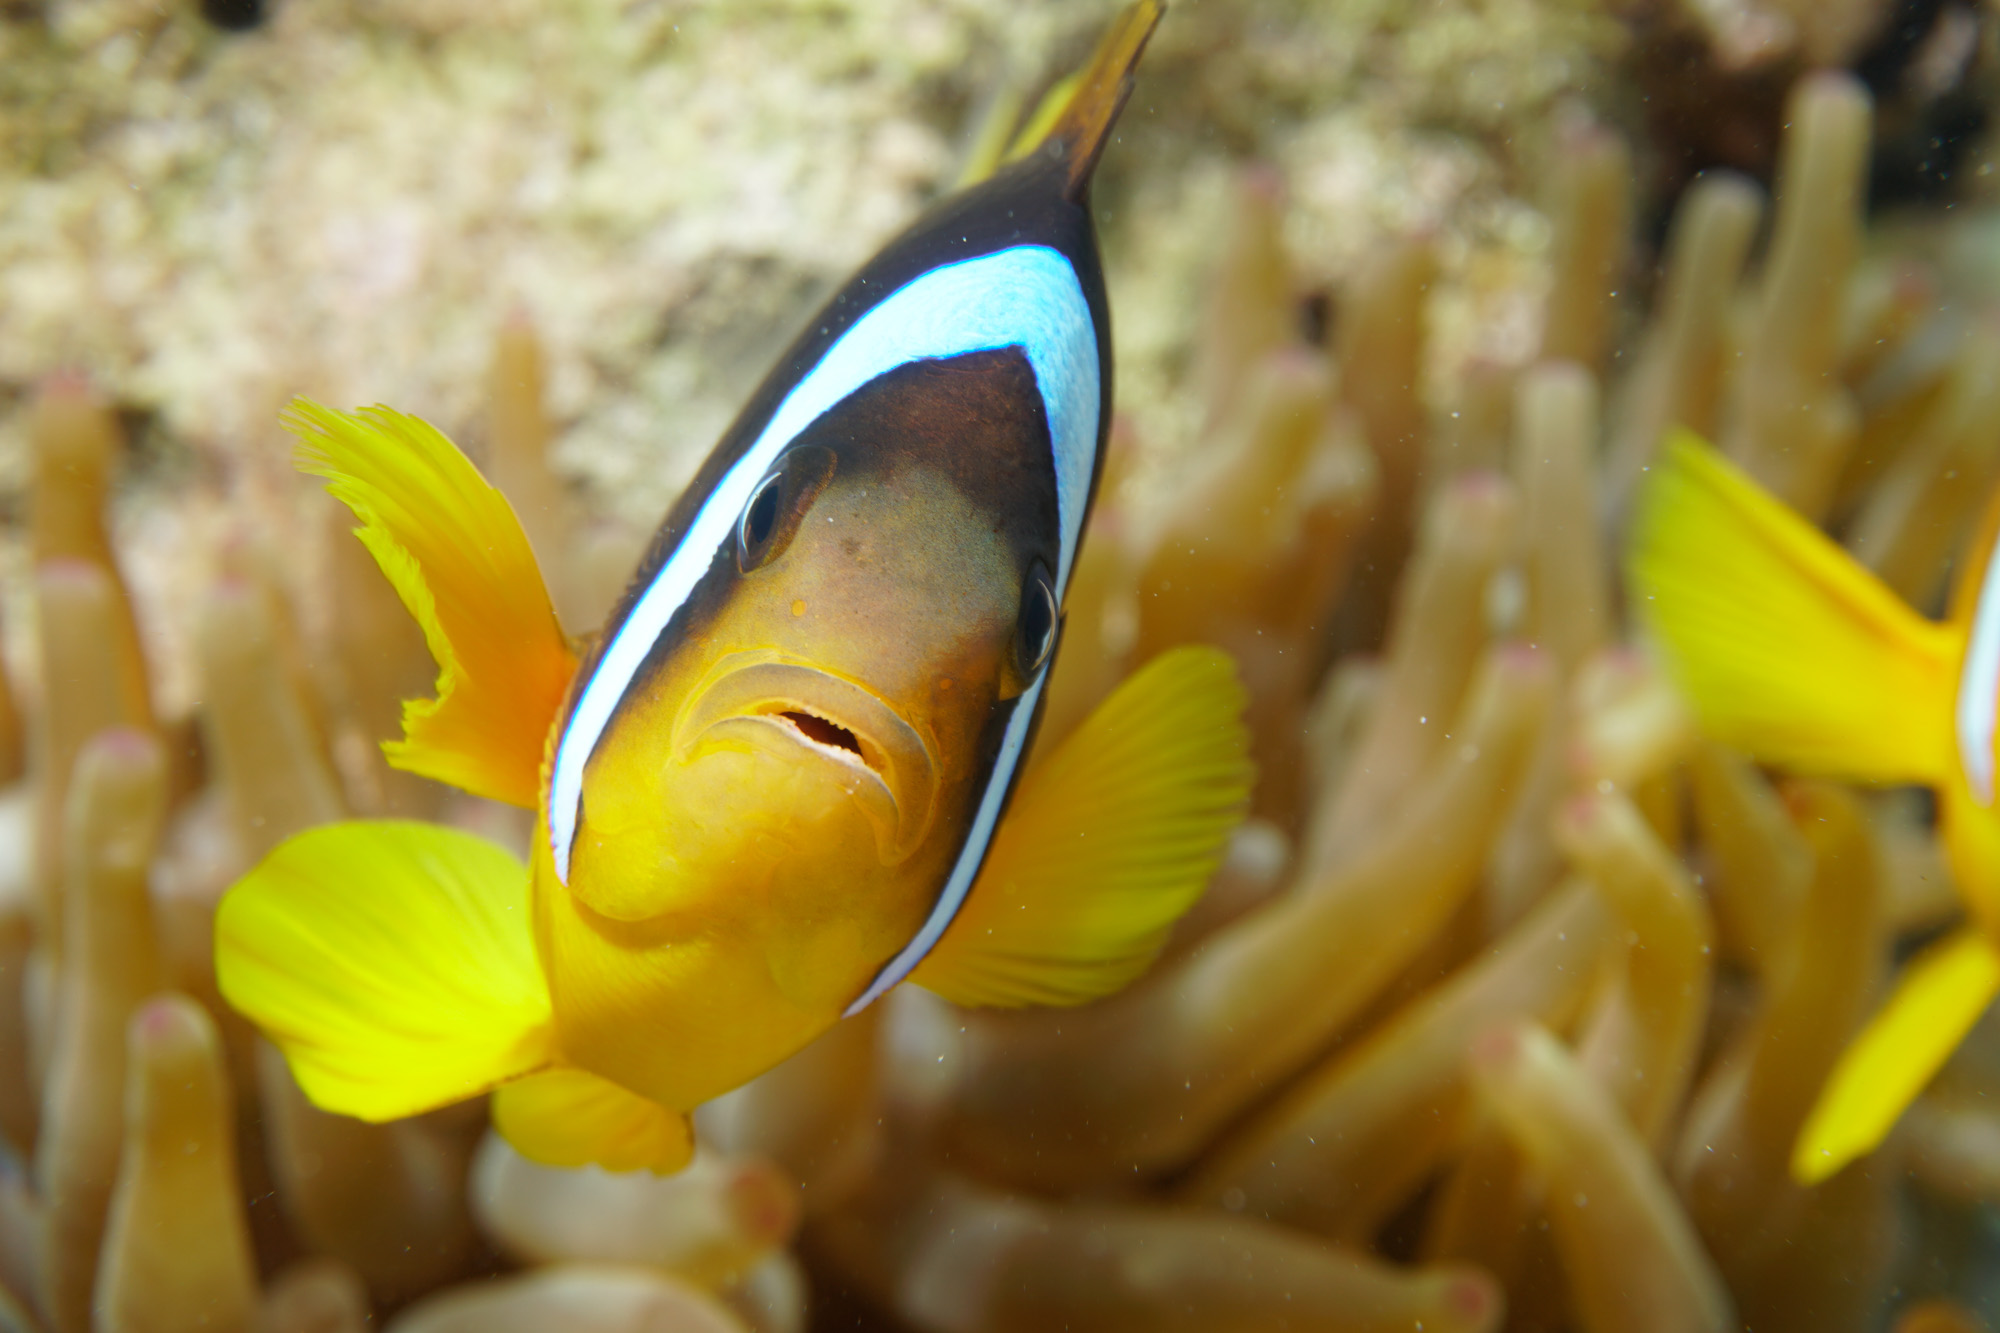
Macro Photography
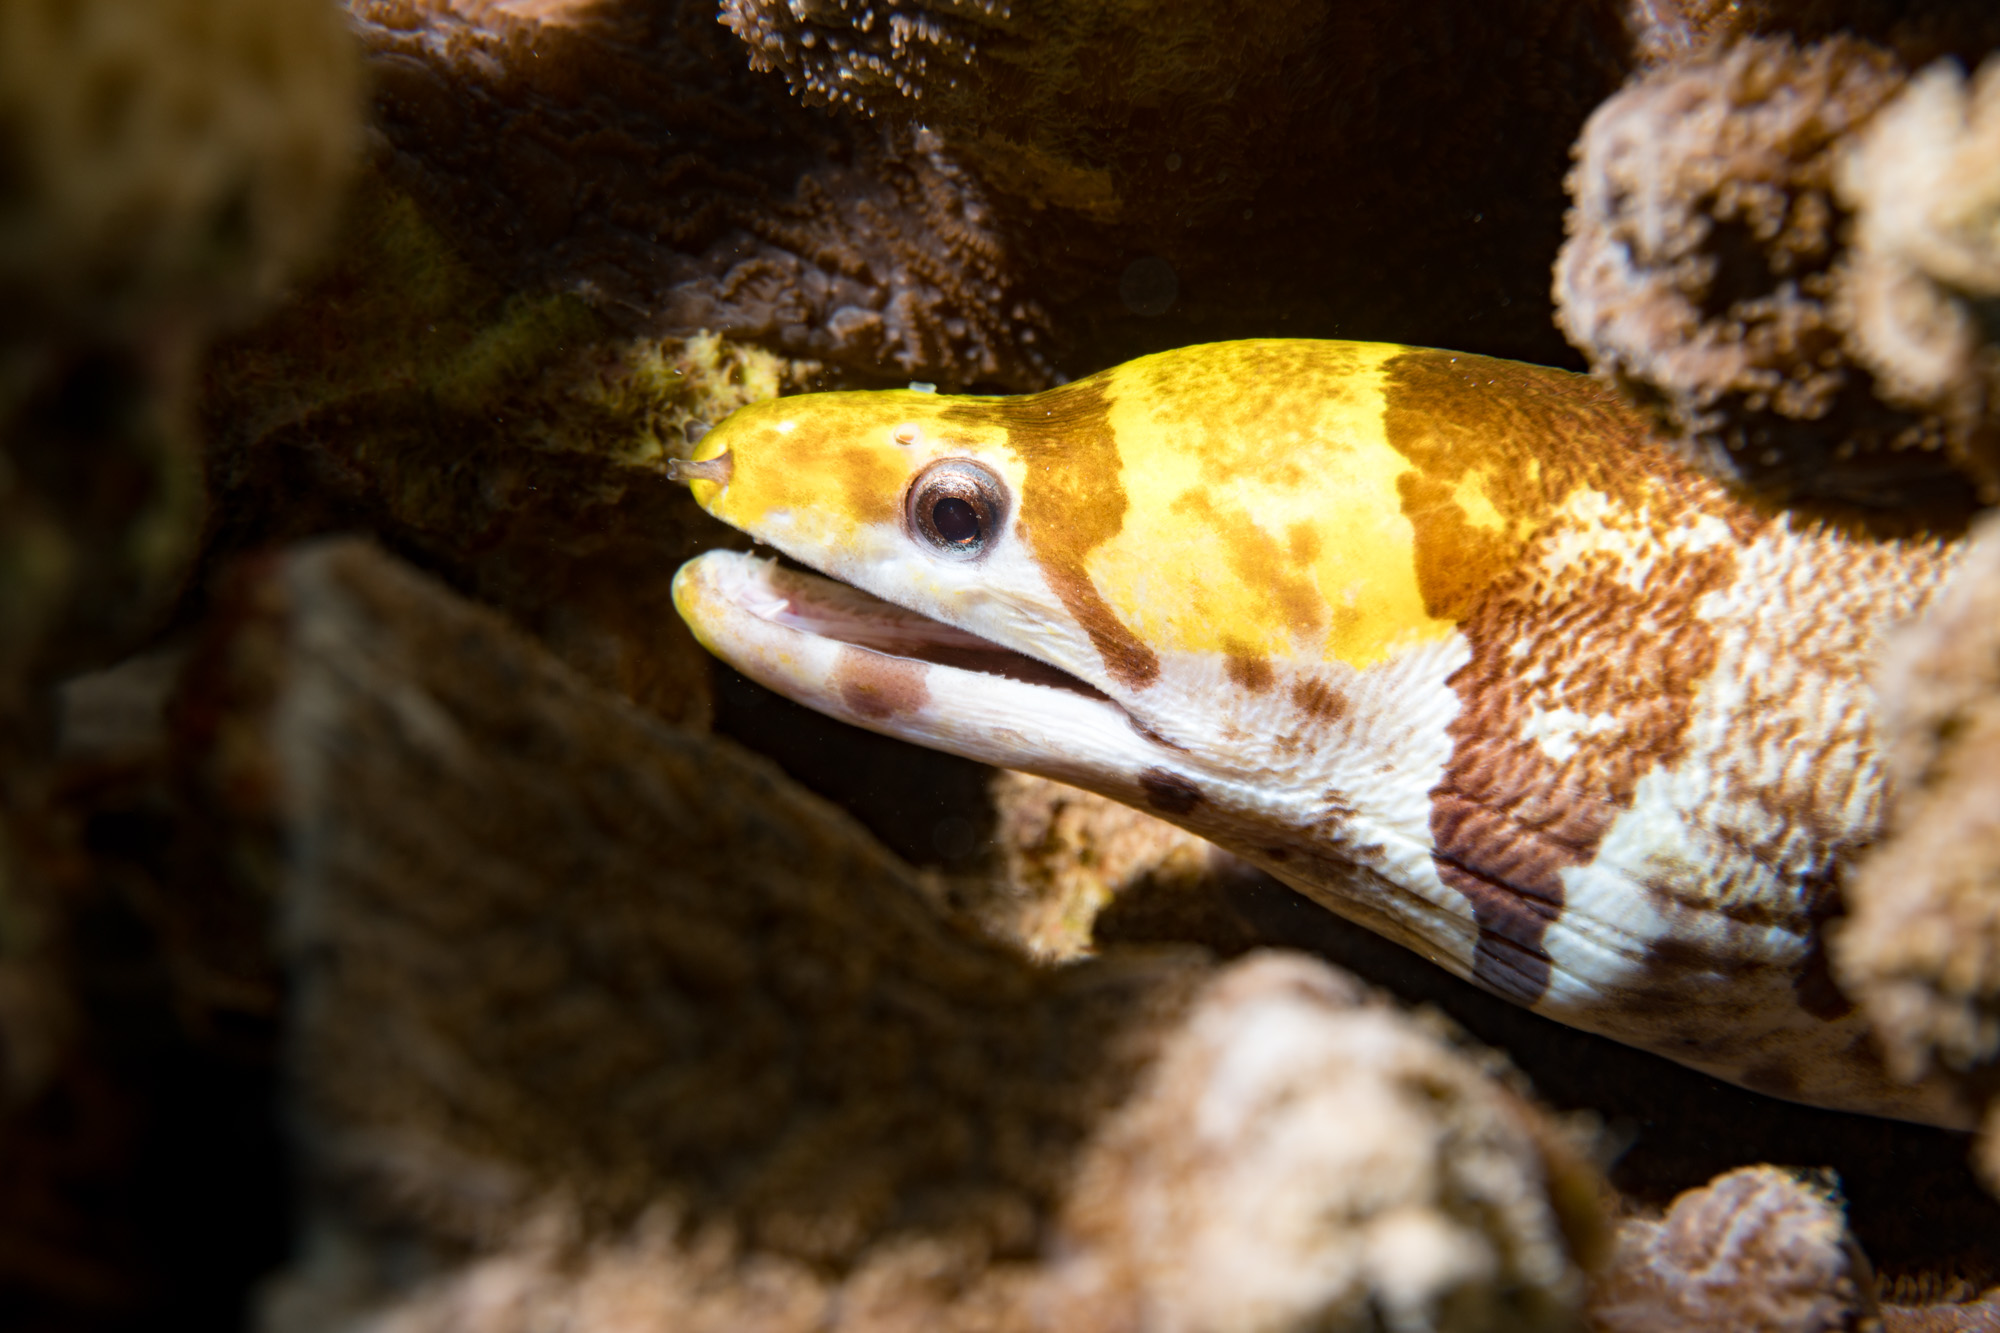
The great thing about the 16-50mm is its versatility. You can shoot wide angle and macro on the same dive, using various wet lenses!
In the following samples I used the 16-50mm, with the Fantasea UCL-09F, Inon UCL-165 and Nauticam CMC-1. The stronger the lens, the harder I found it to shoot, due to the very small working distance.
My preferred lens in this case was the weakest of the bunch, the UCL-165, so I would recommend going for something similar – a +6 diopter such as UCL-05LF or UCL-165.

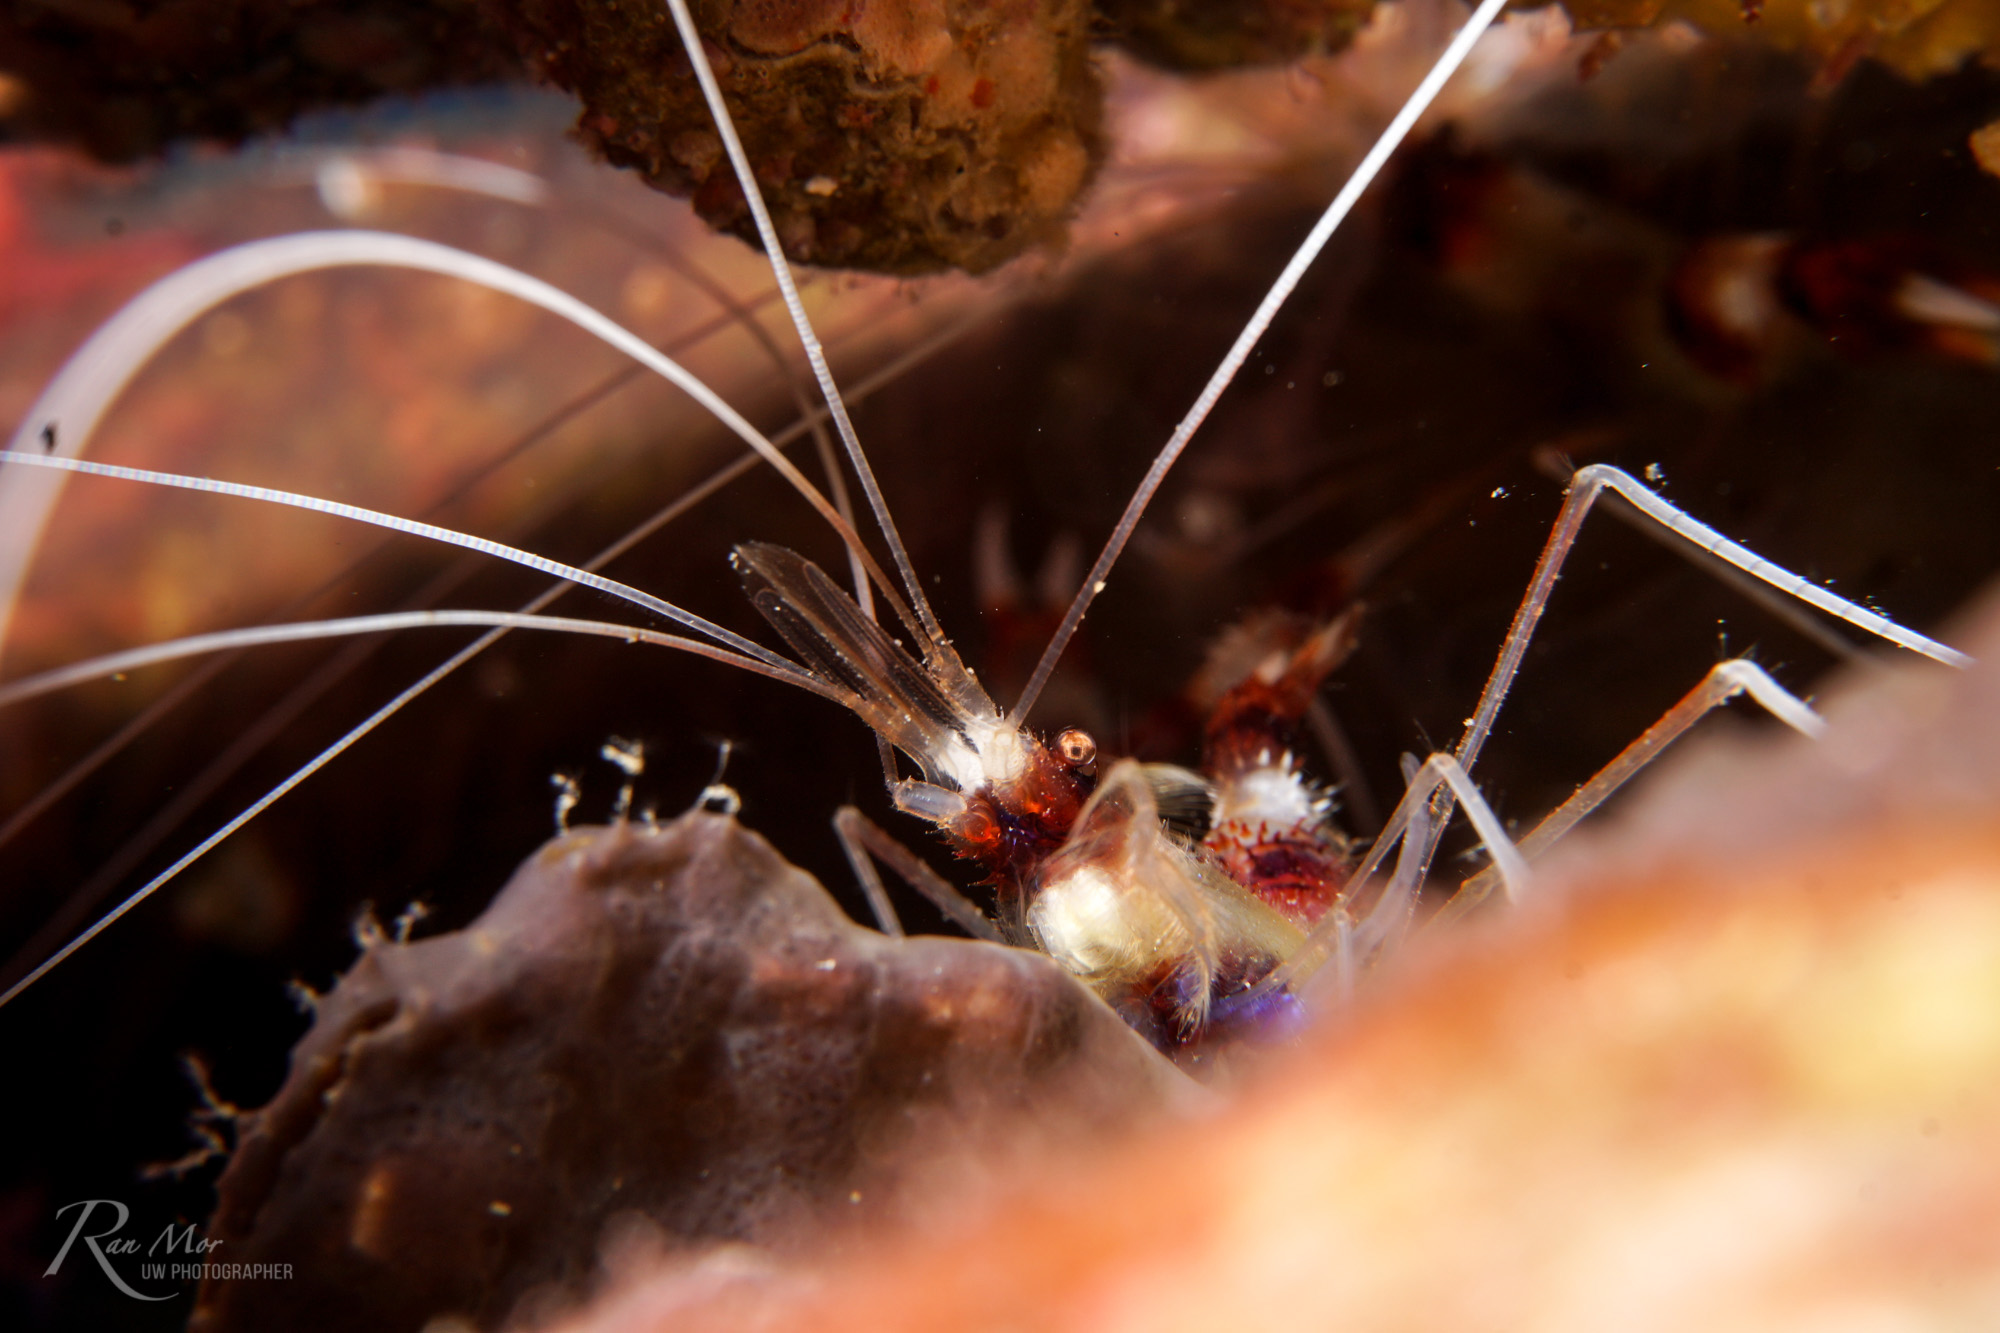


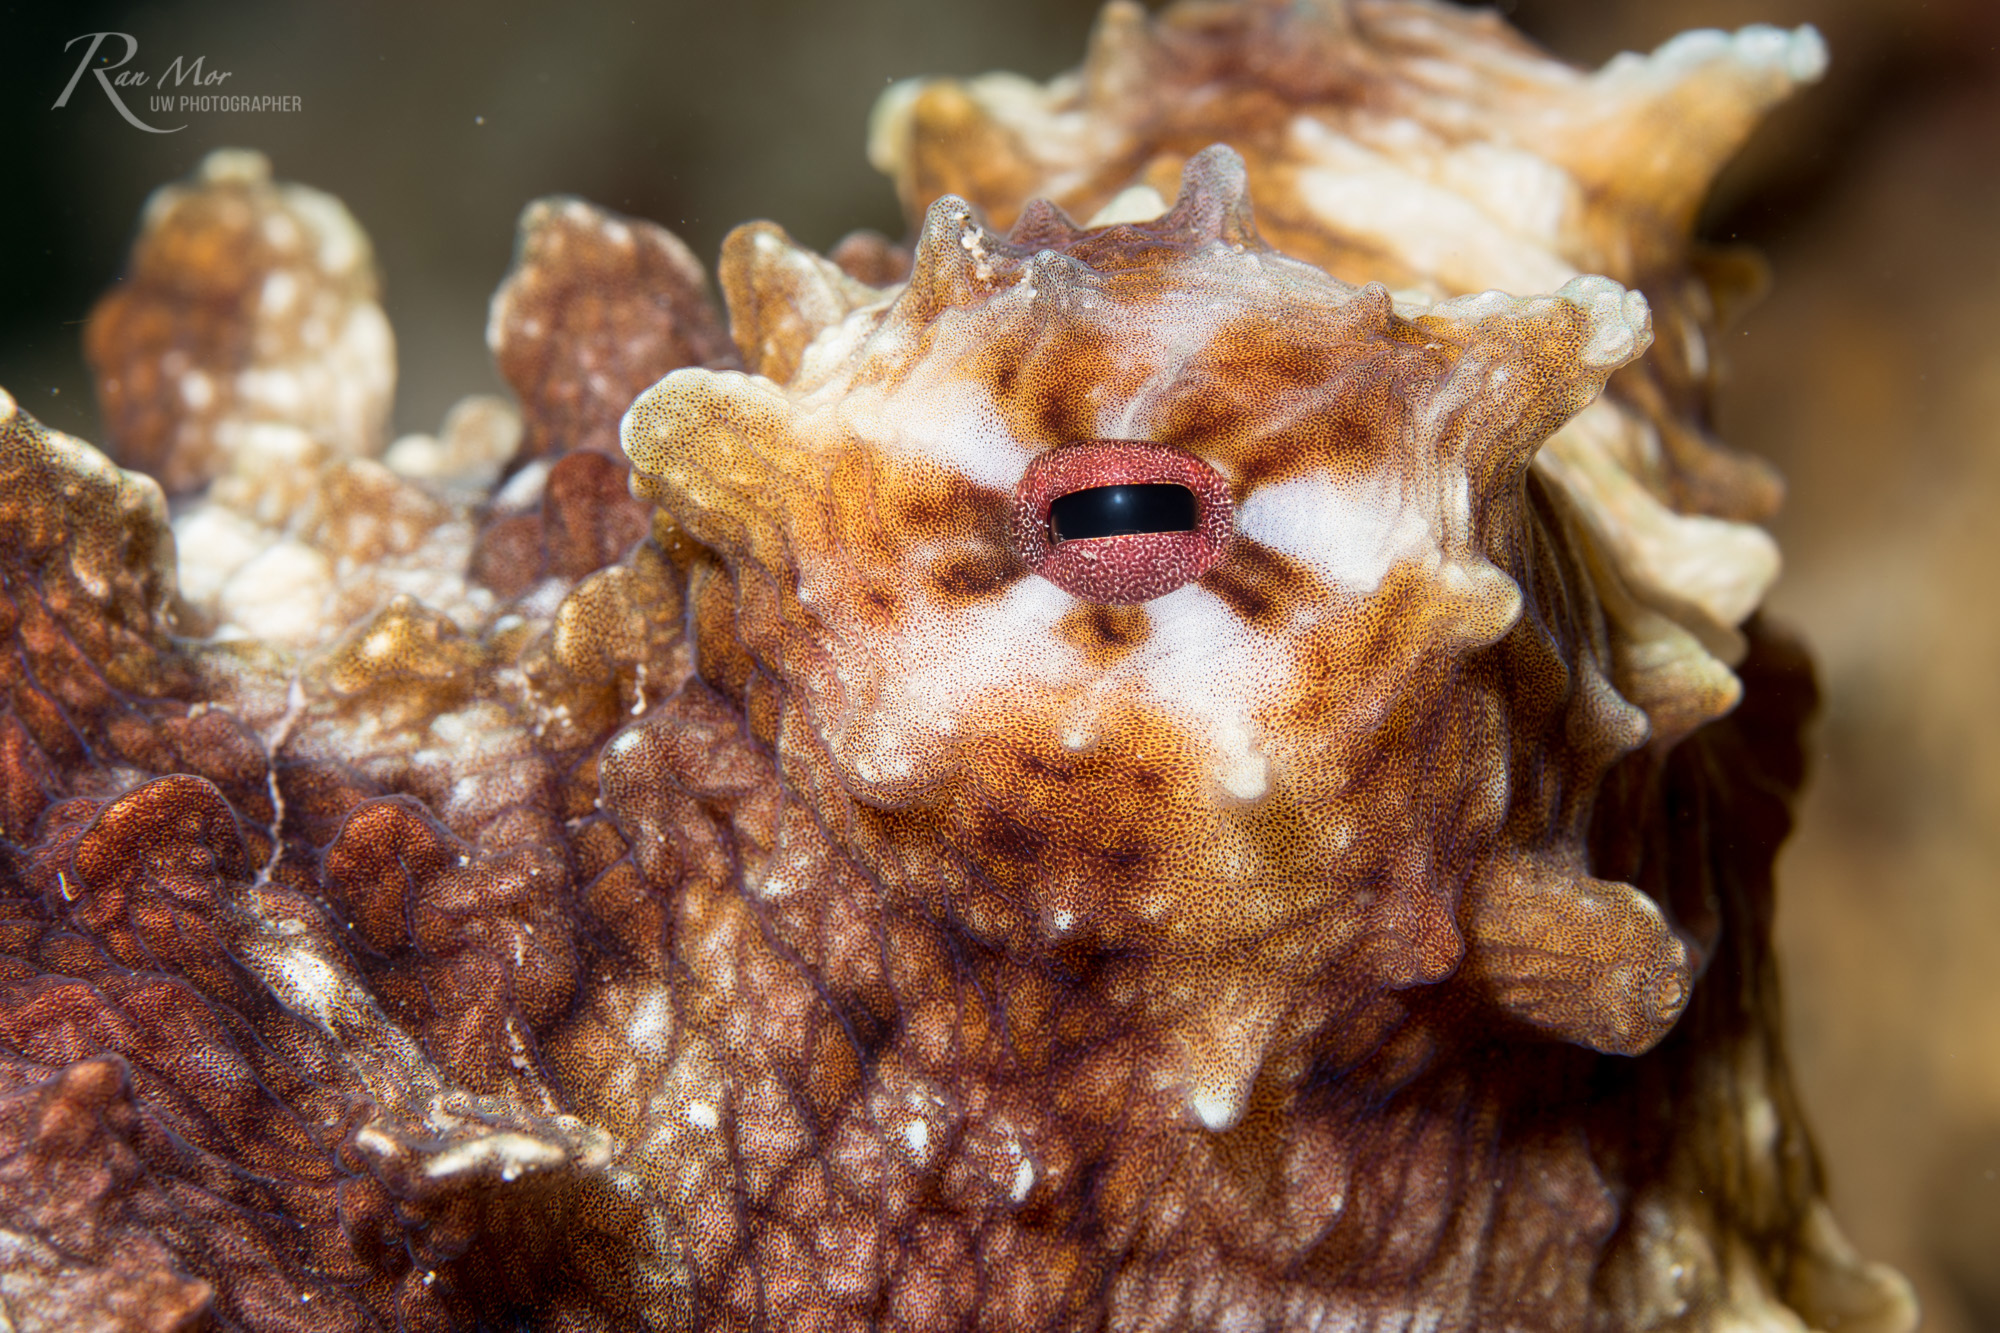
UPDATE: Shooting with the Sony 90mm f/2.8 Macro lens
I recently got a chance to try out the Sony A6500 with the Sony 90mm macro lens! Fantasea’s FA6500 supports the 90mm by using the Fantasea to Sea & Sea converter (2131 FML-FNX Converter 55G). In addition to the converter, you will need the SS-30123 Extension Ring 20L and the SS-30111 DX Macro Port 52. Yes, the 90mm is quite big so all of that is needed to support it.
A manual focus gear can also be added and controlled by a knob on the Fantasea converter part.
Installation is a bit tricky, as it requires inserting the camera from the back and the lens from the front, after the converter is in place. Don’t worry, the instructions will explain everything and once you get the hang of it, it’s quite easy.
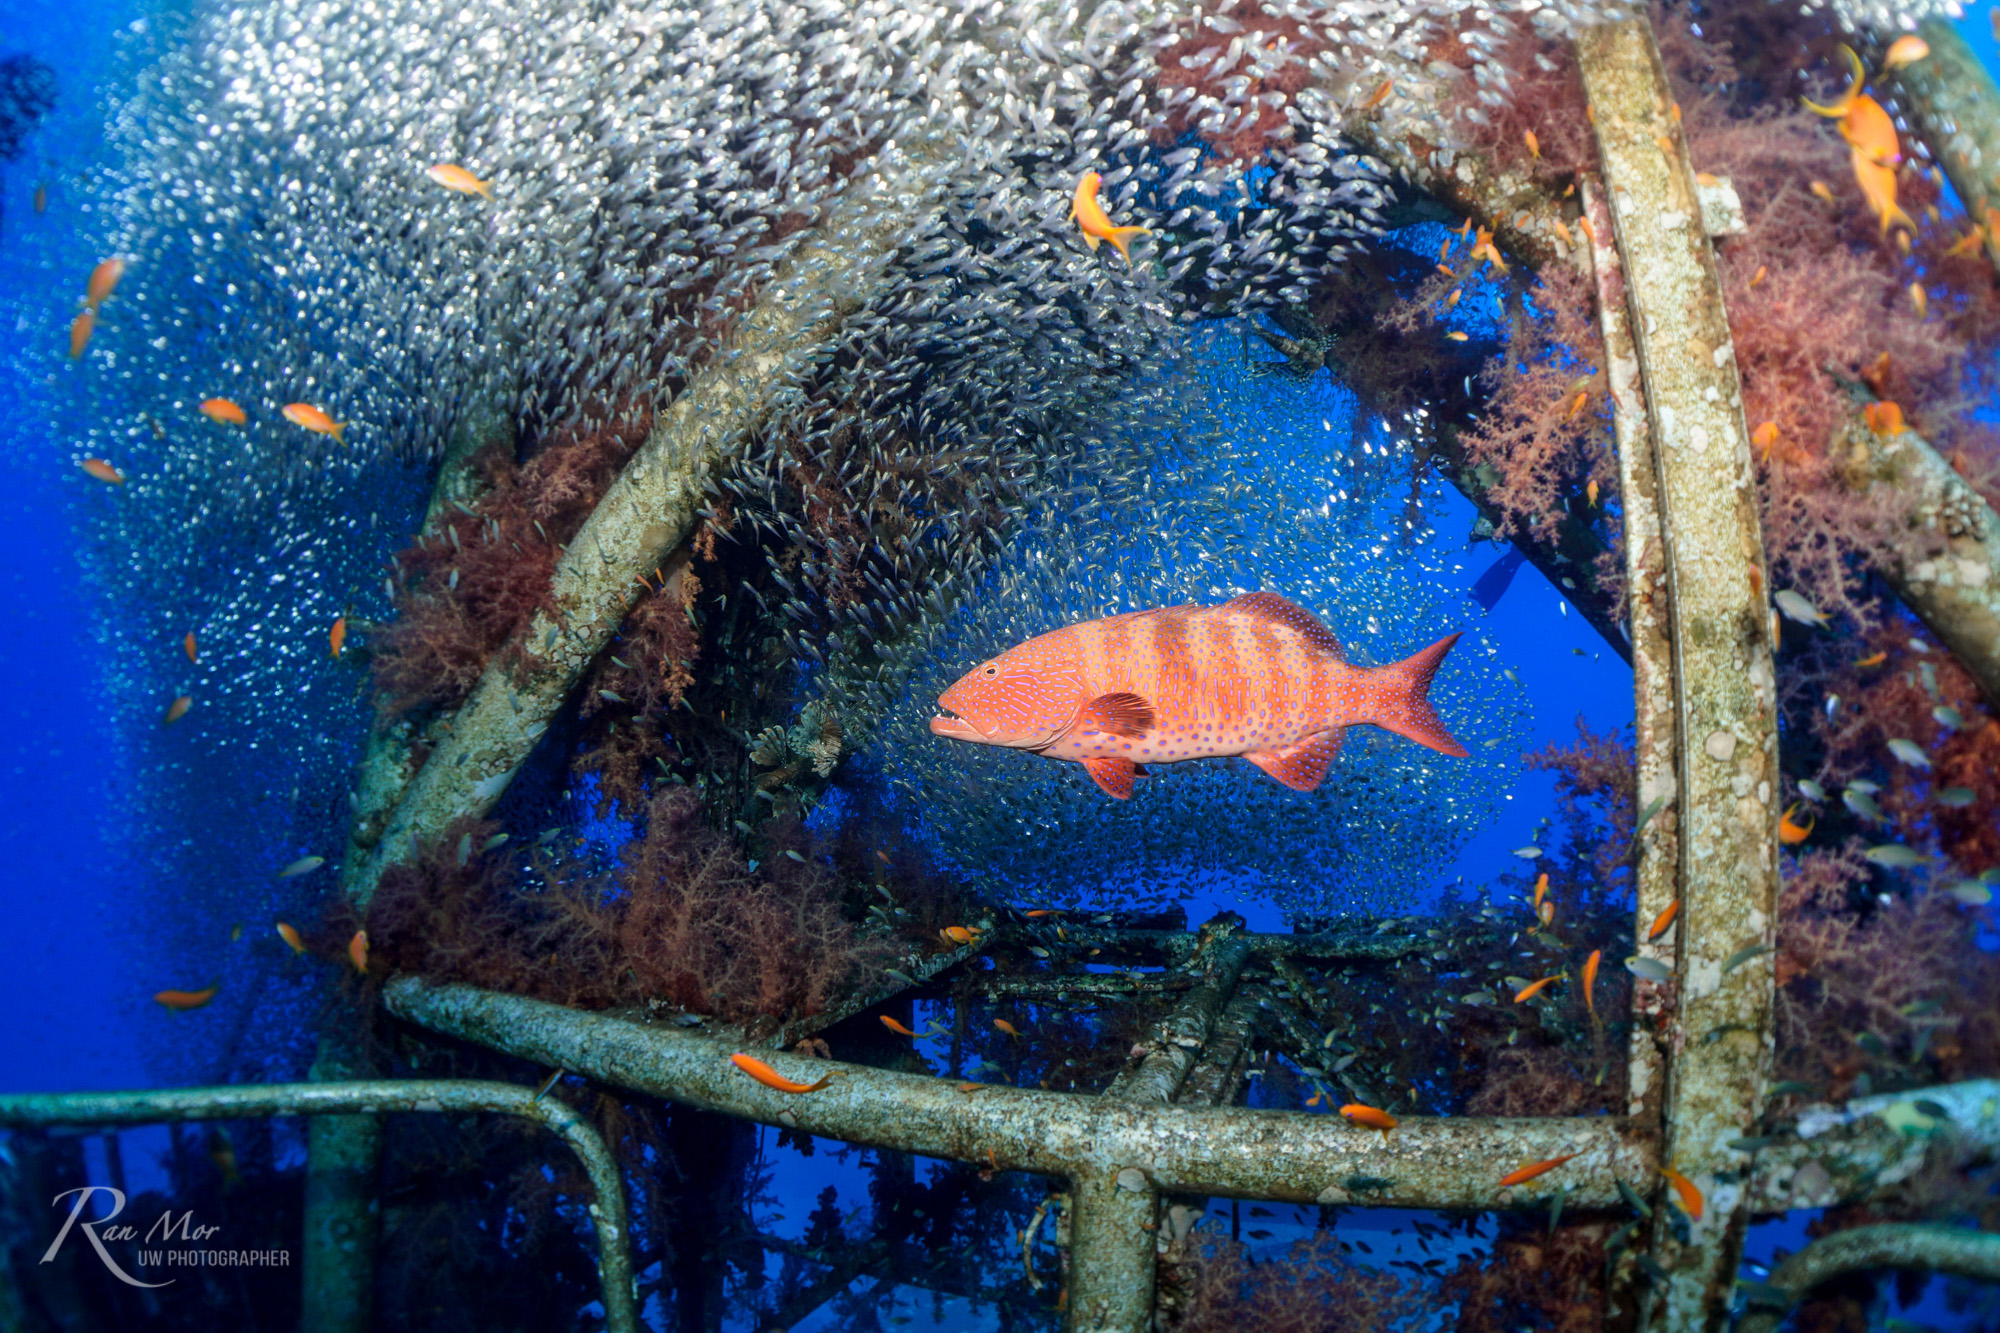
Results are fantastic! The 90mm focuses very well, and provides a wide range of available shots, from super macro to fish portraits. I took it on a couple of dives and the results are below:


Shooting Experience
The Sony 6500 is very easy to control. I usually shoot fully Manual when using strobes, and Aperture priority when shooting ambient light. In both modes I found it to be very intuitive, with all relevant controls within reach.
Sony added two custom buttons from the A6300 – C1 and C2, which can be set to control whatever you feel like you need within 1 button click. The AF/MF button can be configured to lock your AF, and since it’s within easy reach of your thumb, that’s an excellent solution for using back focus!
The menu was improved from the A6300, adding clear titles and colors to help you navigate, so reaching any setting is quick and easy. If you want a complete walkthrough of the menu, check out this YouTube video.
Focusing was lighting fast, as expected from a camera at this caliber. Even without a focus light, in lower lighting conditions, it never skipped a beat, always spot on and precise.
As I mentioned before, recycle time was a bit long on the flash when triggering strobes via fiber optics. I would love to see a firmware upgrade that offers manual flash – 1/64 flash power would speed up the rapid firing significantly. Ahem Ahem Sony!
The Sony A6500 includes Underwater White Balance mode, which works great, especially for 33ft or less. Deeper than that, I would recommend lights as I would with any camera. You can see the performance of the UW WB in the video sample below.
Read more about recommended settings here.
Another interesting thing I found is how excellent the JPG color balance comes out! So good, that when I shot JPG + RAW, I found it hard to reach the same result with RAW editing as the final JPG image!
This is especially apparent on scenes with lots of red colors and a blue background. These samples were shot using the UW WB mode:
Video Performance
The Sony A6500 can shoot 4K at 24/25/30p, or full HD 1080p up to 120fps with stunning clarity and detail.
The 5-axis image stabilization is super helpful and AF works great, even though focusing can be heard underwater, so you might want to add a soundtrack 😉
What am I babbling about? A picture is worth a thousand words and a video is worth a thousand pictures.
Take a look yourself:
Bottom Line
The Sony A6500 is one of the best mirrorless cameras in the market at this point. You will love it. If you’re looking for a single camera for both topside and underwater, look no further. Paired with the 16-50 lens, you’ve got yourself a very versatile imaging machine for both video and stills. Additional lenses such as the 90mm and 50mm macro, or the 16mm with the wide angle converters can improve your optics and increase your capabilities.
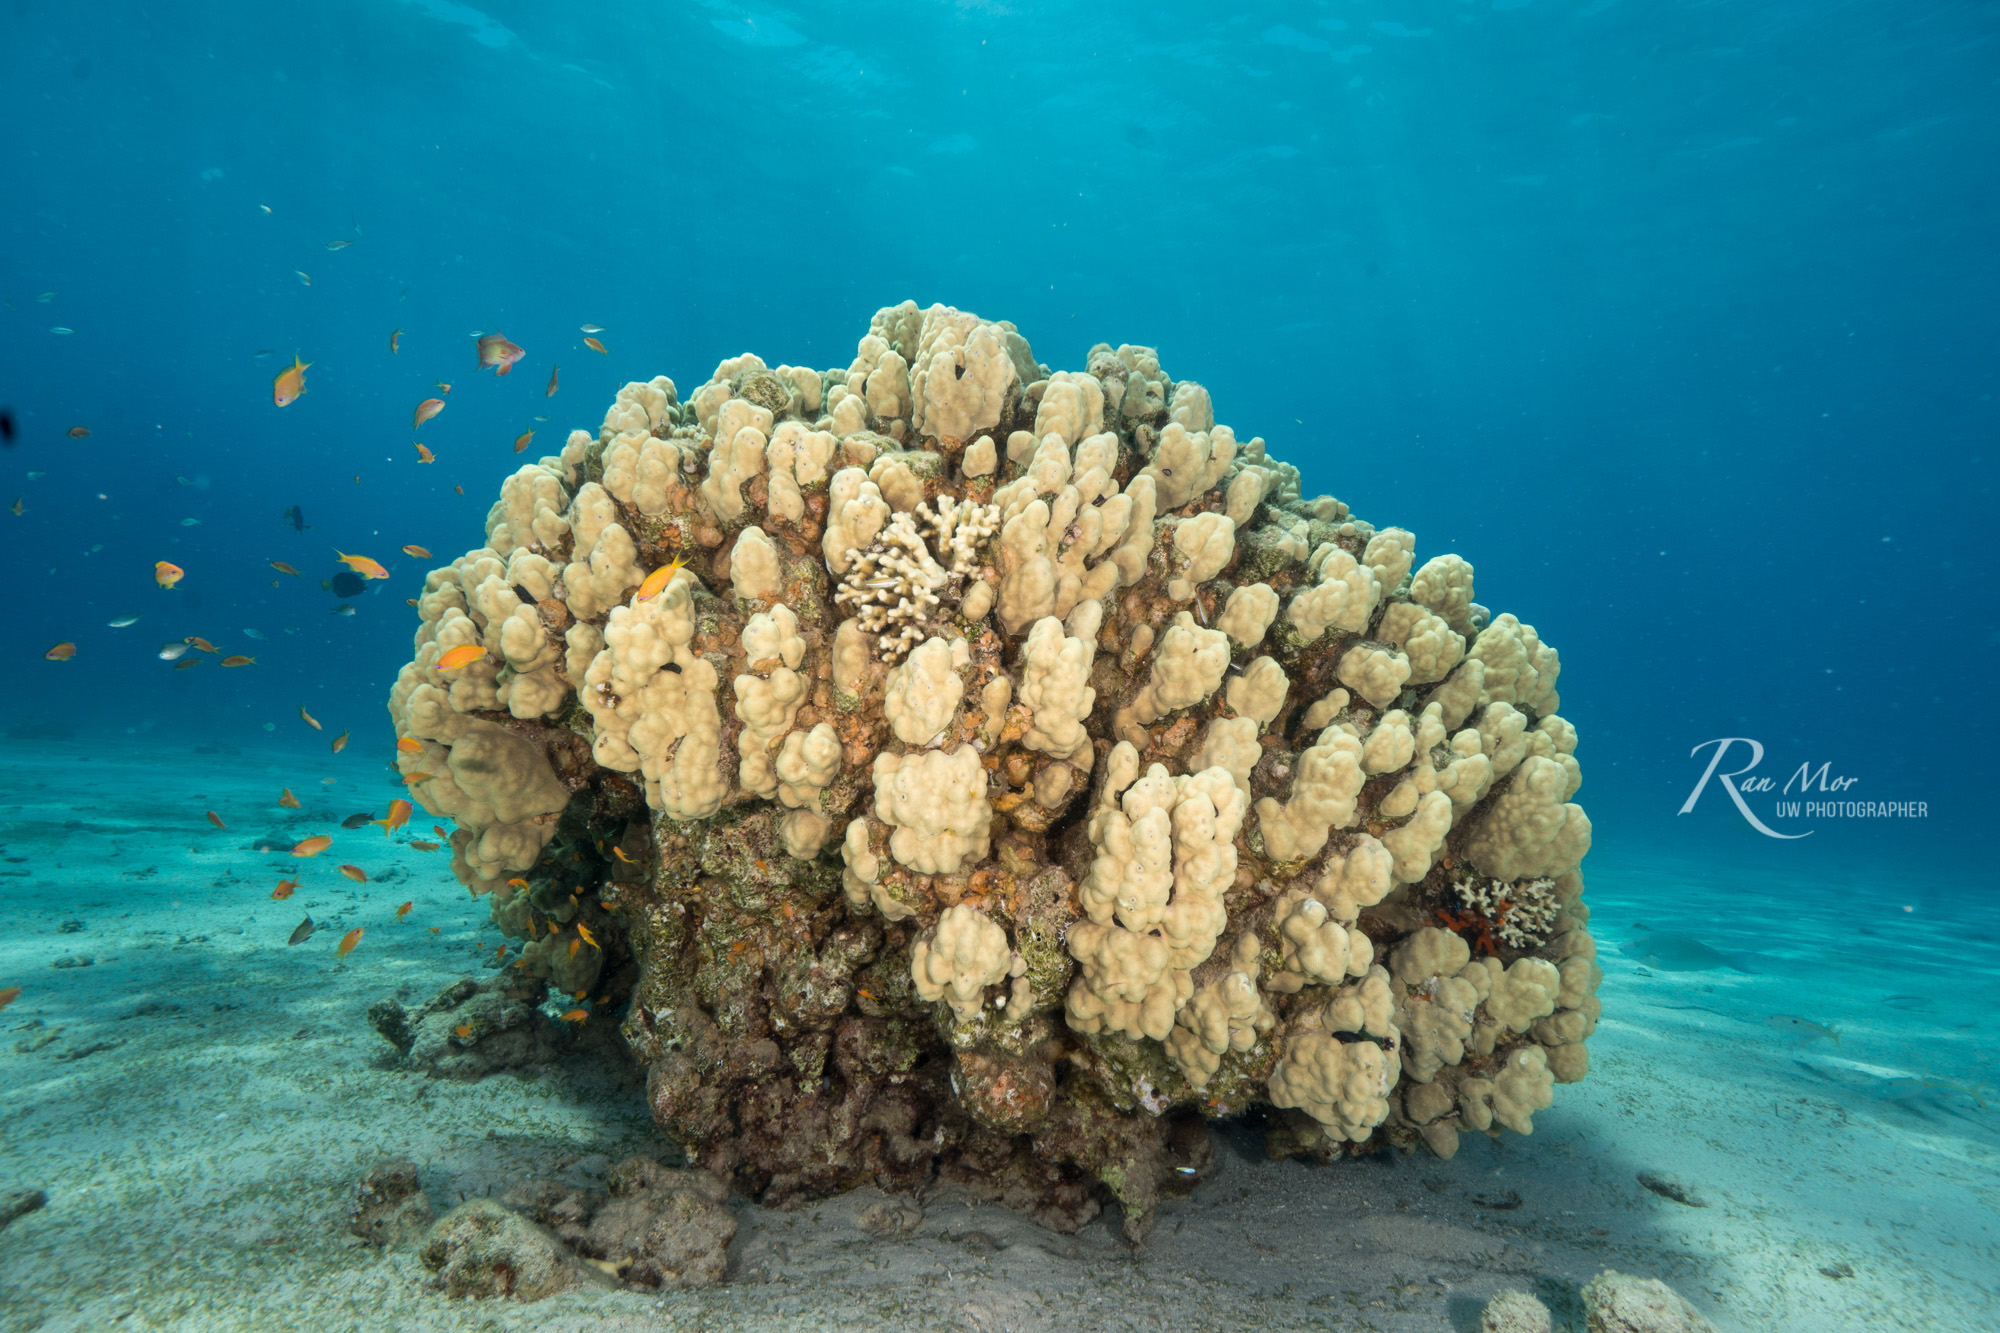
If you don’t want to mess around with different lenses and ports, using the 16-50mm with wet lenses works great, both for macro and wide, allowing you to shoot anything from a Nudibranch to a Whale Shark on the same dive.
The Fantasea housing is affordable, reliable, very well designed and great for travel, making it the perfect companion for your A6500. Fantasea put a lot of thought and work into their first mirrorless housing and it paid off!
Get your Fantasea FA6500 Underwater housing for Sony A6500 here
If the a6500 is over your budget, consider the a6000 in a Fantasea housing
If you have any questions regarding the housing which wasn’t answered here, or you want me to send over some more samples, shoot me an email at ran@housingcamera.com. I’m always happy to help!
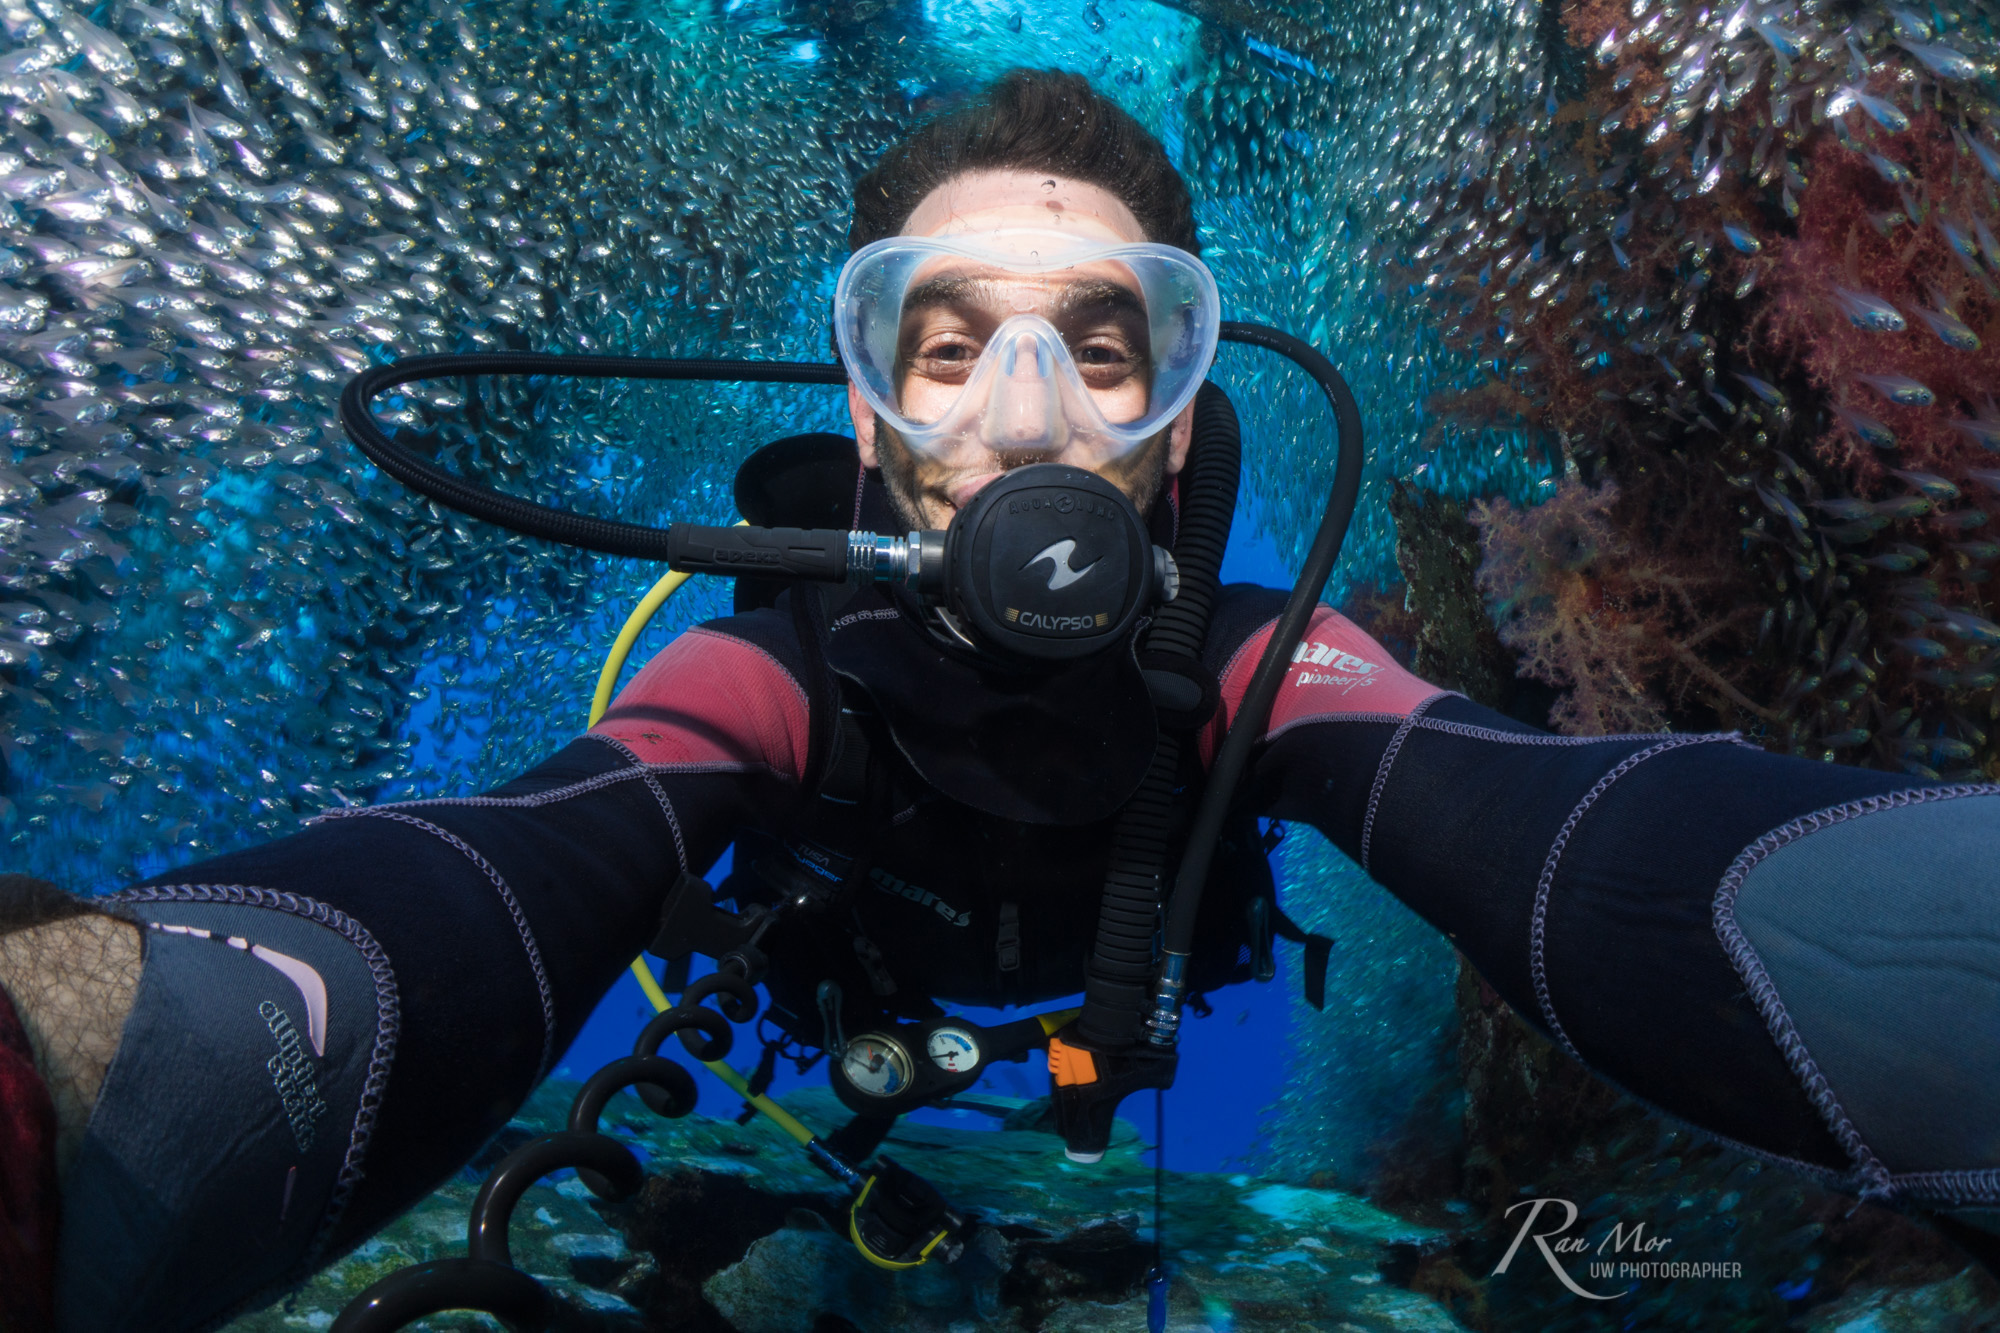
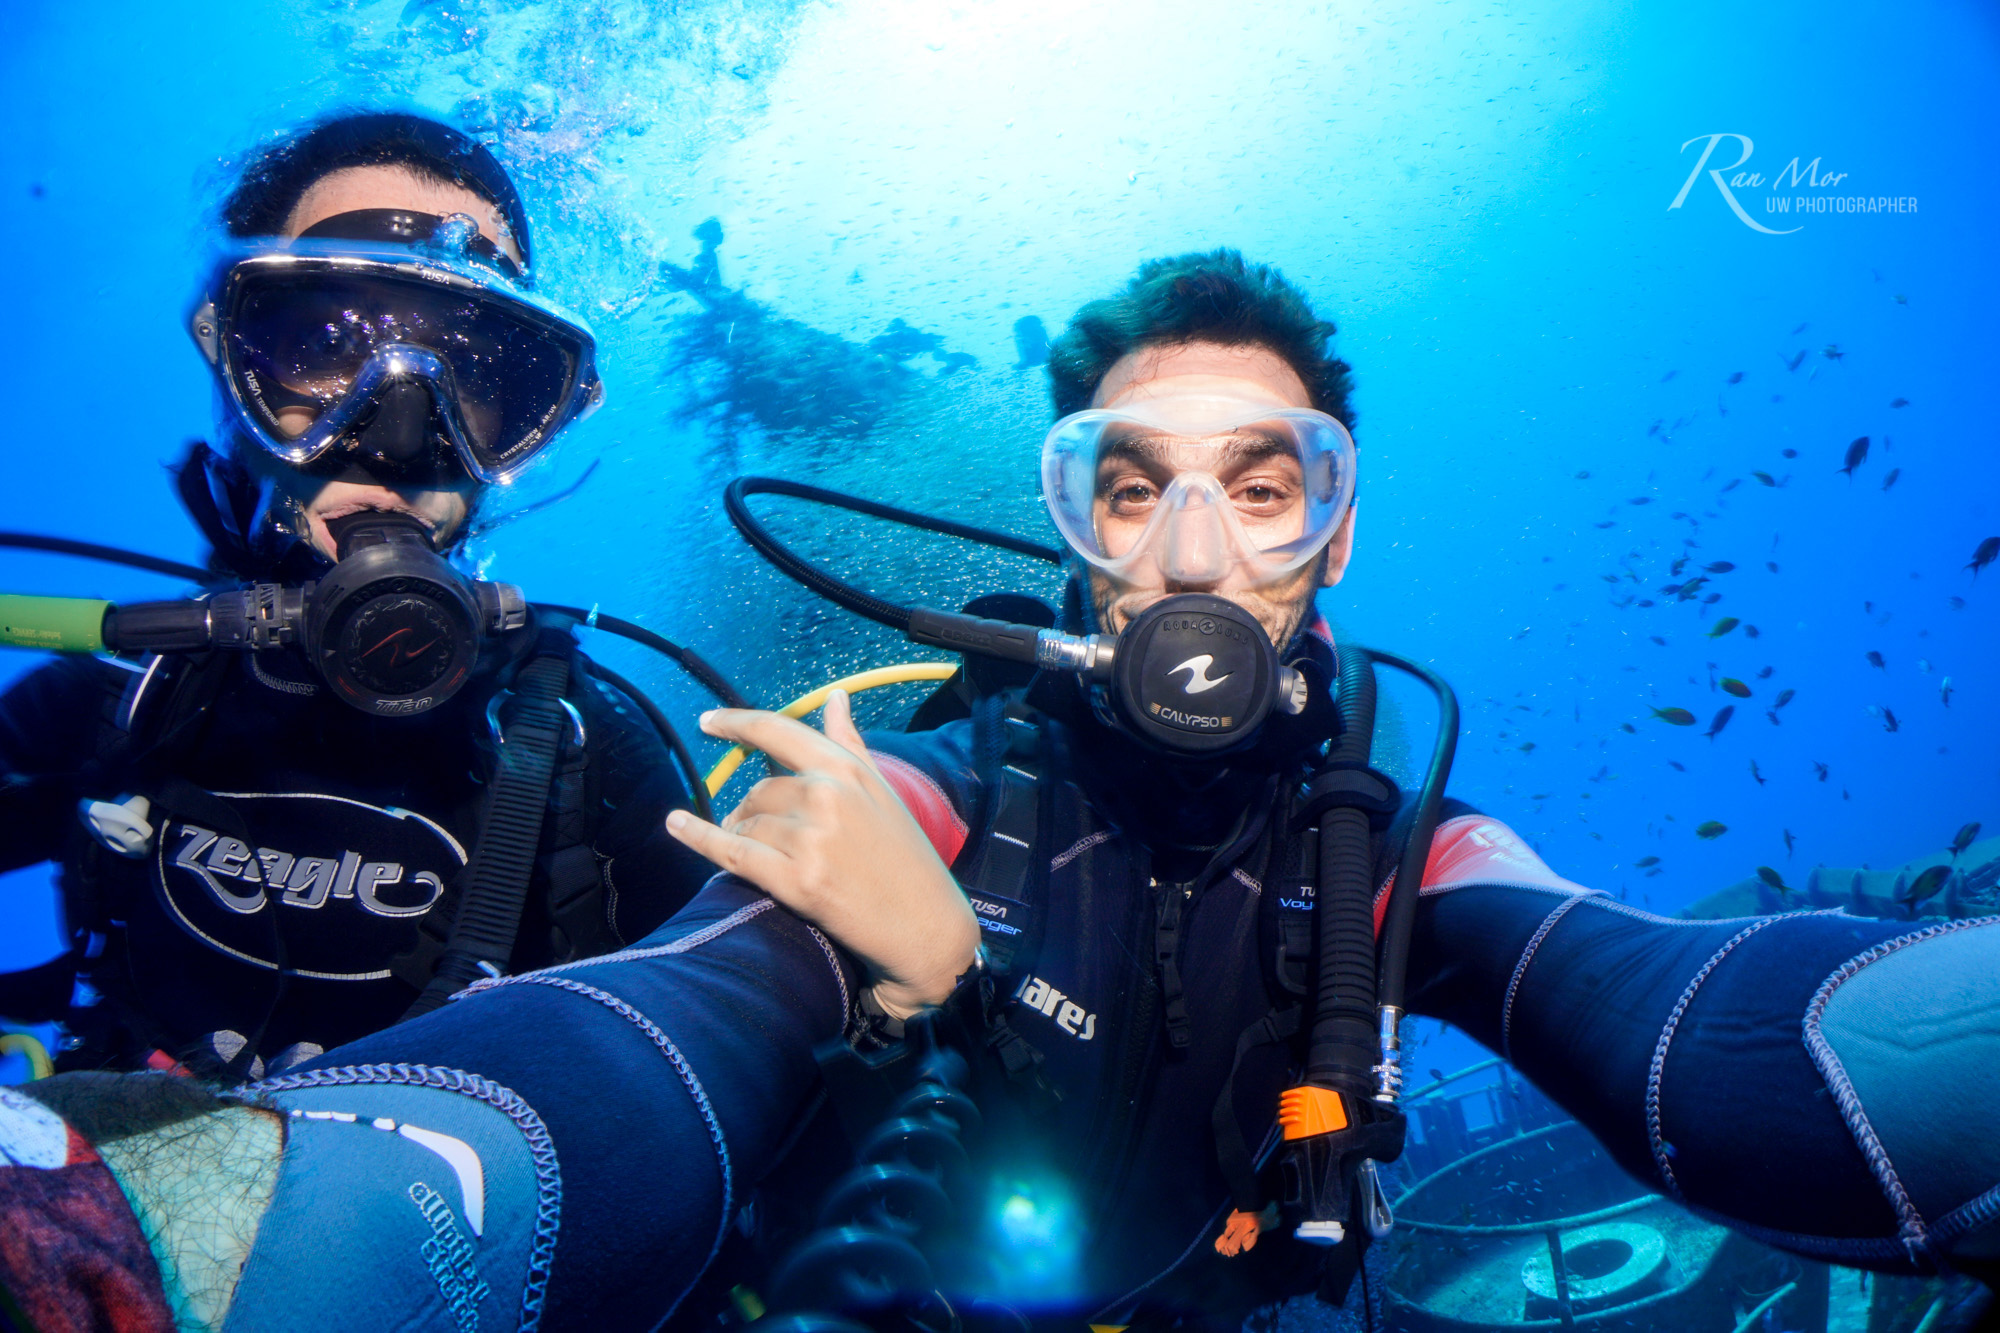
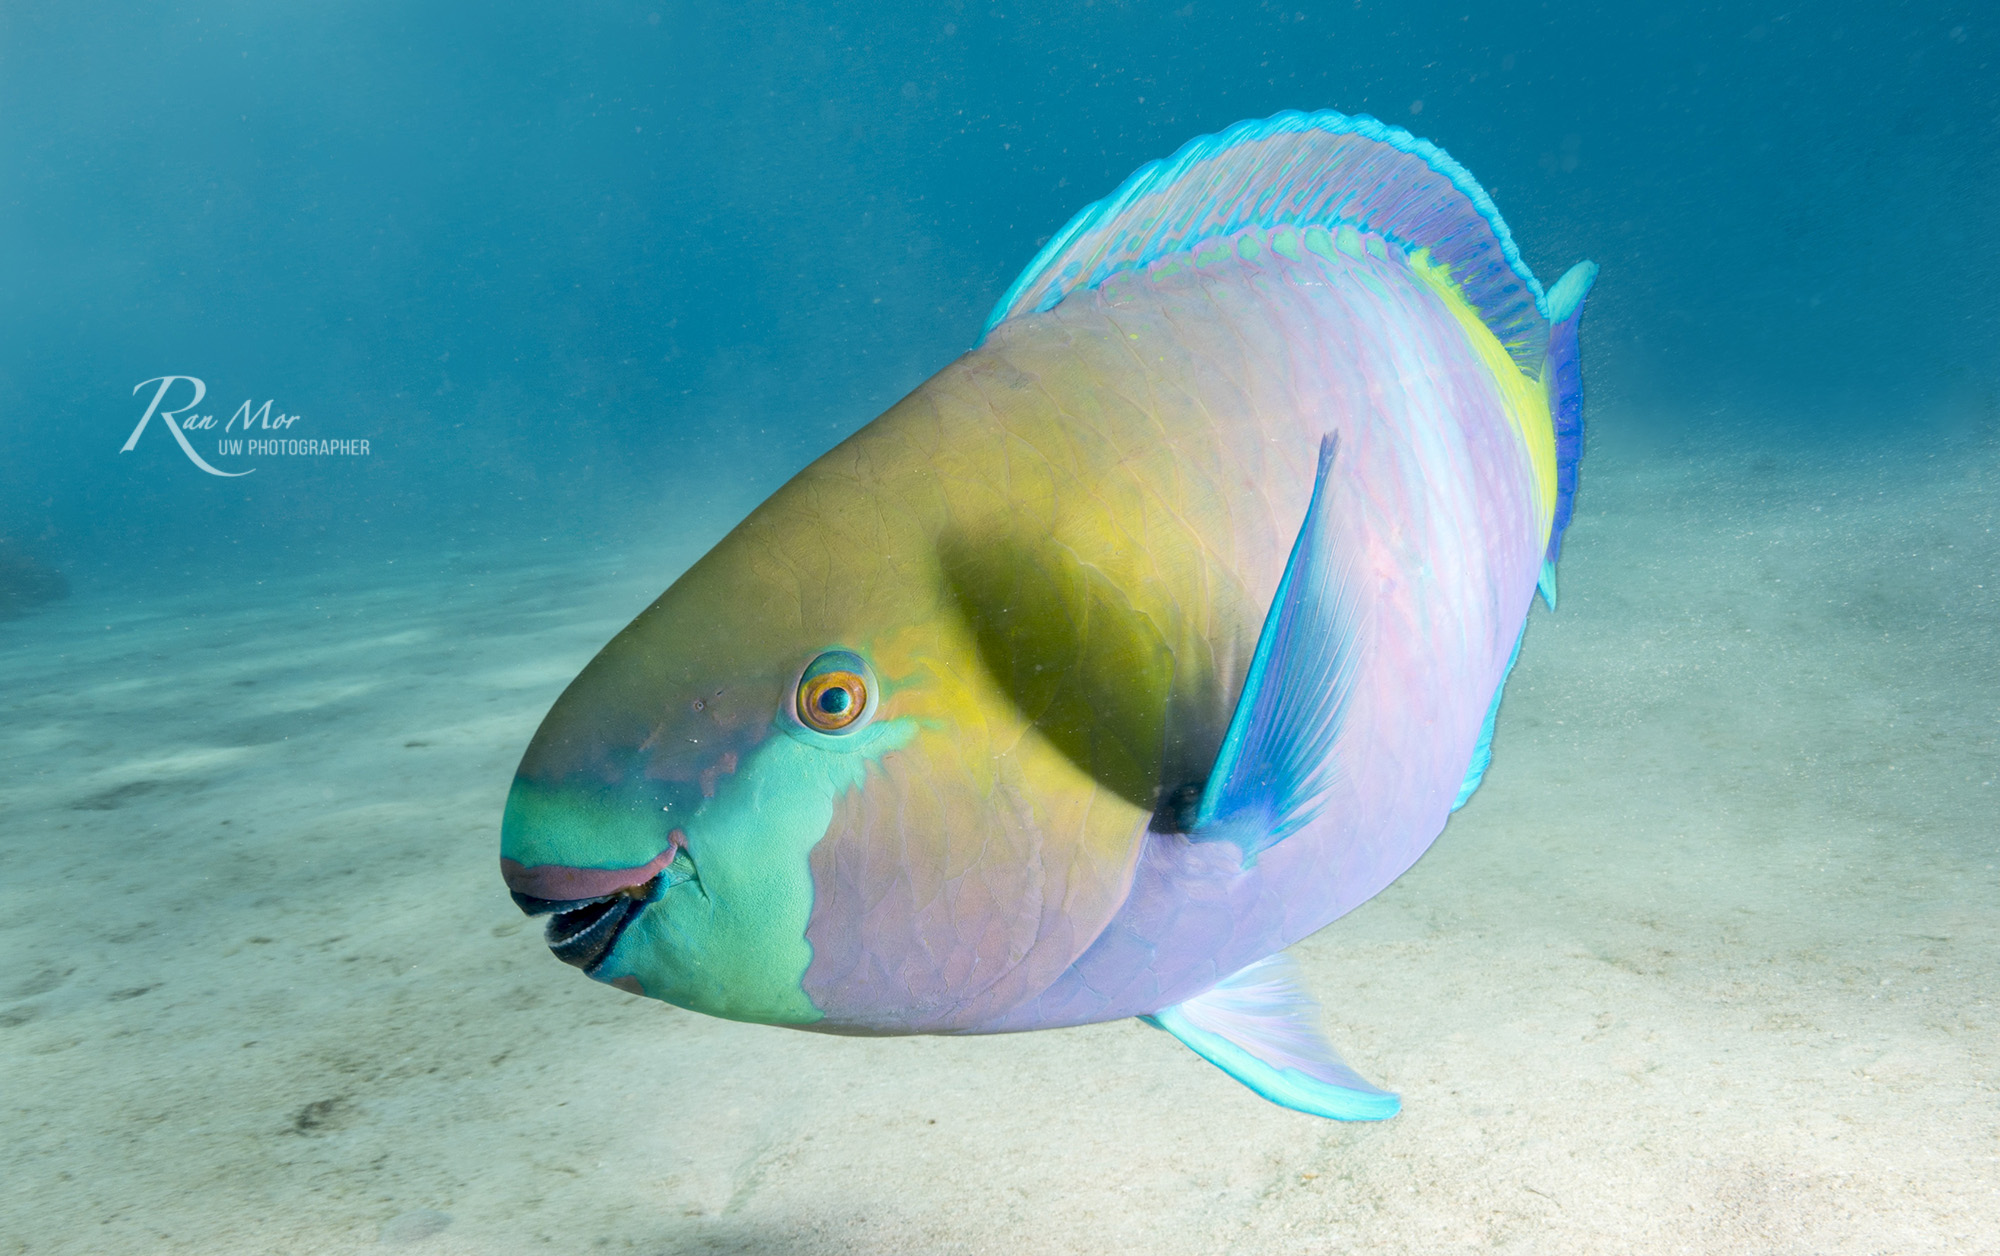
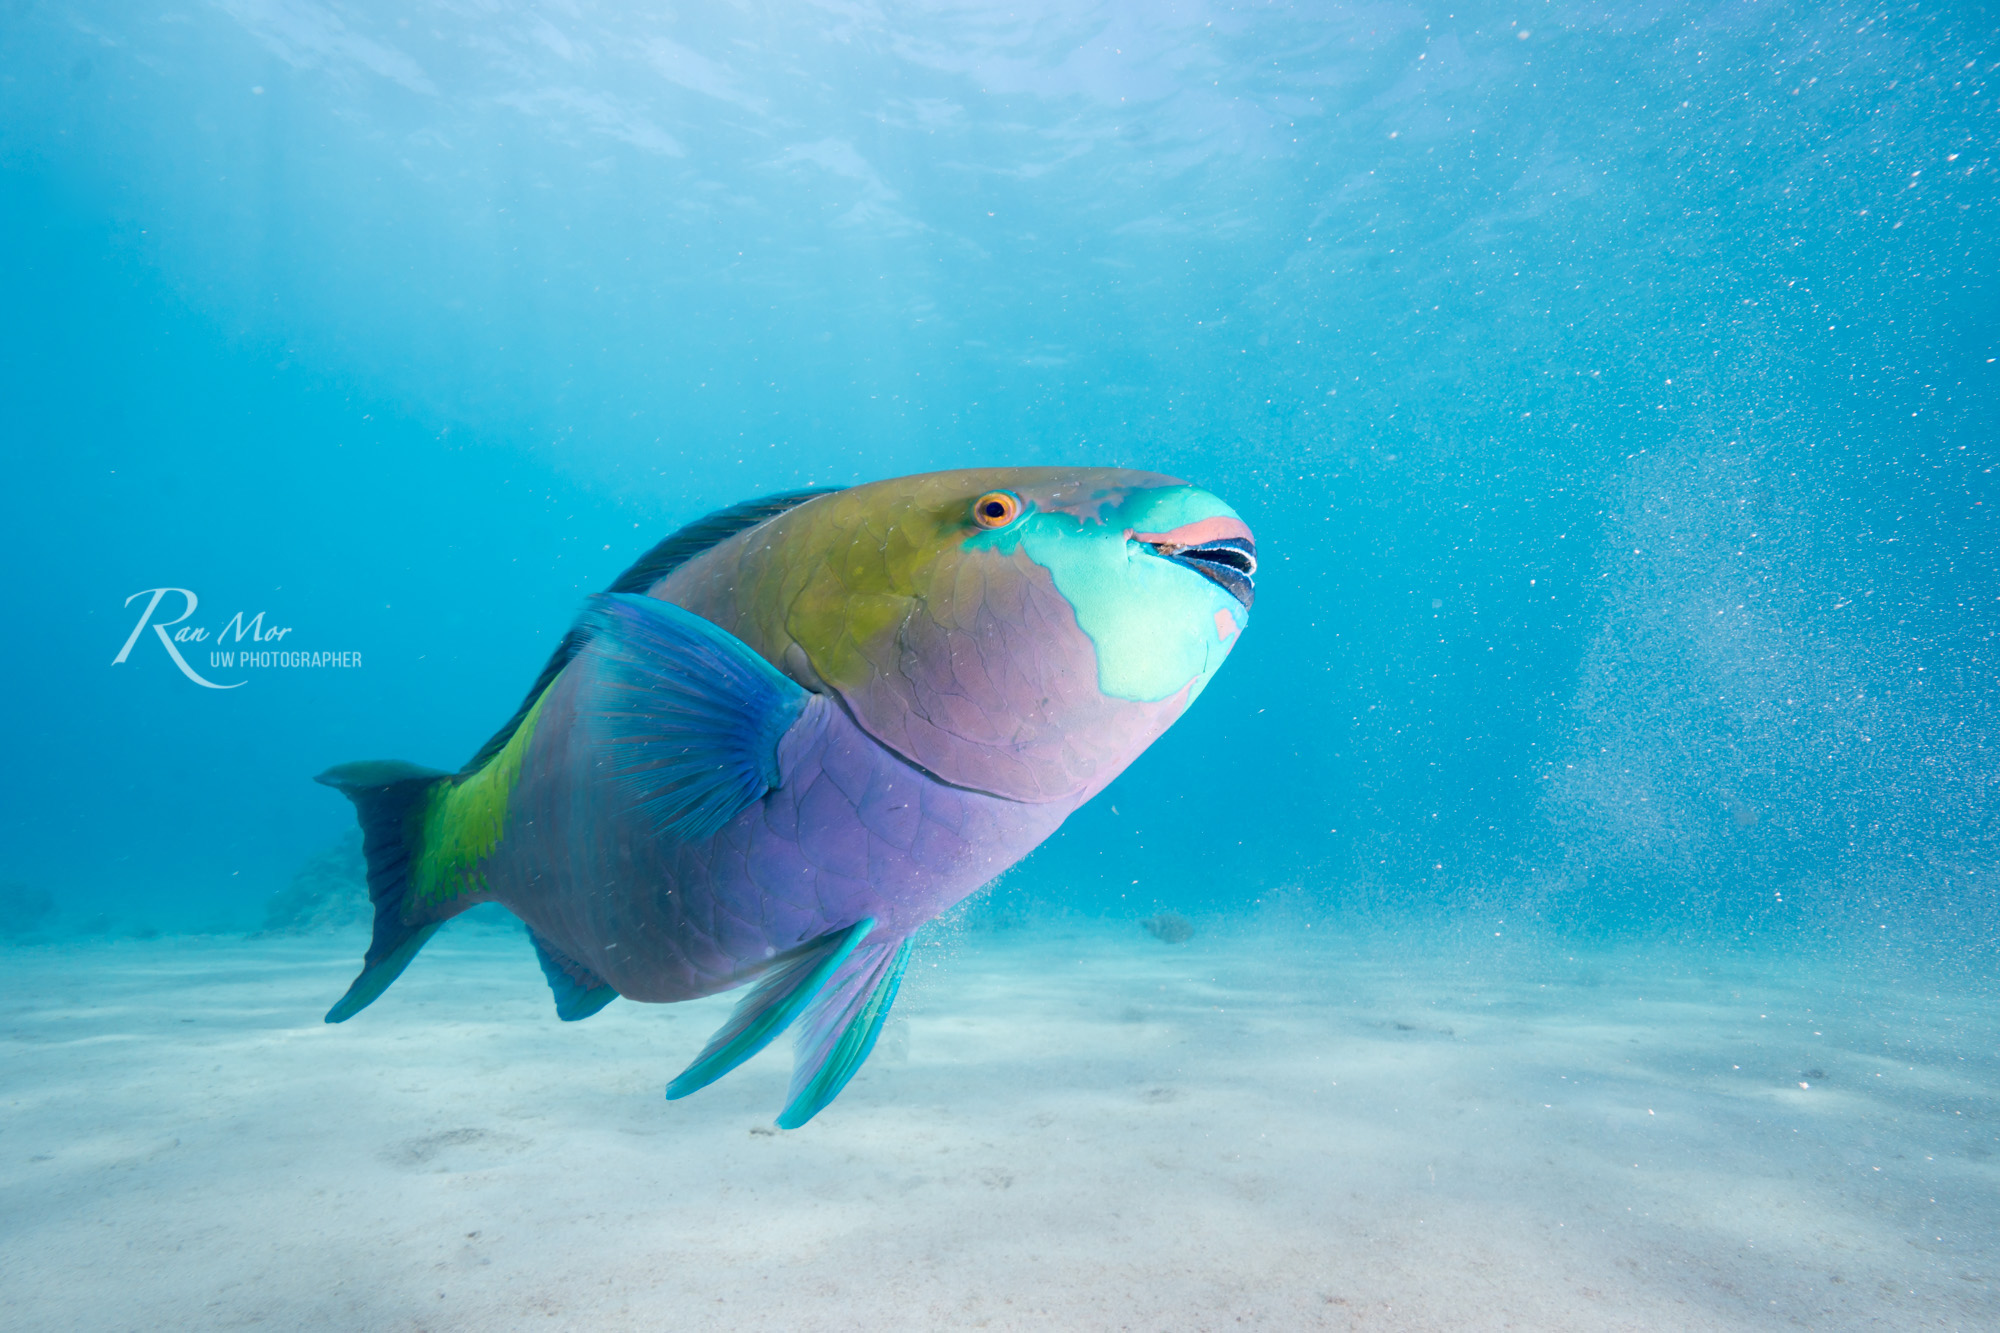
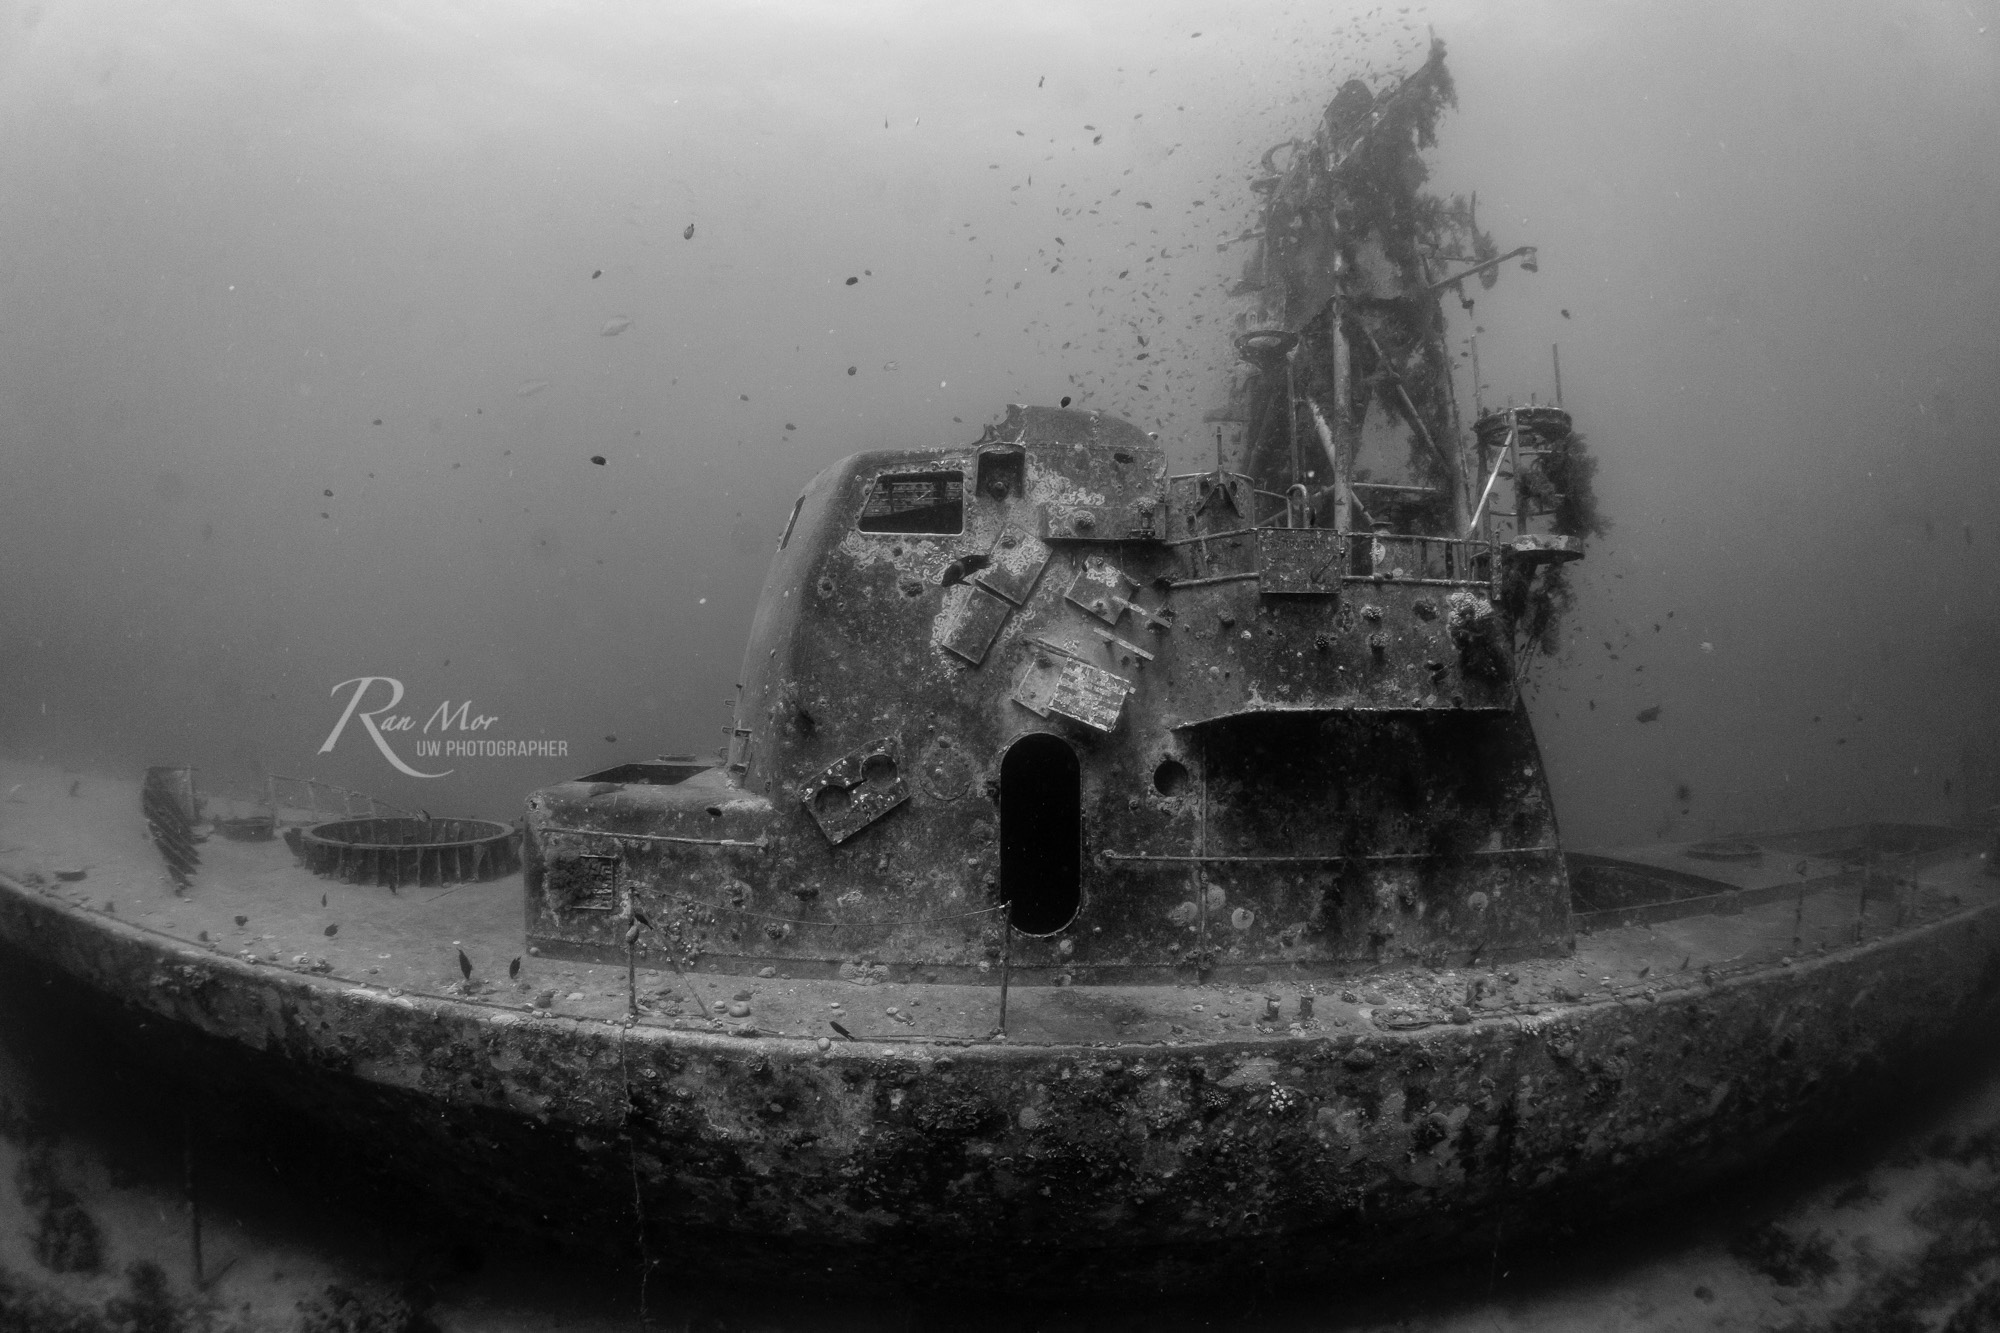
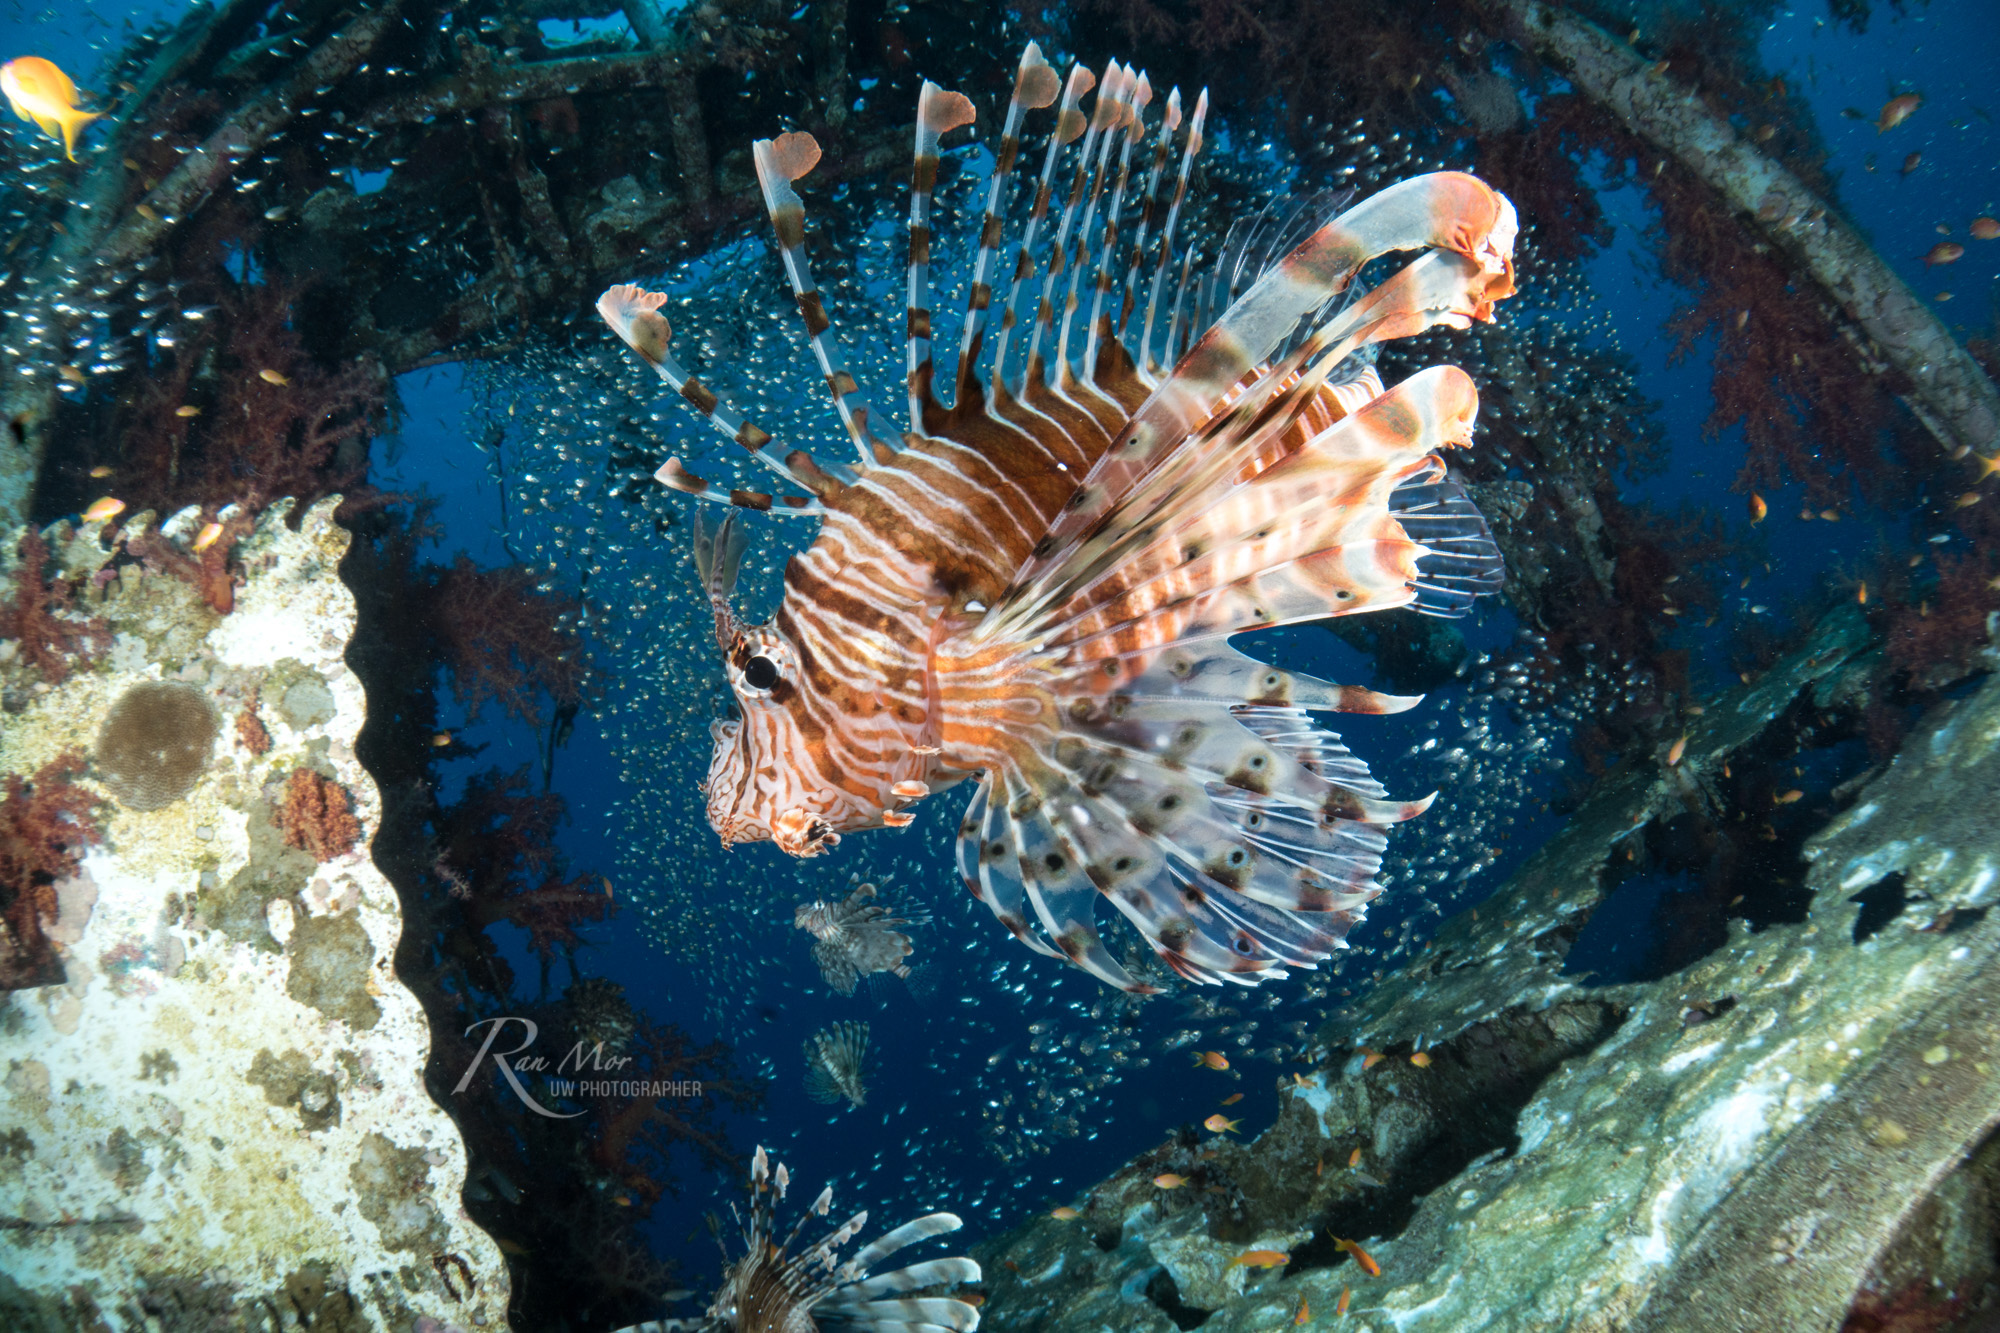
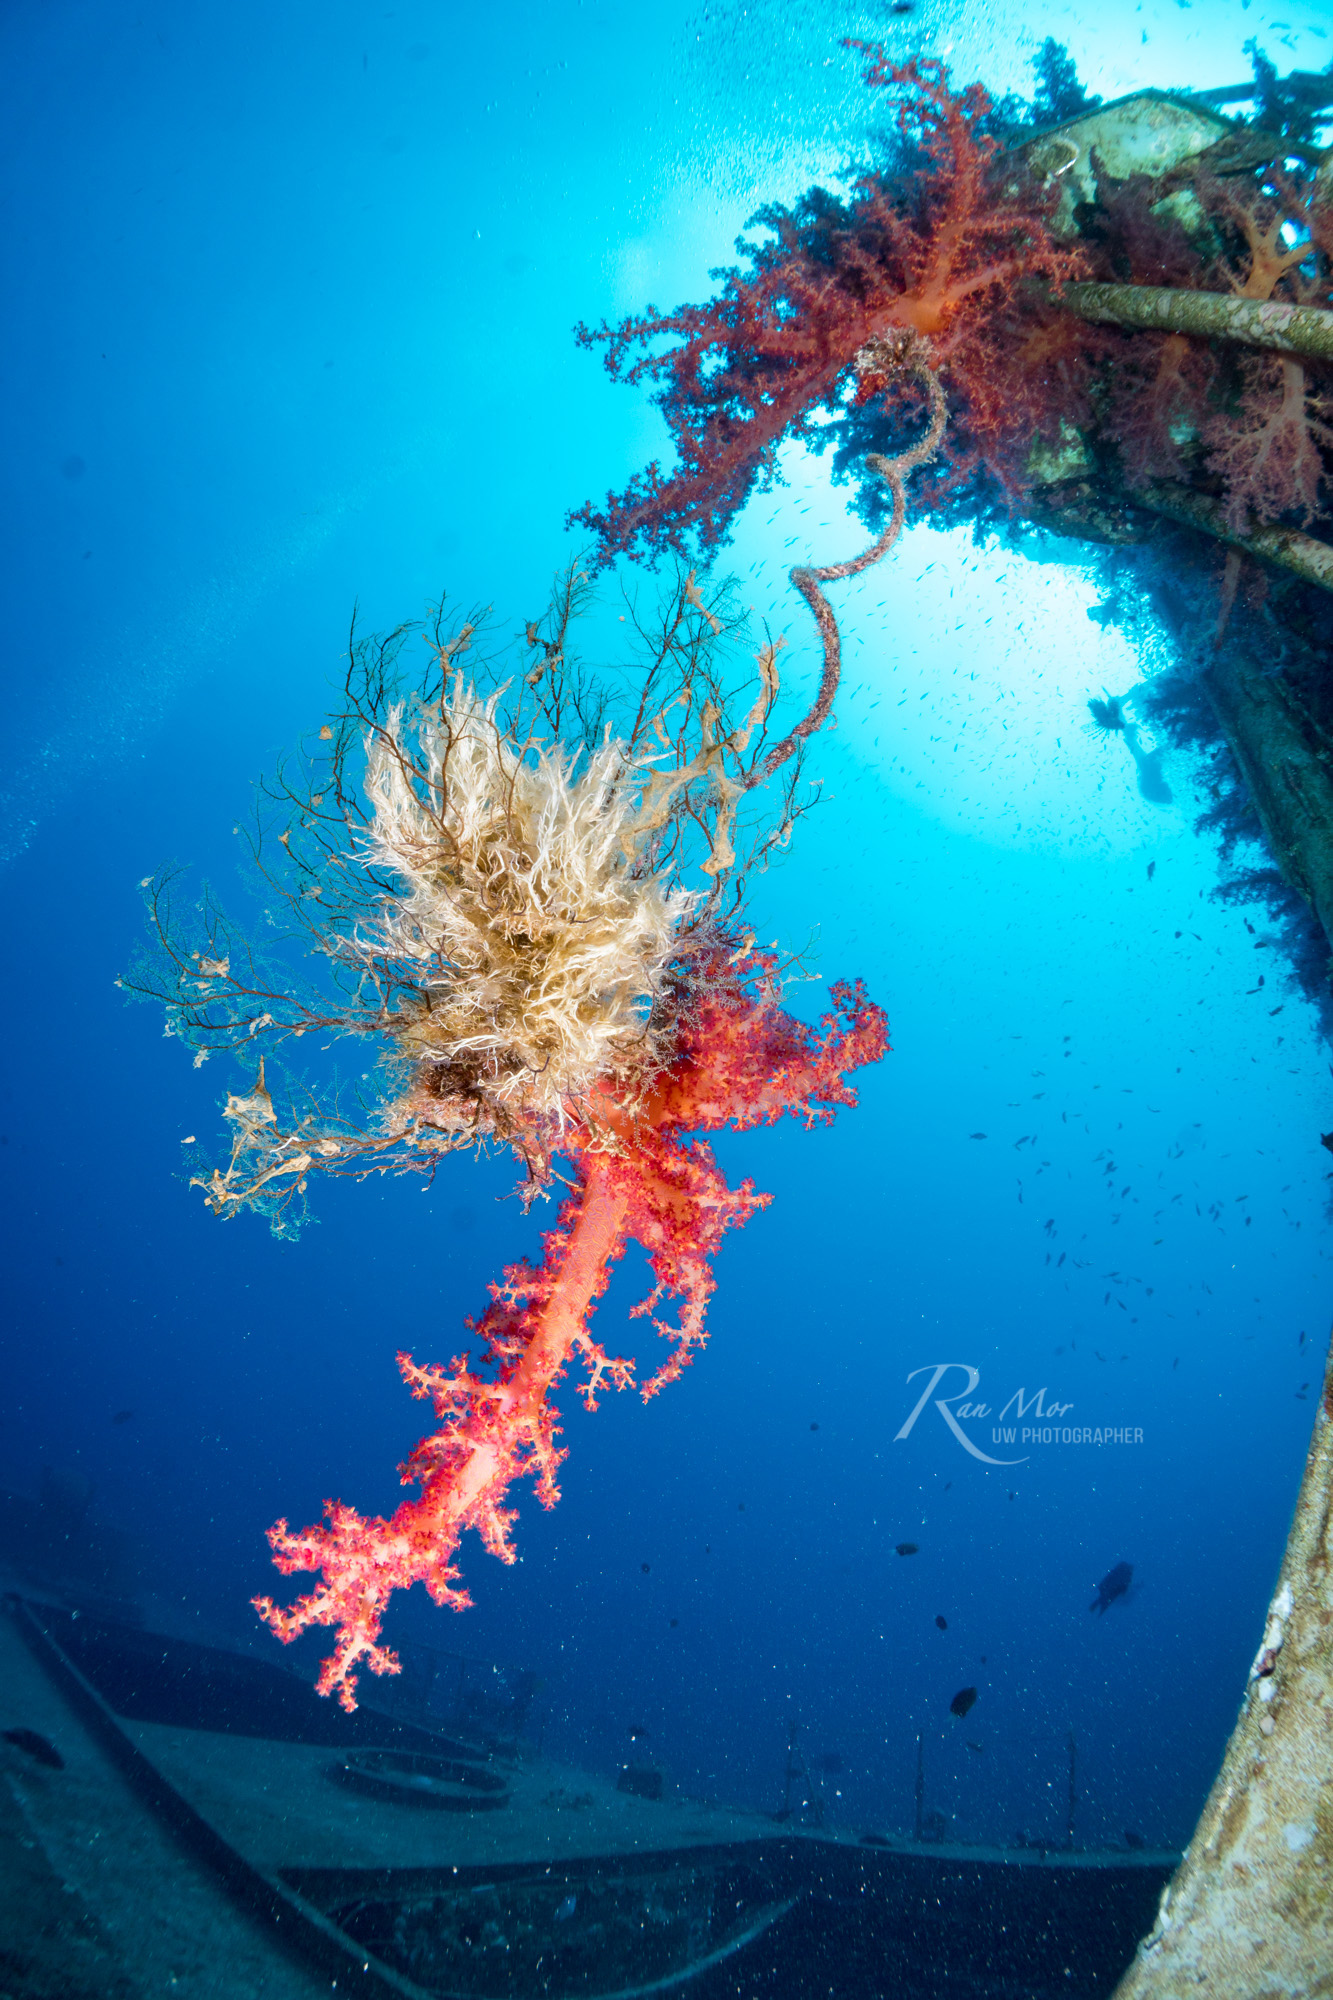
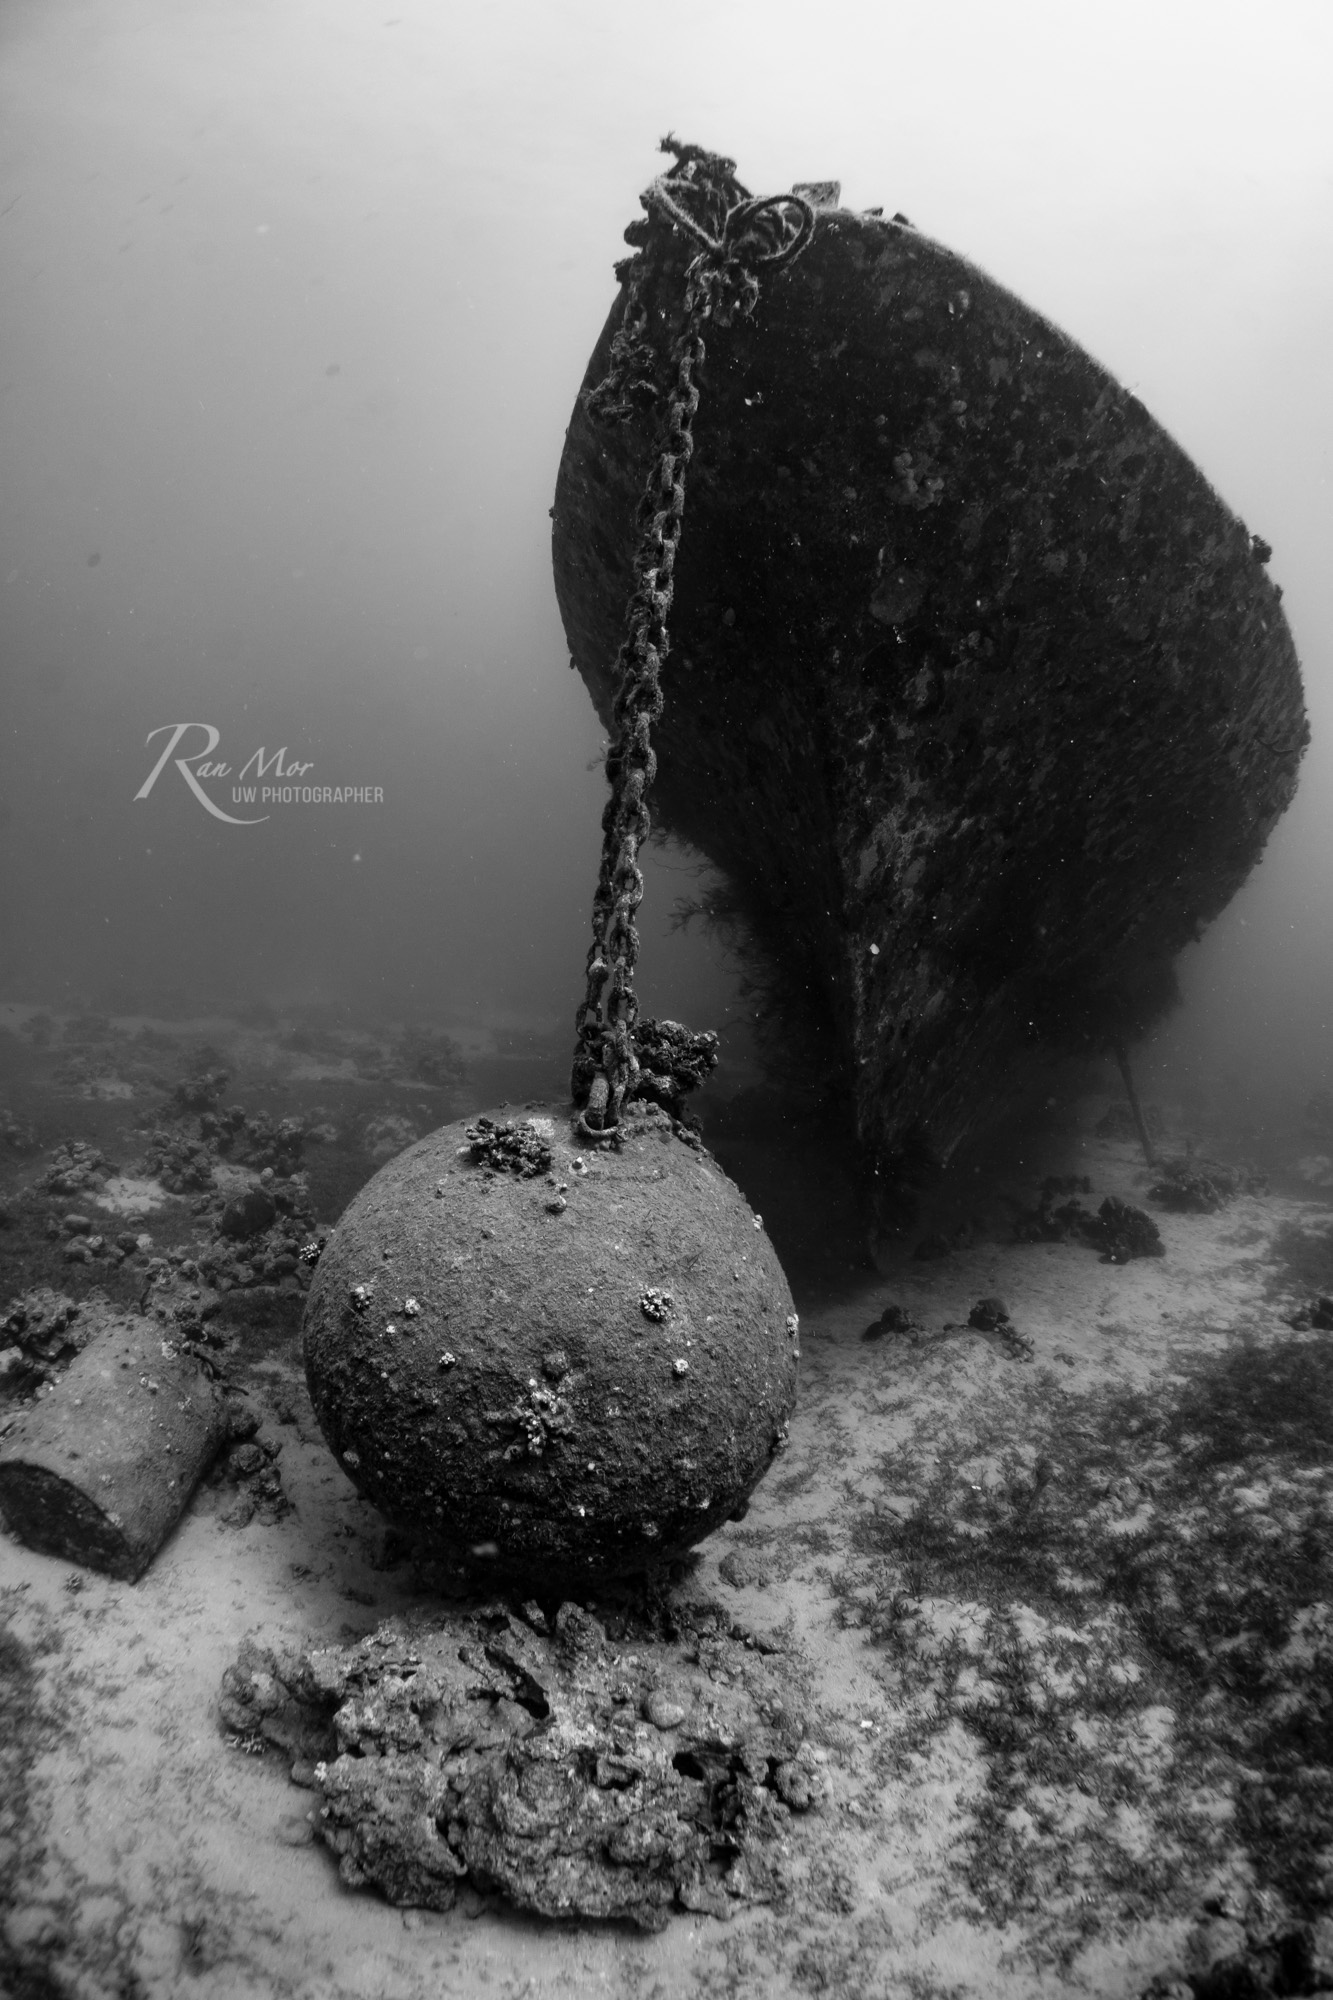
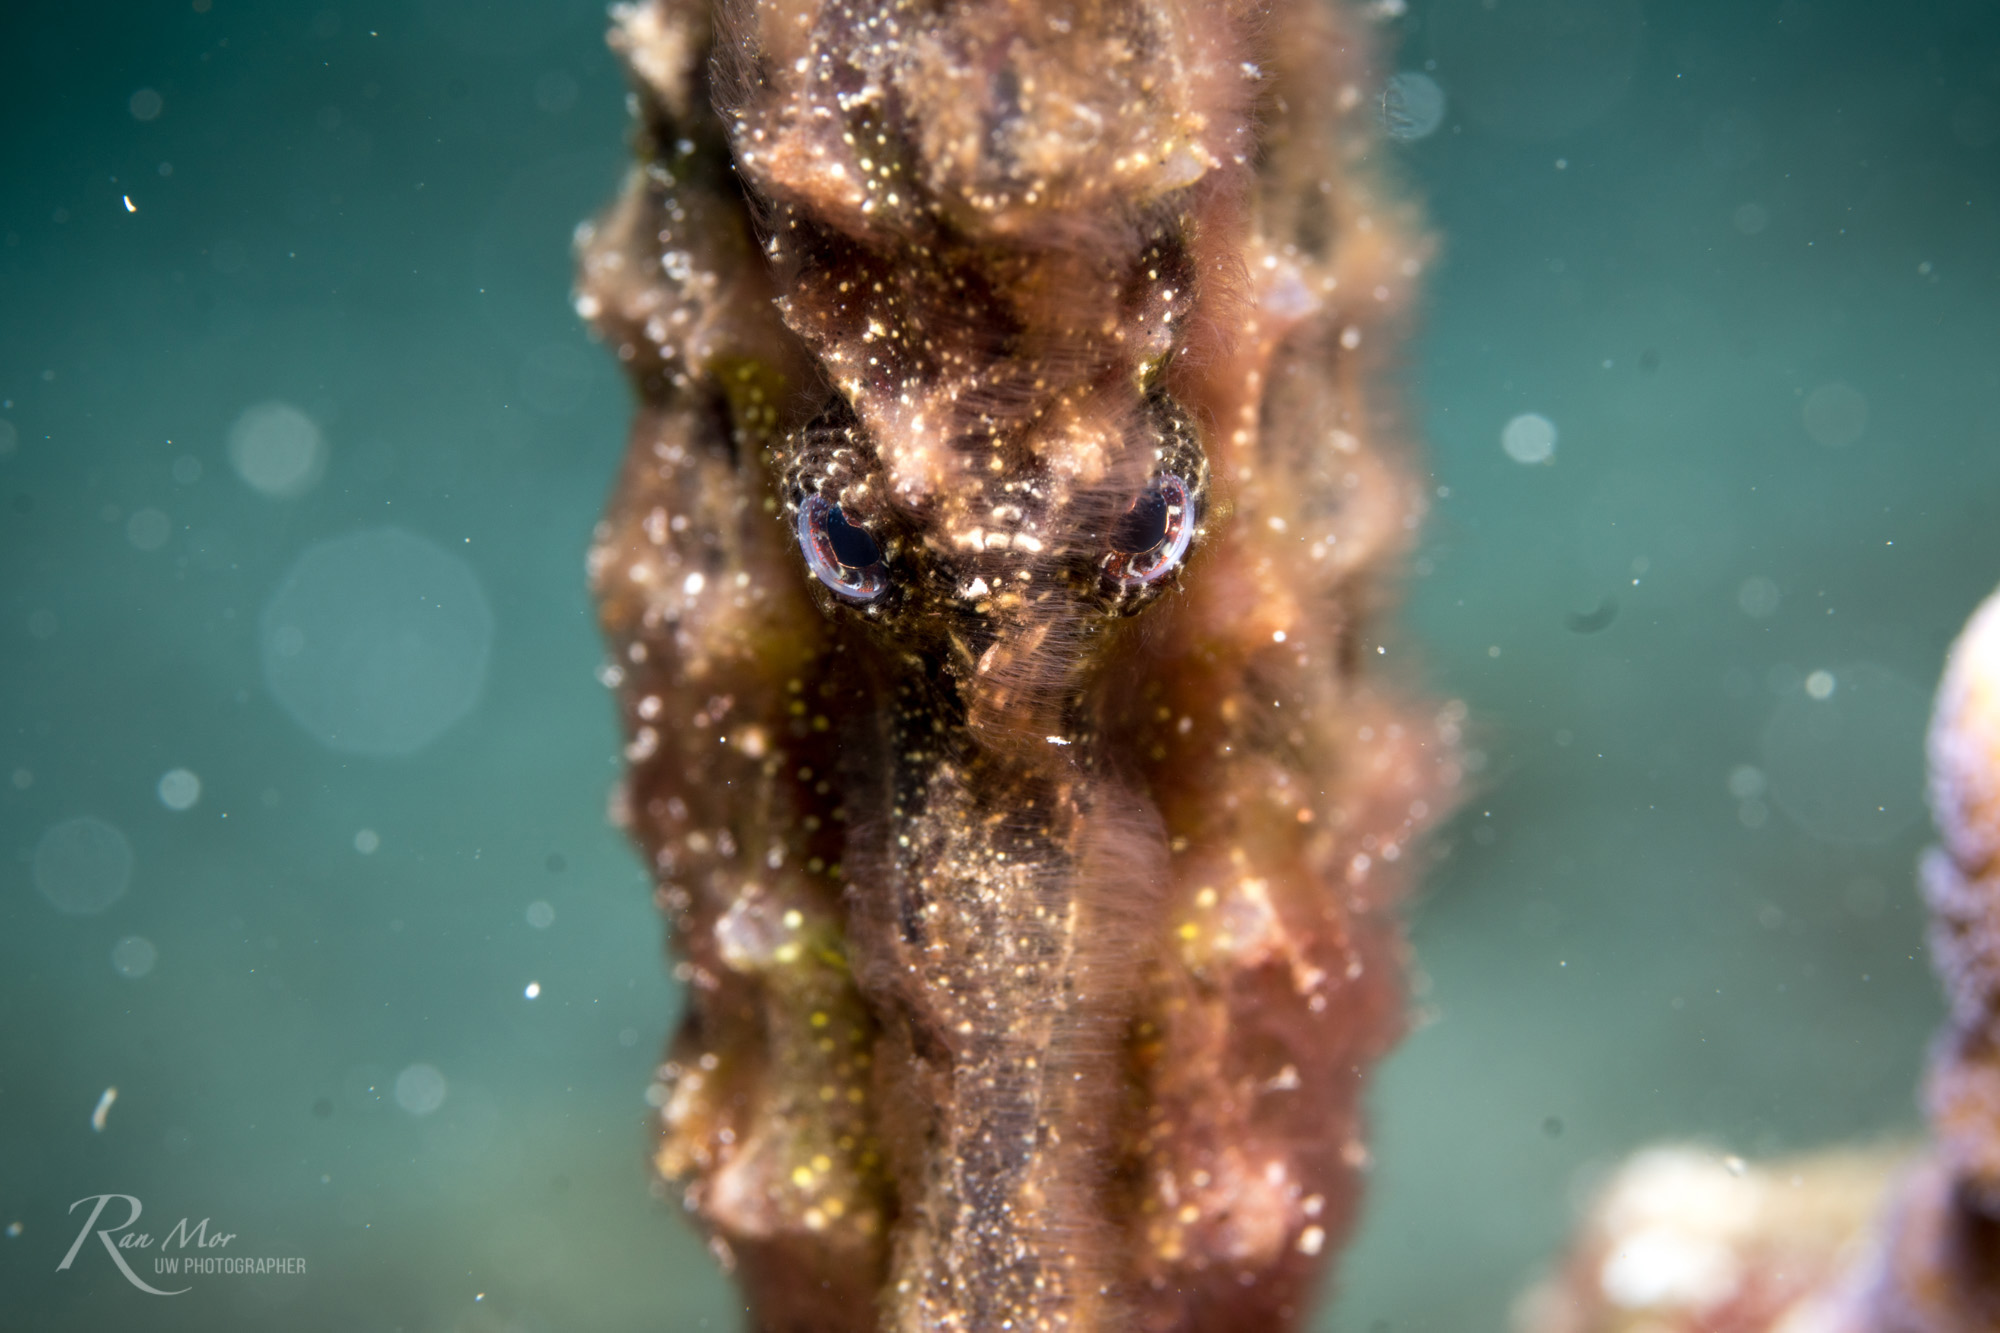
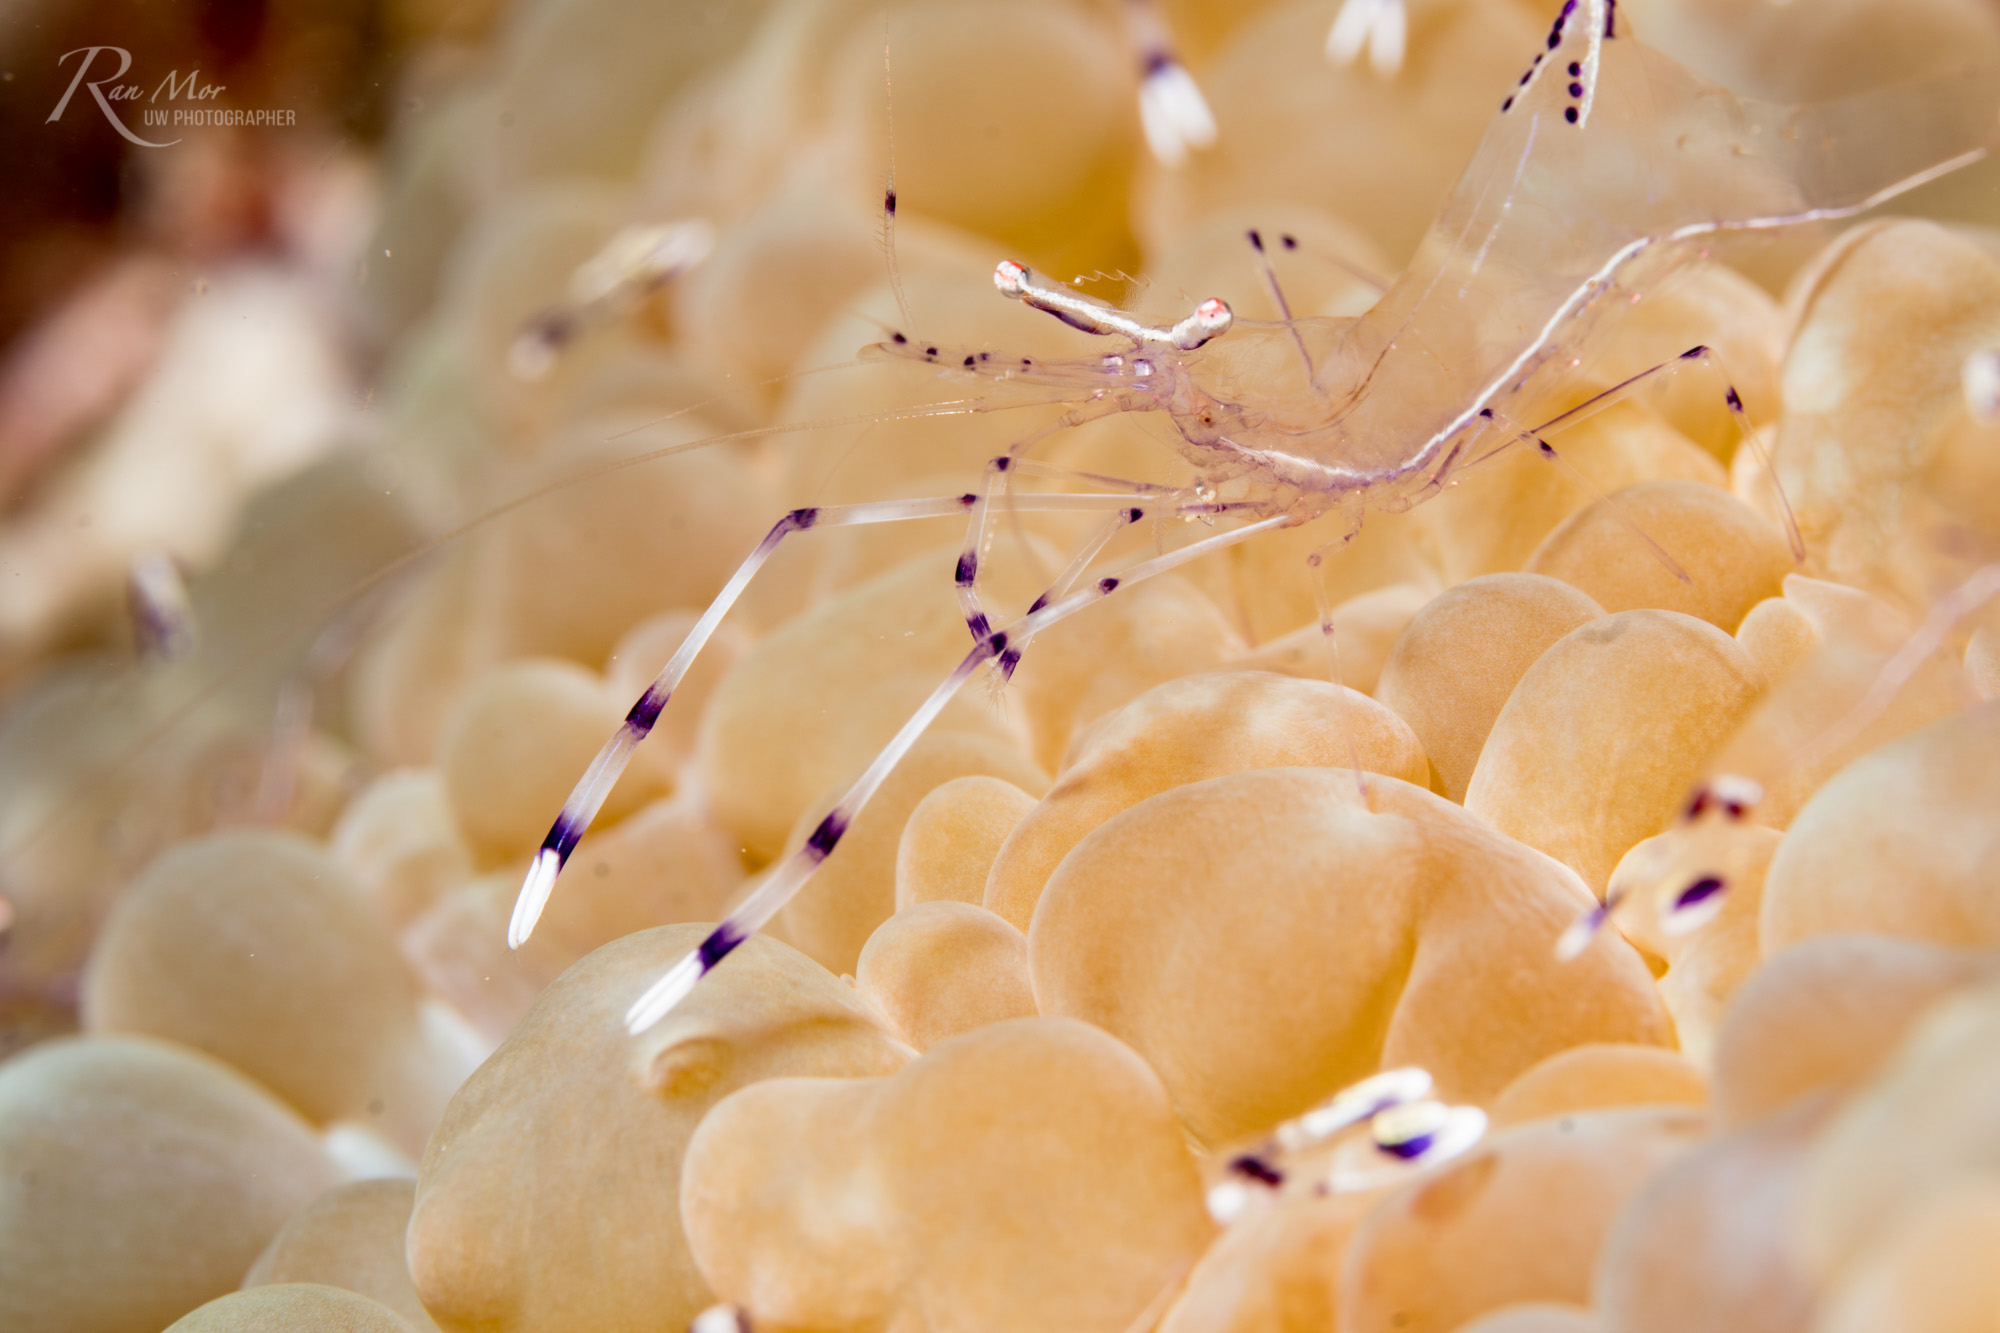
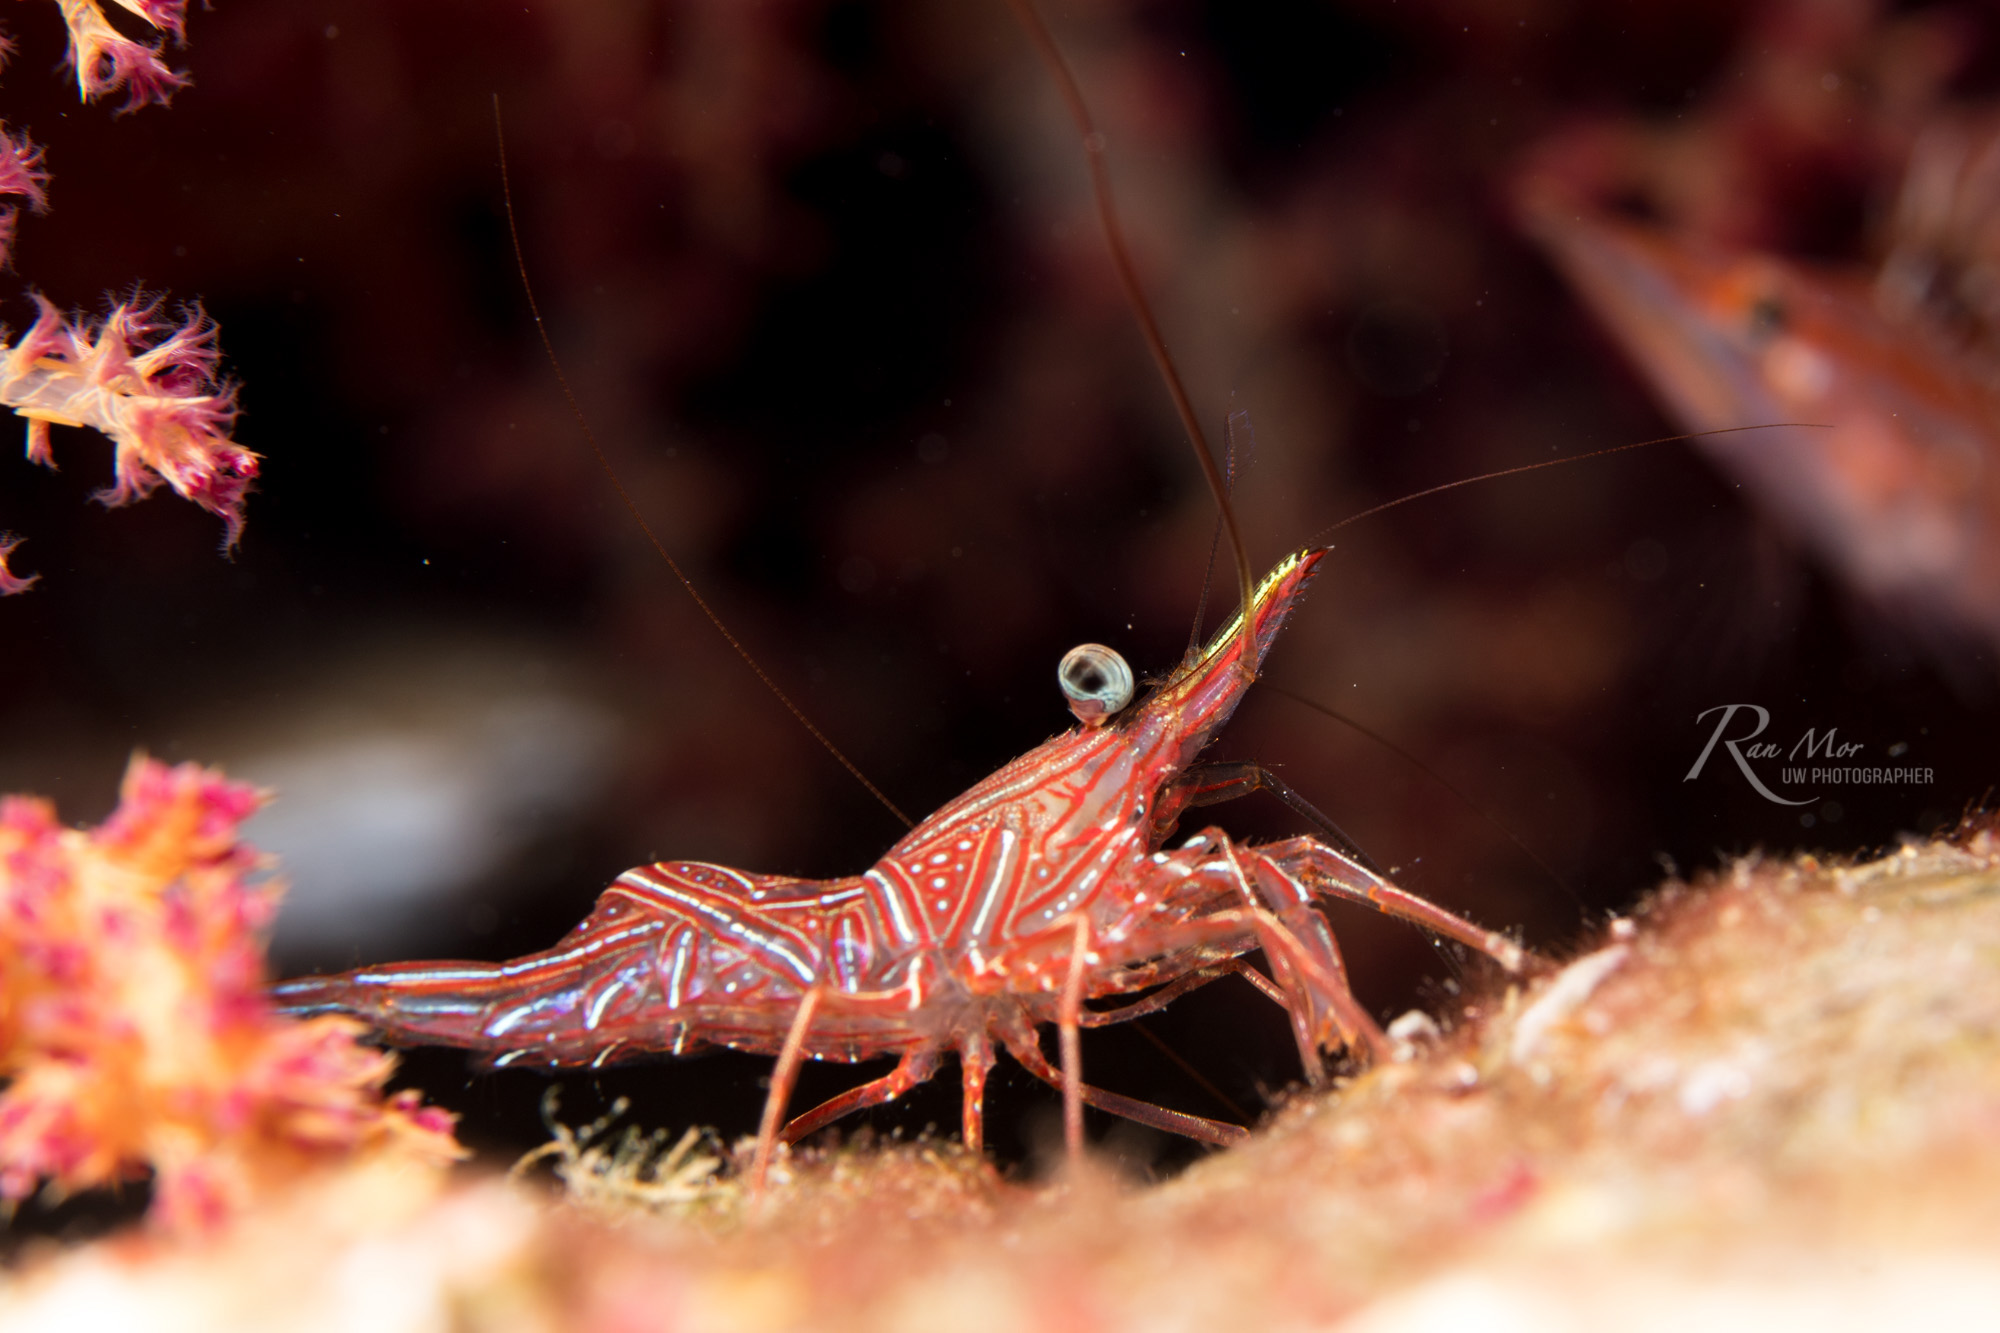
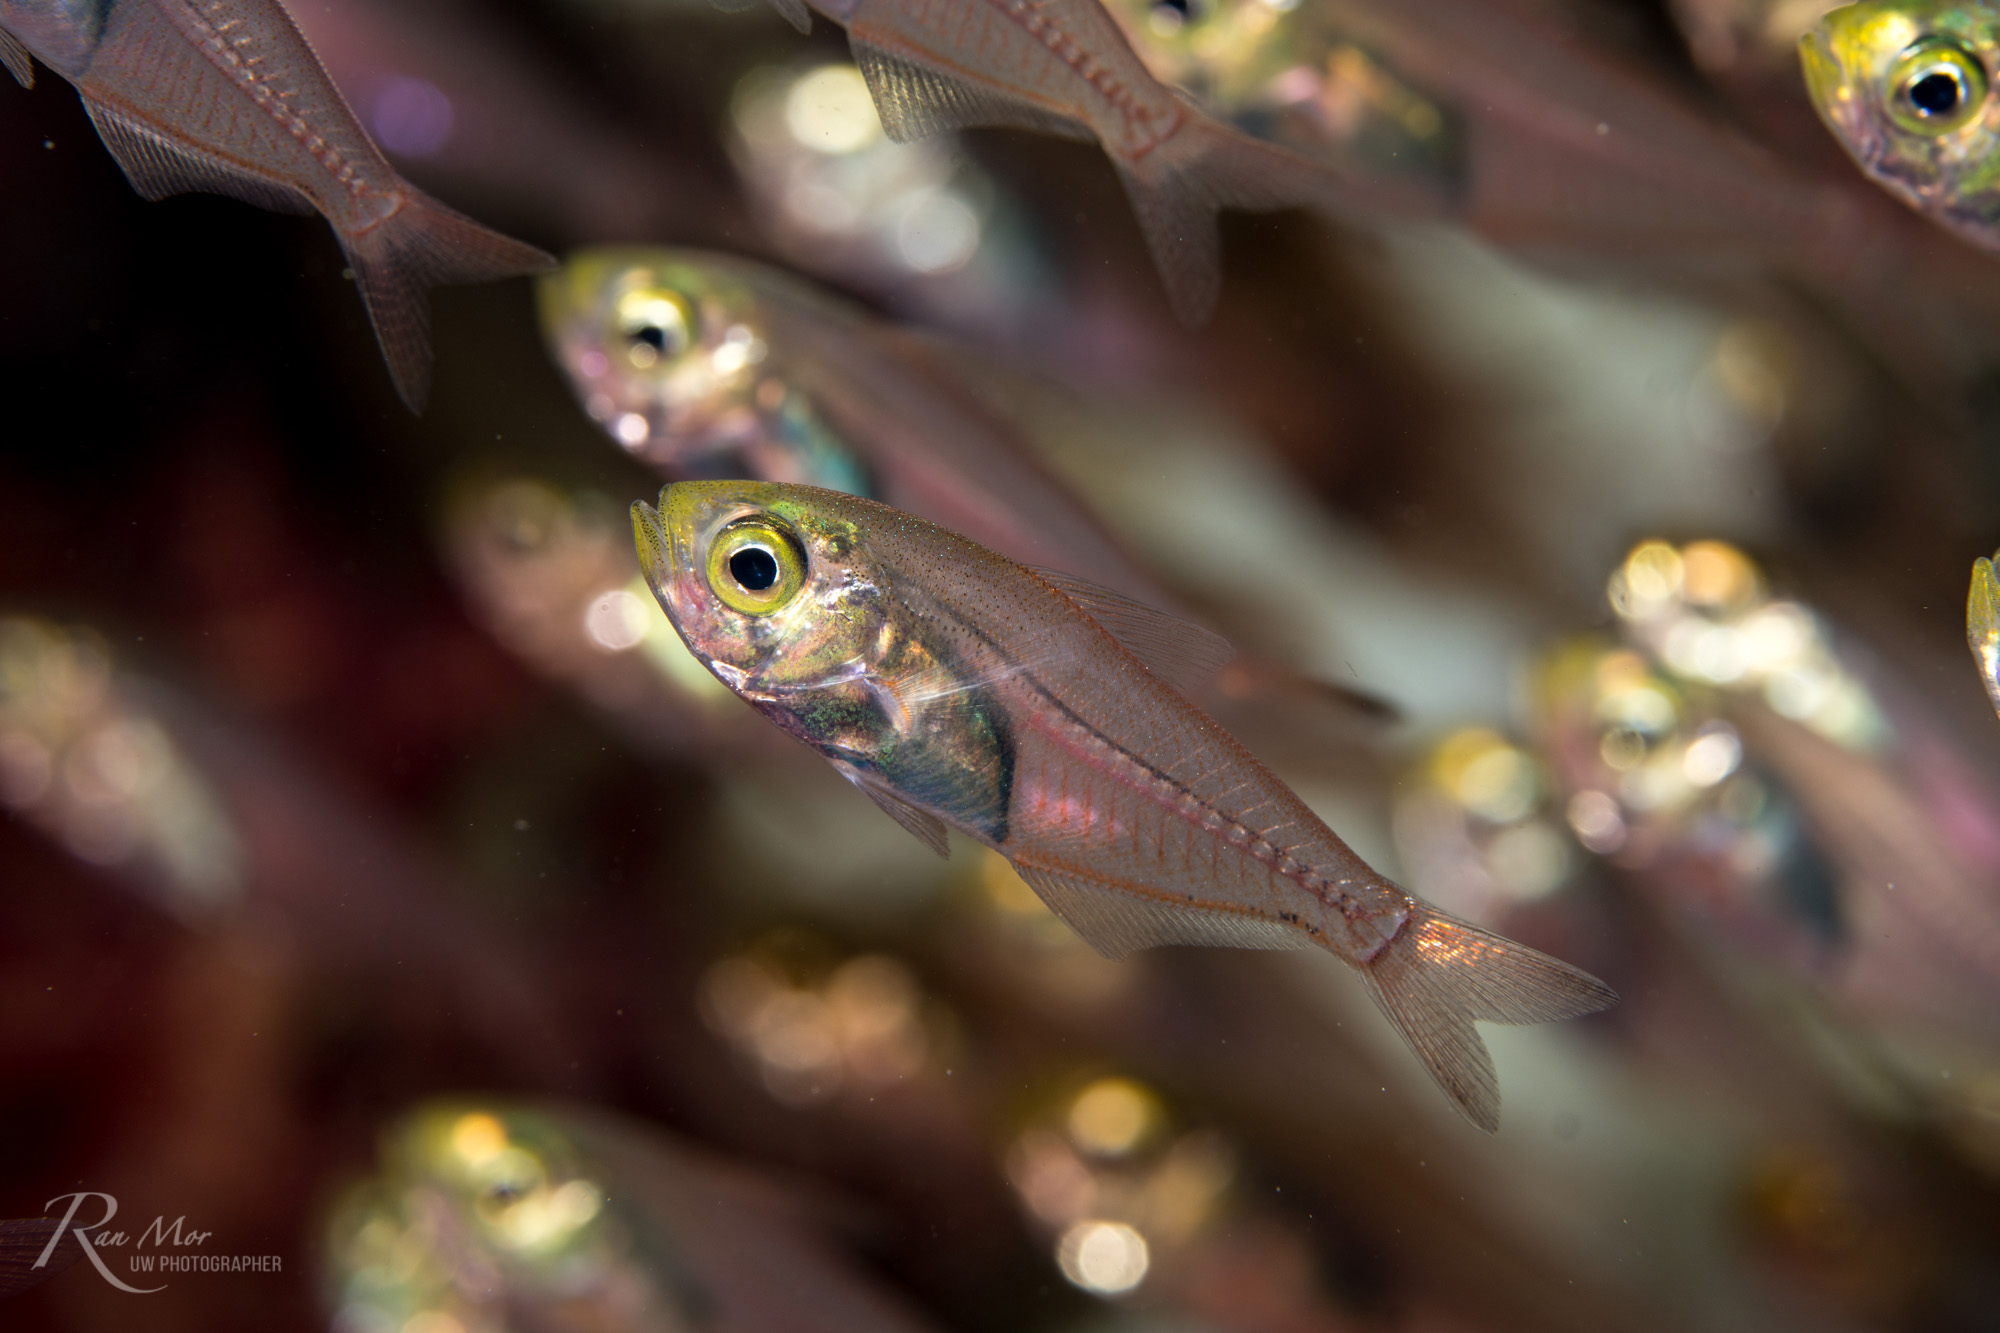
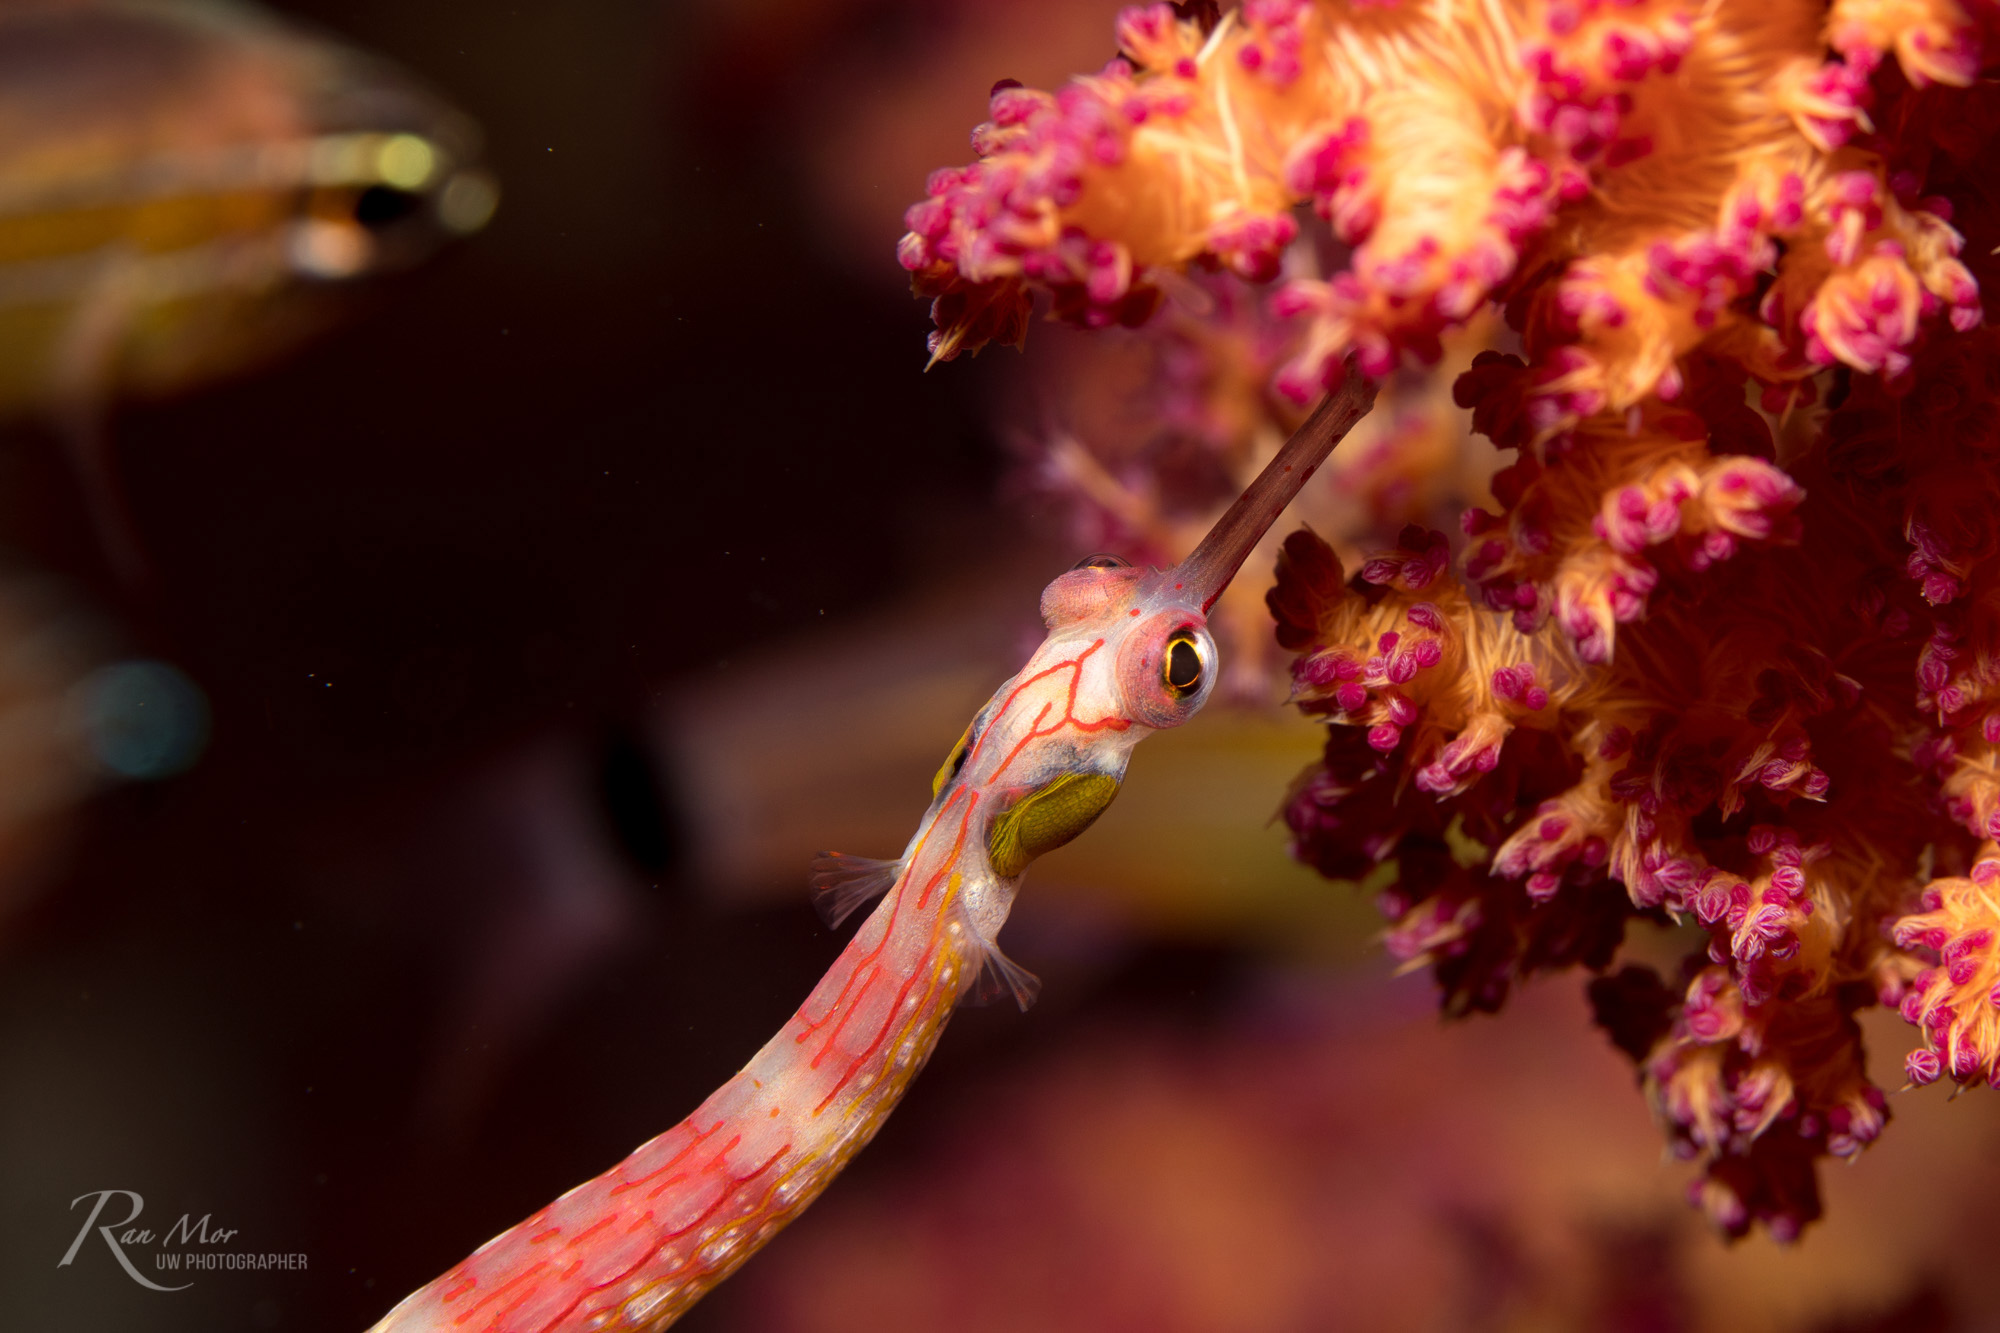
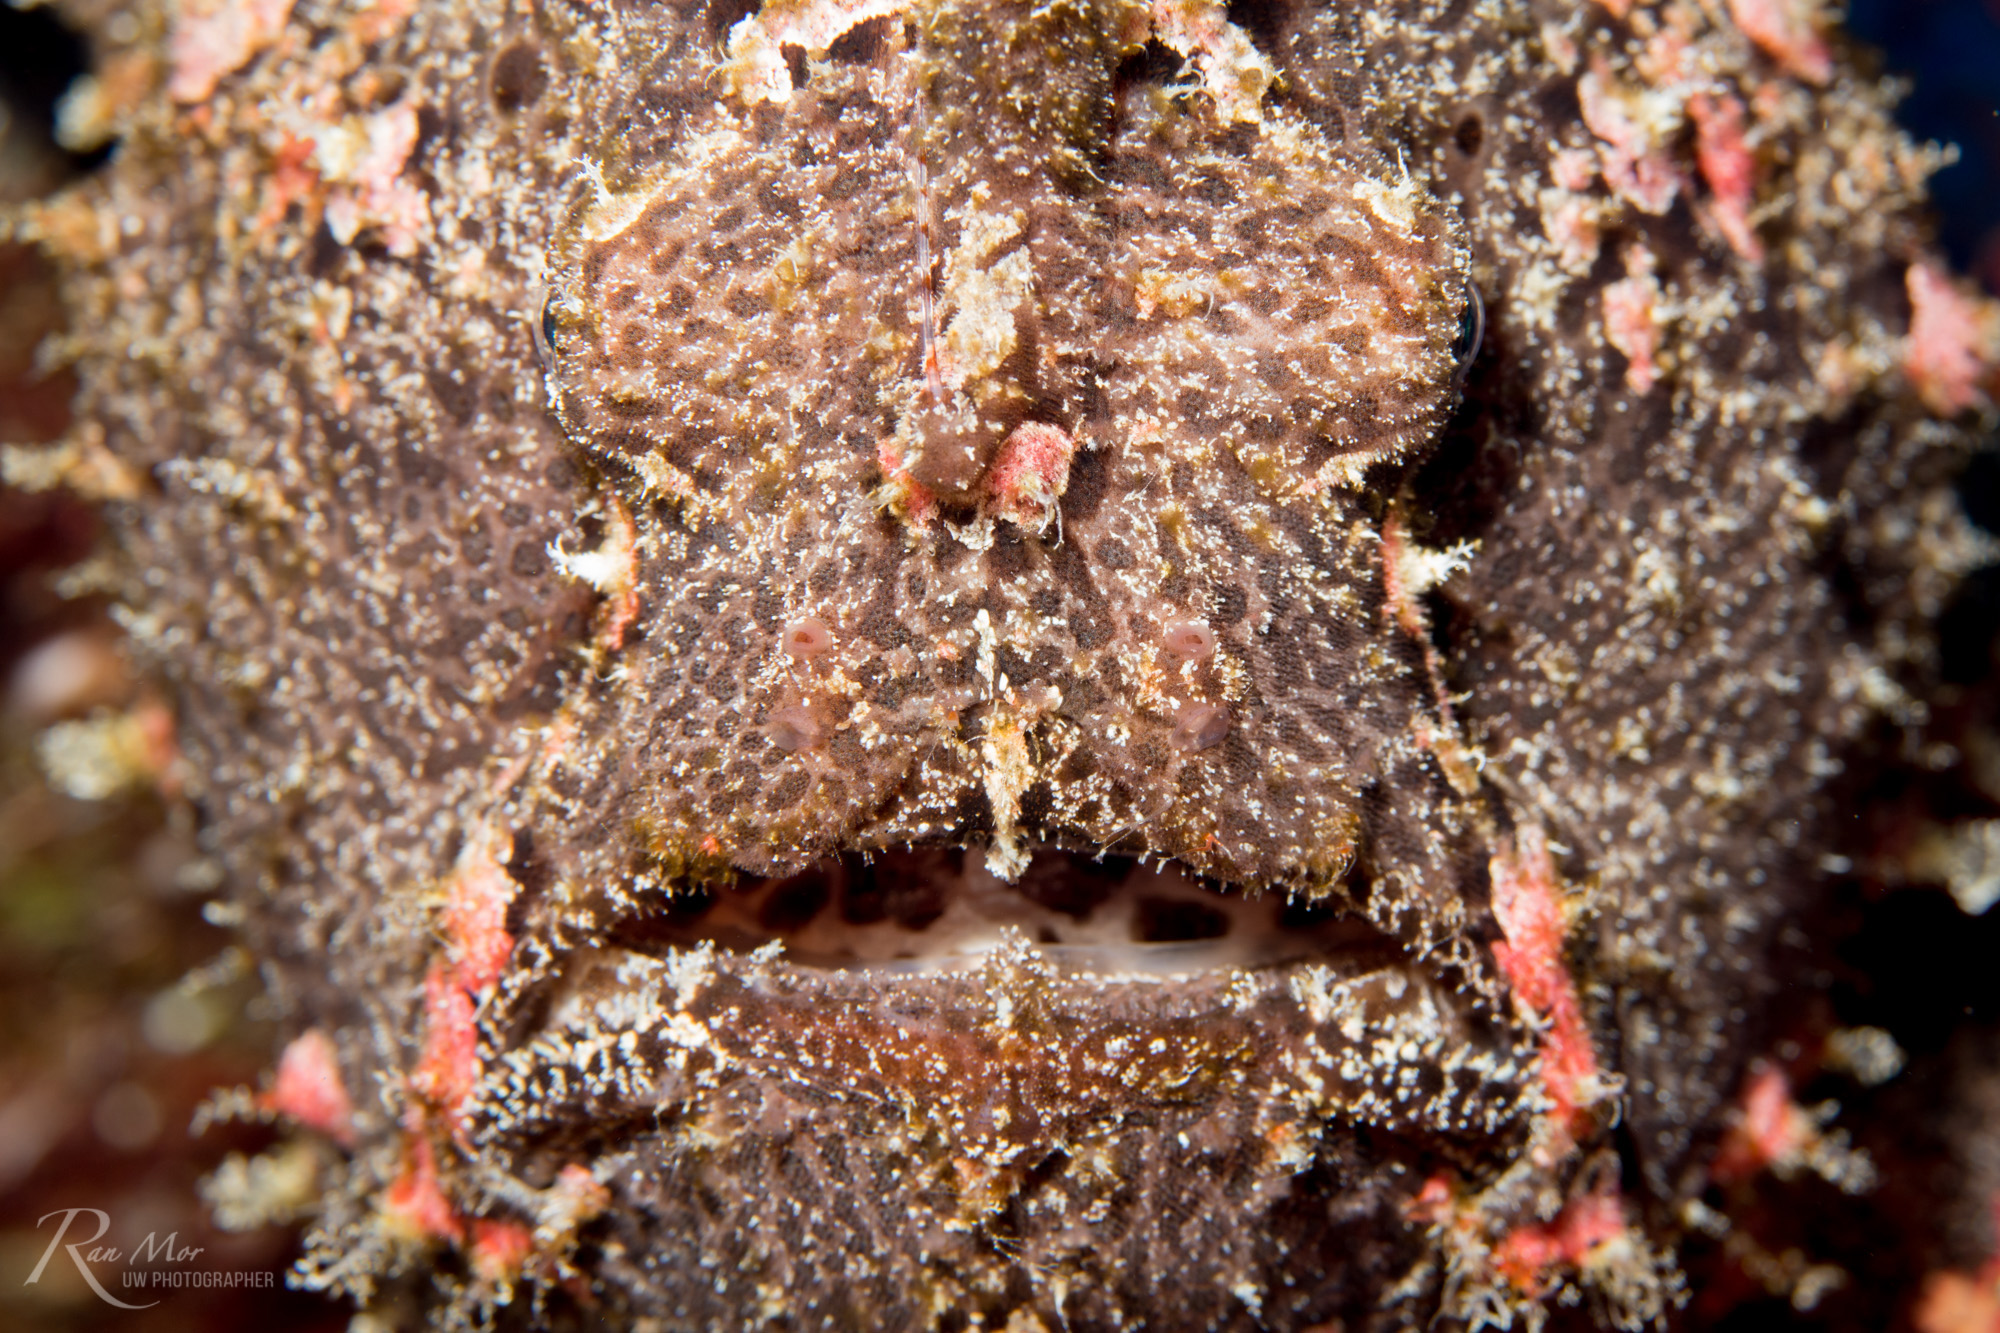
More photos of the system and underwater samples below:


Visit his personal portfolio at www.ranmorphoto.com.
- Native Lenses vs. Wet Lenses for Underwater Photography – December 20, 2023
- The Complete Guide to Practicing at Home for Underwater Photographers – October 4, 2023
- Best Strobe for Underwater – The Ultimate Strobe Guide (Updated!) – June 29, 2023
8 comments
In the last sentence in the first paragraph under Accessories you state: “Note that the A6500 does NOT offer a manual flash mode, which is helpful when using external strobe.” But then under Shooting Experience, you state: “The Sony 6500 is very easy to control. I usually shoot fully Manual when using strobes, and Aperture priority when shooting ambient light. In both modes I found it to be very intuitive, with all relevant controls within reach.” How is shooting Manual possible when you stated earlier that the A6500 does not offer a manual Flash Mode?
Shooting manual with the camera means controlling the aperture and shutter speed manually. This can be done while the flash is set to auto and fires at the right level for a perfectly exposed shot with the chosen manual settings.
Regards, Tal
Hi Ran, do you know of any quick release systems for Fantasea’s flat port on the FA6500 housing that would fit the UWL-09F.
This is my experience using the Sony A6500 with Fantasea FA6500, two Sea & Sea YS-01 strobes triggered using Fantasea FA-2 connect by fibre optic cable.
This setup allows me to shoot faster than the 1/160th limit – 1/250th is max any more than this you get the black line.
I can not use TTL – manually control the strobe power output. I can at least switch the strobes off if I want to take a picture using ambient light only (not possible using the camera on-board flash and no option in menu to not fire the strobe).
Also make sure the Live View Display Setting Effect if OFF, so you are able to see what you shooting at.
Overall I am pleased with Sony A6500 and Fantasea setup – it is a much lighter than a DSLR setup.
Hey Duncan!
Yes, the Fantasea Bayonet system is in the works! It should be ready soon, we’ll update on our blog as soon as it’s available.
It will allow quick bayonet-type mounting on the standard flat port for wet lenses – wide and macro, as well as lens holders on the arms.
Hang in there! It’s coming soon!
Thanks for the feedback Ace!
Btw, you can indeed turn off the flash with the Fantasea housing!
The button on the top, if you press it firmly, will lower the flash and turn it off so you can shoot ambient light.
Try it out 🙂 It works!
Anyway the FA-2 is awesome and I personally prefer using that over the built in flash, for recycle speed and battery life.
Hi bro,
Can i ask when you use 90mm on a6500, do you use MF or AF?
Thanks
Hey Ben!
I used AF on all photos.
Occasionally I lock focus with AF and then fine-tune by moving back and forth, but for the most part it wasn’t needed.
The 90mm does have a very wide range of focus distance, so I did have to help it by “leading the focus” to my subject using reference points midway, to prevent extensive focus hunting.
That’s a fairly common technique for this type of lenses.