
 CAD
CADBasic Composition for Underwater Photography

Composition
Once you have mastered your technical skills, managed to get the right exposure, natural colors and precise focus, it’s time to actually produce some good photos!
Photography, especially underwater, is first of all a technical skill. It would be impossible to get good photos without knowing your camera and learning a thing or two about shutters, apertures and lighting.
The second phase for a photographer is learning how to transform his images from okay, to WOW. That’s where composition comes to play. Since composition means “how elements are arranged in you frame”, every photo has some sort of composition to it. The photographers job is to control in creatively and precisely as possible.
Rules of composition have been around for ages. The ancient Egyptians and Greeks have laid down the guidelines for many aspects of composition that we use today. The explanation to why those rules actually work lie deep in the theories of aesthetics and psychology. To keep it simple, there is just one main reason to use the following rules: Because it looks good!
First and most important guideline: The Rule of Thirds!
The Rule of Thirds is derived from the Golden Ratio in mathematics. It basically states that if you divide your frame into horizontal and vertical thirds, you get 4 lines and 4 meeting points. According to the rules, you should place your most important elements on these points (Power Points) and along these lines. Why? Because it looks good!
The Rule of Thirds should be used regularly, but as a general guideline. Many beginners are frustrated that they cannot get a grid to display on the viewfinder or cannot see the viewfinder as well as above water. That’s completely ok. There is no obligation to be too precise using this rule – simply offsetting the subject from the center is a great way to apply the rule.

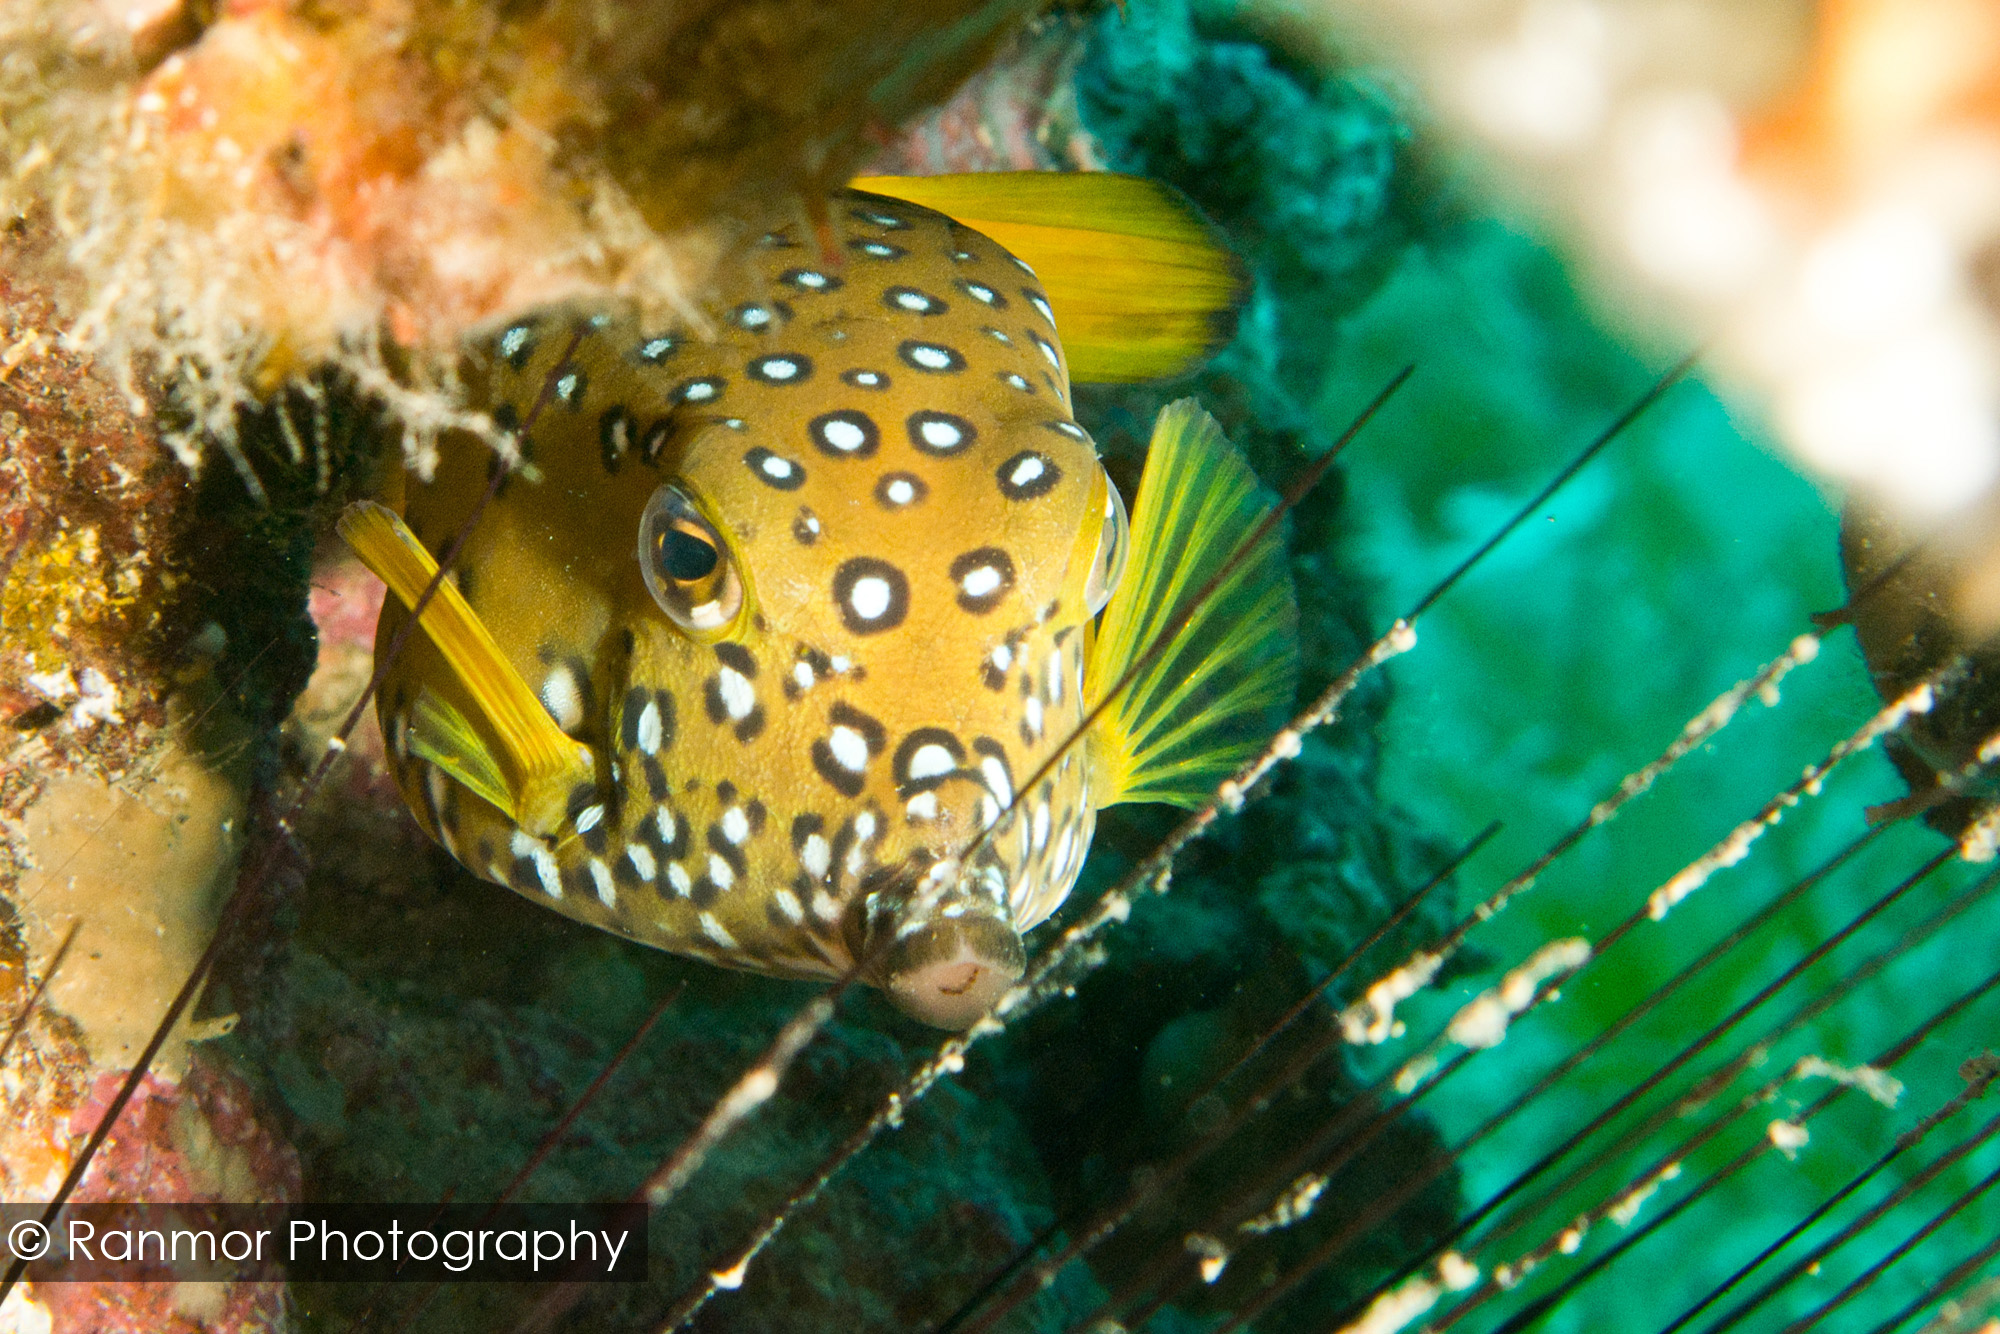
In most images your subject won’t be a small red ball that can easily be placed on an intersection, but usually larger. In most cases the most important part of your subject are the eyes. When shooting people, animals, fish, shrimp or any other living creature, we tend to place our focus on the eyes (The window to the soul yada yada…). This is why we will also use the eyes to apply the rule of thirds as seen in the image below:

Symmetry
Many times, if we are lucky and the subject is facing us straight on, we would not want to use the rule of thirds directly, but apply a second rule – Symmetry.
Symmetry has been a known aesthetic property for thousands of years, thanks to our natural need for balance and thanks to nature’s tendency for symmetric shapes. There was actually a research done that proved that people with more symmetric faces are much more appealing and considered good looking. The Taj Mahal is also a great example of the importance of symmetry and the power it contains.
As photographers, we can always find the symmetry in nature to add strength and balance to our shots and make them more visually pleasing. The most important thing to remember regarding symmetry, is that you should try to portray symmetry in the most accurate way possible. That means positioning yourself and the axis of symmetry exactly in the middle and trying to keep both sides as symmetrical as possible.


Shapes and Guidelines
Using shapes and lines in your composition is a great way to add interest and flow to your frame.
A good example is using a natural line on the main diagonal of the frame (i.e from one corner to the other). This creates a good base for the image and sense of completeness. Adding a subject according to the rule of thirds could add even more interest.

Framing the Subject
Framing is a useful composition tool which helps emphasizing the subject and adding depth and structure to your photos.
Potential frames exist everywhere around us, both above and under water. You can use a full, obvious frame such as a window or shoot through actual holes, or use more subtle frames and half frames such as branches, corals, rocks and plants near the edge of the image. Using a wide aperture will allow the frame to appear blurry / out-of-focus, enhancing depth.
Get close
Getting close to your subject might be difficult underwater, but crucial for a few reasons. The main reason is the amount of water between you and the subject – the closer you get, the clearer the photo.
The second reason is that you don’t want the viewer to search for the subject of the photo. It should pop out. If you are too far away, especially when using wide angle, the subject might get lost in the frame and the photo would lack interest.
When we take photos, we tend to focus our minds on the subject and forget that it’s not the only thing in the frame that might be pretty cluttered. Many times, it actually takes quite a small part in the whole frame. When we show it later to other people, they might not even understand that the small Nudibranch in the center of the frame is actually the main subject!
Make sure your subject dominates the frame, and feel free to fill your frame entirely with the subject.


Color Separation – Separating your subject from the background / Shooting up
One of the most common problems during diving and taking photos, is that you’re basically facing down most of the time. While this posture is great for balance and moving around, it is not so great for taking photos. Taking photos of stuff from above creates two problems:
- Boring angle – divers are used to seeing things from above.
- Cluttered background – your subject disappears among the ocean floor / coral which is below it (behind it).
Just as your learn in topside photography to kneel down and shoot from your subject’s eye level, you have to practice the same guideline underwater. Shooting from a lower angle, or even shooting up from below your subject will immediately solve both problems – much more interesting angle, and the deep blue becomes your background, which is great for isolating your subject and adding a sense of order to your frame, in which you could easily implement the Rule of Thirds mentioned before.
An improvement on this method would be to wait for something interesting to happen in the background, say s a school of fish passing by or a group of divers, and then grab the shot!


The most important thing is that you start using at least some of these rules, and try new things, instead of taking the same photos over and over again. Go over photos taken by photographers that you are following and appreciate their work, attempting to understand which composition rules they have applied and how can you do the same.
Happy shooting and dive safe! 🙂

Visit his personal portfolio at www.ranmorphoto.com.
- Native Lenses vs. Wet Lenses for Underwater Photography – December 20, 2023
- The Complete Guide to Practicing at Home for Underwater Photographers – October 4, 2023
- Best Strobe for Underwater – The Ultimate Strobe Guide (Updated!) – June 29, 2023