
 USD
USDThe Ultimate Underwater Housing Maintenance Guide
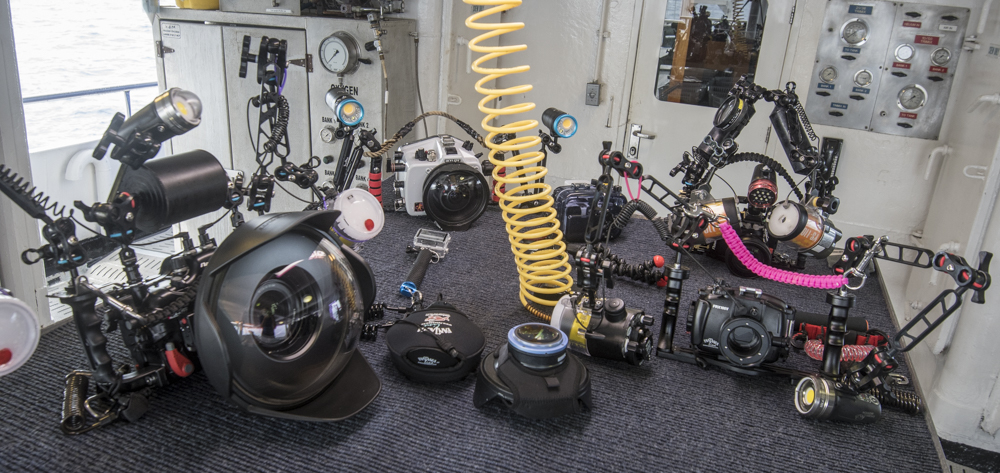
So you bought an underwater housing. Congratulations. Now you want to take it diving, what do you need to do to keep your camera dry? And after you’ve taken it diving, what do you do after that? How do you keep your housing in perfect condition your next dive?
Pre-Dive
No one wants to flood a camera, but it can happen. One of the best ways to avoid water getting in is to take your time and avoid all distractions when setting up your housing and after each time it is opened (to change batteries, download images, change lenses, etc.)
I have two hard rules (that I usually follow):
- No setting up the camera after long airplane rides and directly following extensive travel. Jet lag is real and it makes us forget things… like O-rings!
- In the same way there is no diving after drinking, there is also no playing with the camera after drinking.
It is good to have a routine, do the same things in the same order every time and you’re less likely to forget an important step. Having a checklist helps too (and a packing list before you leave for your dive trip to make sure you don’t leave anything at home.) Once the housing is set up, do another inspection and double check for things like charged batteries, memory cards with free space, O-rings, sync cord attached, everything sealed, etc.
Here’s my checklist for pre-dive camera preparation, before I seal the housing.
- O rings – are they clean, greased, and free of damage? Inspect, and install for housing, strobes, ports. This one is kind of out of order, but I do it first and last before sealing the housing because it is most critical in the health of the system.
- Do I have the proper port for the len(s) I plan on using?
- Do I have and and all adaptors that I need to use for any lenses? For example, an EF to RF Canon adaptor, or a Canon lens to Sony body adaptor, etc.
- Is there a memory card in the camera?
- Sync cables – do I have them? Are there any bad kinks or breaks in them? Are they secure in my arms?
- Is my flash trigger on my camera? Does it have batteries? Is it turned on?
- Is the camera housing plate on my camera?
- Does my housing vacuum system have batteries? Is it turned on?
At this point, I would actually begin to assemble the housing. Then, I’d have a new checklist, like:
- Are all sealed electronics turned on? Vacuum system and flash trigger are the two most likely to be forgotten.
- After checking all o-rings again for debris, I’ll insert the camera and close the housing. Then, I’ll seal the housing and confirm the vacuum seal.
- Once the vacuum is confirmed via the housing vacuum lights (on Nauticam, for example, they flash yellow and then solid green before and after removing the air, thus confirming the seal) I turn the camera and strobes on.
- I’ll then test fire several times to make sure that a) the camera is functioning b) the strobes are firing and c) that the strobes are adjusting in power output. I’ve had strobes get stuck and refuse to change power level before, so I confirm this every time now.
In the above list, for me, I’m most likely to forget one of two things – the flash trigger (either not turning it on or not installing it) or forgetting the camera plate – which you’ll quickly realize, and be very frustrated about). For other people, they might forget other things more often – that’s why a list is so helpful!
A lot of issues can be caught early by taking a test shot while the camera is still above water. Is the strobe not working? Better to find out when you can still trouble-shoot on dry land and try to fix it. If possible, check the housing seal by submerging completely in a fresh-water dip tank. Look for bubbles coming out of key places. I also like to take a test shot inside the dip tank because I’m still in a place where I might be able to fix a problem. Many housing brands have different types of vacuum systems which confirm the housing is sealed before putting in the water.
A lot of issues can be caught early by taking a test shot while the camera is still above water.
While setting up your housing avoid things like your adorable cat that sheds extensively, partners with hair, and even your own hair. I recall being on a dive boat in Roatan, heading out to a shark dive, when I looked down and saw a long strand of my own hair sticking out of the housing, and on closer inspection, continuing into the housing. Luckily, I happened to notice before I got in the water and was able to open the house quickly to remove it.
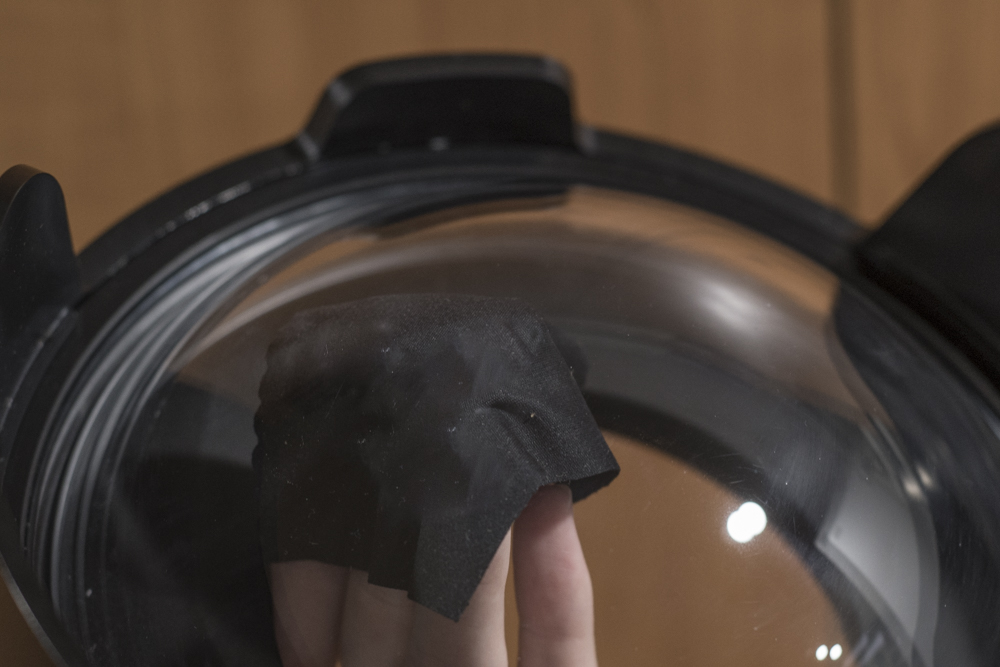
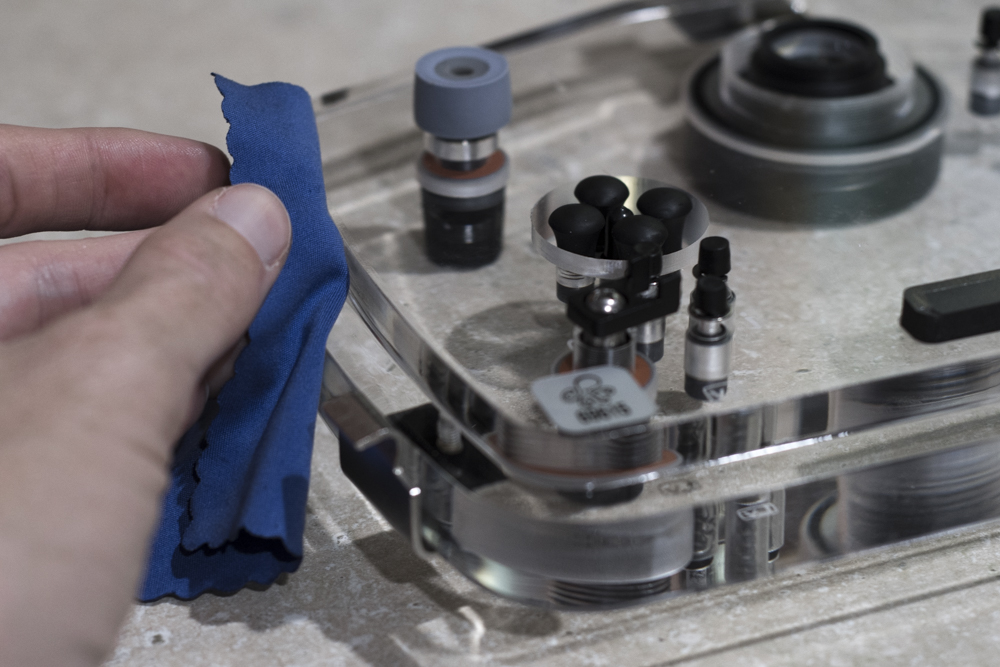
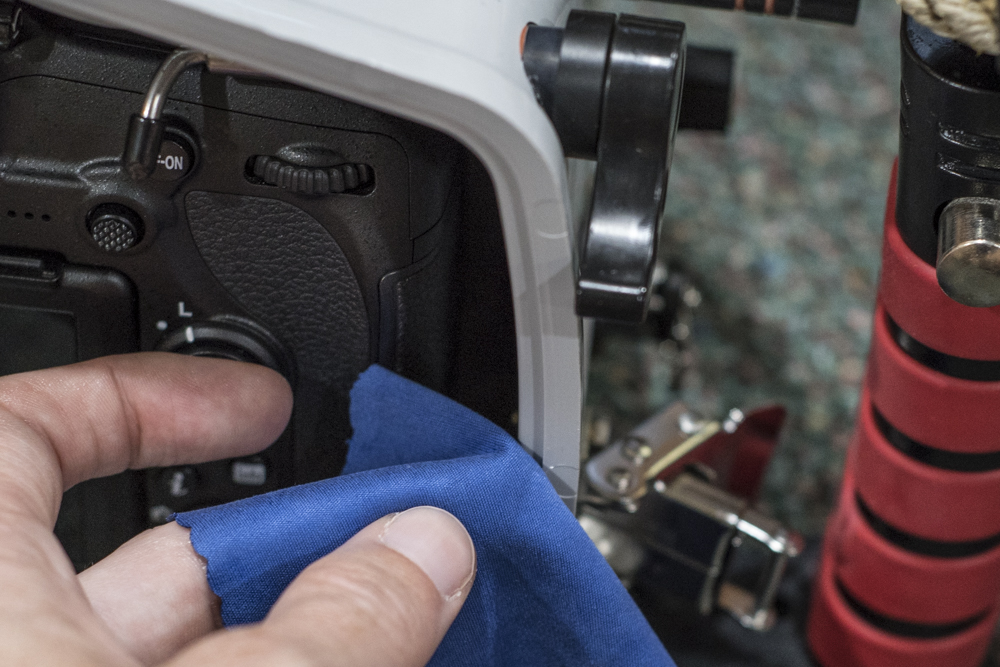
Be sure to make sure the camera and inside of the housing is in perfect working order too. Clean the insides of ports with microfiber cloth to remove dust and dirt that may show up as dots in images and make sure the camera lens is clean.
That being said, I don’t recommend you open your housing on small boats, or in wet or potentially wet environments. Once again, we can be our own worst enemy, leaning over an open back of a housing to insert a forgotten battery can lead to accidently dripping water onto the camera from our wetsuit or hair.
Other divers love to see camera equipment and more than once I’ve seen curious diver say, “Hey, whatcha got in there?” as they lean over an open housing and drip water into someone else’s camera.
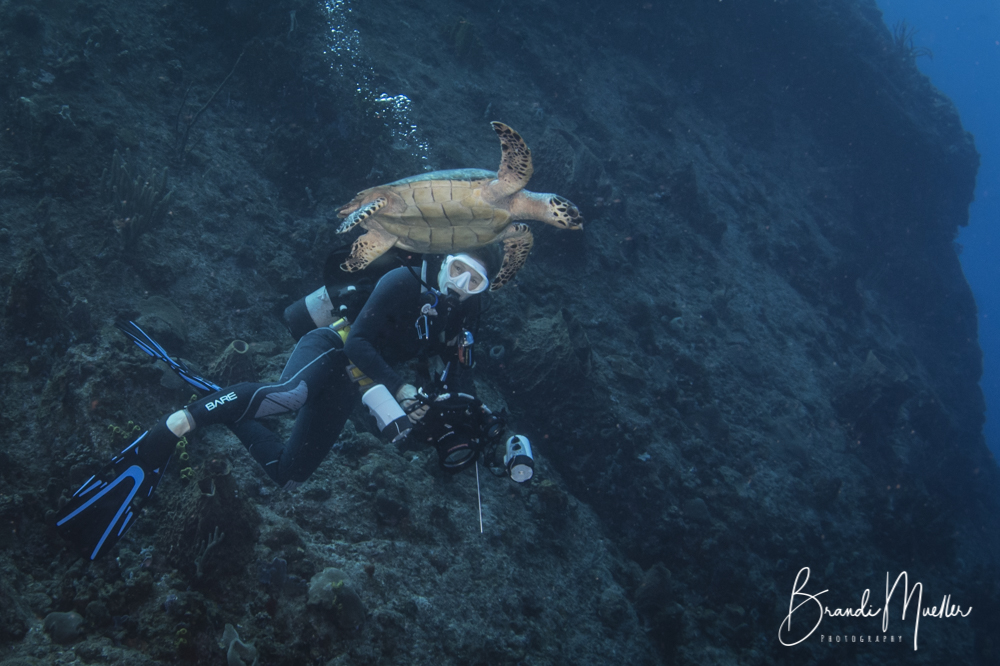
Entering the Water
Many dive boats will hand you your camera once you get in the water. This is best as the harsh impact of hitting the water when jumping in can cause issues with seals and it’s easy to accidentally scratch ports against your gear.
Once in the water I usually take one more test shot when I’m starting my descent because I’m still close to a point where I might be able to quickly get back on the boat to fix it (or if it’s leaking and I notice early, I might be able to return the camera to a dry environment before a complete flood.)
Flooded camera? Take a breath
What should you do if you’ve entered the water and notice your camera has flooded? The first thing you should do is remain calm, and not take off for the surface.
If you have the misfortune of noticing a leak or a flood while at depth on SCUBA, it is imperative that you not break proper diving safety protocol to try to save your camera.
We get it, it’s stressful to see your investment potentially in jeopardy! But no camera is worth your life. Surface at a safe speed, including your safety stop.
If you can tell that the leak is a minor one, while you’re safely surfacing, you can try to prevent water from contacting the actual camera in the housing. Depending on your housing, the best way to do this is to keep your housing level or slightly pointed port-side down – this will allow small amounts of water to run into your port or stay below the tray of your housing, potentially keeping the camera dry.
Once you get to the surface and are back on the boat, dry yourself and your gear off before opening your housing. At this point, either your housing has a minor leak and the water is below the camera level, or the water’s been in contact long enough with the camera to make time not an important part of the equation, anyways.
So, overcome the urge to rip the door of your housing and maybe get your camera wet in the process.
Once you have the camera removed, carefully inspect it for water damage. Do not turn it on if you are not sure! Check all components, remove the battery, memory card, etc. Dry everything and lay it out on a clean, dry surface where you can carefully inspect all parts, like a table cloth on a flat surface in a well-lit area. You can use paper towels or toilet paper to try to soak up small amounts of water in little crevices.
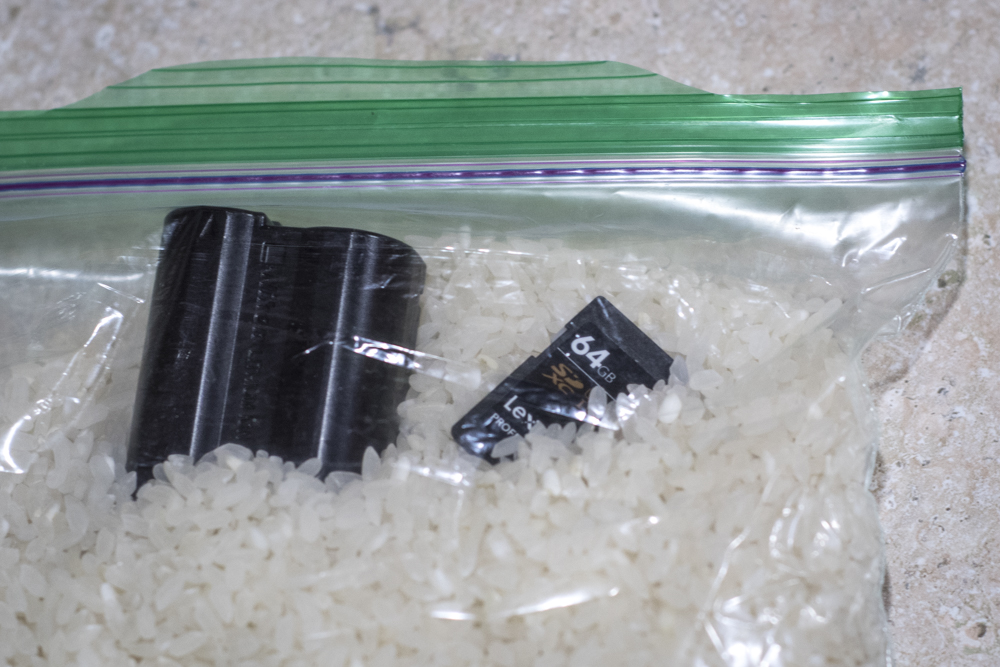
If the flood is major – for example the entire housing has filled with seawater for some time – your best bet may be to rinse everything in freshwater. Salt corrosion is the worst part of this equation, so rinsing with freshwater can help you find a miracle, although it is unlikely that your camera can be saved. However, the memory card may be saved by a freshwater bath and careful drying. Clean all contacts with freshwater and lay out to dry for as long as possible – days is ideal – and try a bag of rice.
For the housing, rinse the inside with freshwater if there are no electronics.
If there is an electronic system, like a vacuum check, it depends on how submerged your housing has been. If the electronics have already been fully submerged, you can remove the battery, rinse with freshwater, and carefully dry. It is likely that the electronics will need to be replaced, but it’s worth a try!
The most likely culprit of your flood is a problematic o-ring. Check all of your o-rings after doing the above, and replace as necessary. Check your housing, without a camera inside, in a bathtub. If things seem ok, take it for a dive, but still without a camera inside.
This may allow you to see if there’s still a leak or not.
If there is still an issue, and/or if electronics need servicing, it’s time to send it in for repair – now you can also give the shop or servicer a better idea of the exact problem.
Be optimistic, but also have insurance. Depending on what country you reside in, different insurance programs are available, such as DAN equipment insurance. Sometimes renters or home owner’s insurance policies will cover large electronics too, but be sure to find out ahead of time and know what is covered and what isn’t.
Before, after, and in between dives, try not to leave housings in direct sunlight as it can heat up on the inside and possibly damaging the camera or cause condensation to form.
O-Ring Care
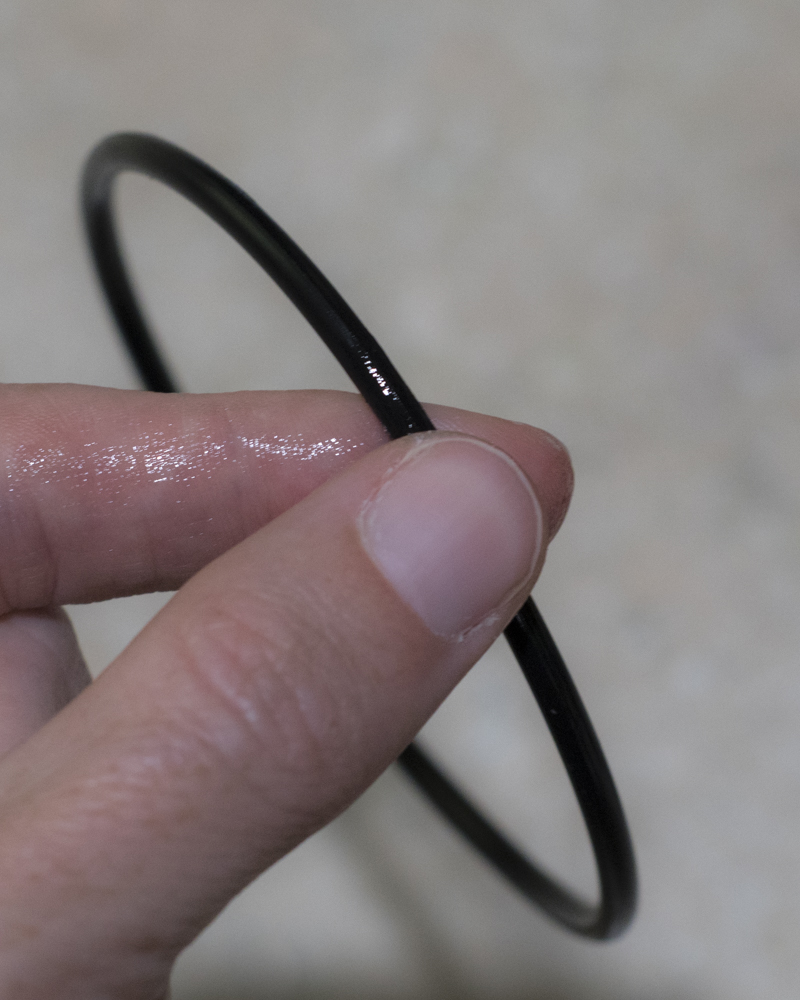
What keeps water out of your housing? It often comes down to the O-rings. These need to be lightly lubricated and usually it is best to use your housing manufacturer’s brand of O-ring grease. If that’s not available at least make sure it is high quality silicon grease as some contain other products that can cause O-rings to swell in size or soften which might prevent a good seal. Applying grease is a bit of an art: too much can make a slip stream for water to enter past the O-ring and excess grease an attract sand, dust and hair; on the flip side, too little can lead to dry O-rings that crack.
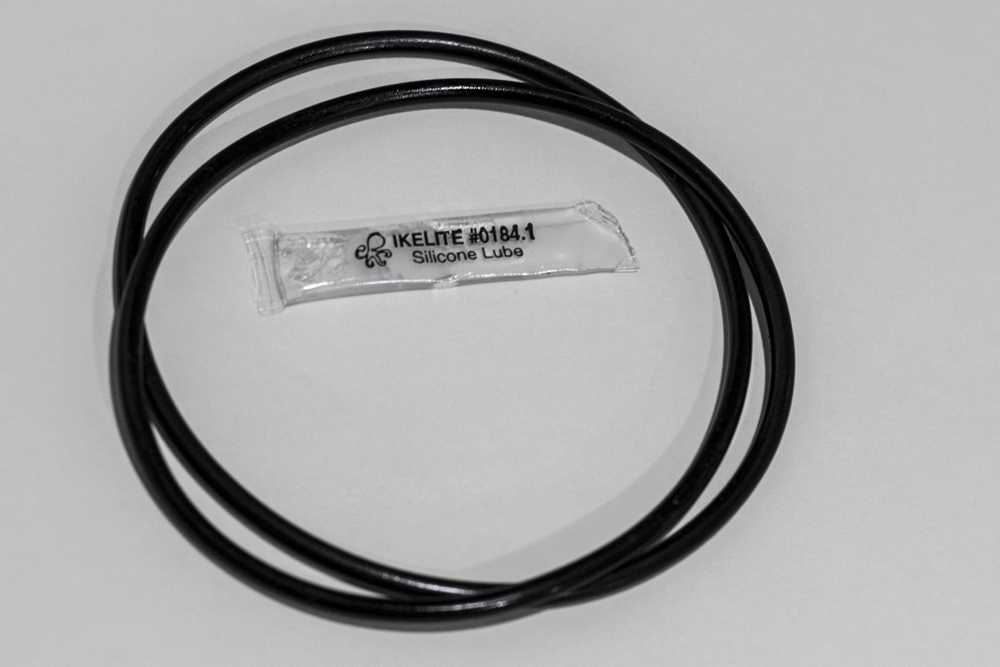
Remove the O-rings from the housing with a non-sharp tool and clean the groove where they sit. I often use a Q-tip but be cautious as they can leave tiny cotton fibers behind. A microfiber cloth can be used or make-up applicator sponges. To clean/grease the O-ring, put a dab of grease in between your thumb and forefinger and gently pull the O-ring between. Don’t pull too hard or stretch them but this should help to remove dirt and sand and lubricate them. Also feel for nicks or breaks in the O-ring. When finished they should look shiny, but not globby.
How often do you clean O-rings? It often depends on the diving conditions. In some environments it might be once a day or just when you open the housing to change the battery or memory card, and maybe not even every time you open it. Other times you will need to clean them often, such as when diving in sandy or silty conditions that may allow sand and silt to get on the O-ring, causing floods.
Usually we are only concerned with the large O-rings for the back of the housing and the ports. Check with your housing manufacturer, but usually the O-rings within the housing buttons and dials do not need to be regularly lubricated. They should be fine until the housing is sent in for servicing every one to two years.
Post-Dive
After diving you want to rinse off the housing and dry it thoroughly before opening. Return covers to the ports to keep scratches from occurring.
Some boat or dive shops have high pressure blower attachments (sometimes to scuba tanks) that can be used to blow water off housings. If you use these, be careful not to apply the highest pressure because it can actually force water into the housing. Use at low pressure and sparingly. I prefer to use a towel to dry off the housing before opening.
To leave it in the dip tank or not?
After each dive in salt water you want to prevent salt from drying on the housing. Some boats have camera dip tanks onboard to rinse housings and it’s good after a day of diving to soak the housing for a few minutes and press all the buttons and spin dials to remove salt. However, avoid leaving the housings in the rinse tanks for extended periods of time, especially if there are several people using them. Mysterious floods have been known to happen while in the dip tank and if a lot of cameras are in the same small space in rough seas there is a chance for port scratches to occur from other cameras.
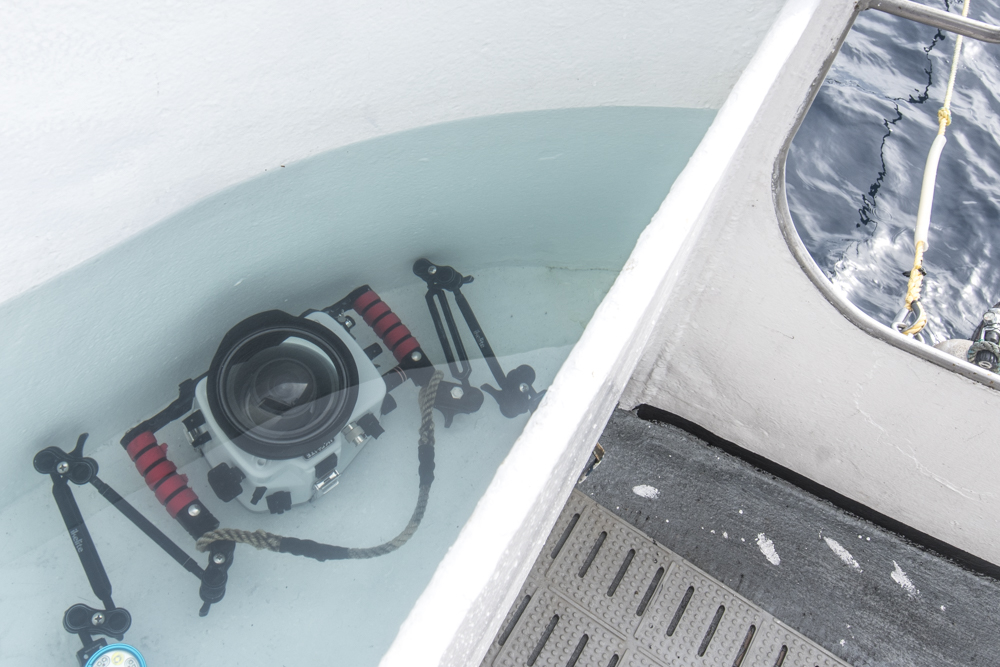
No freshwater rinse tank on boat? Salt water can be a solution to keep the housing wet and prevent salt from drying on the housing, until you can rinse it in freshwater (but still watch out for other cameras that may cause scratches too).
Sometimes port scratches happen no matter how careful you are. These may not be the end of the world. Often small scratches, once underwater, won’t show up in the images because the water will sort of fill in the scratch. Larger scratches might show up on images though, and in that case you probably have to send in the port for servicing. Some products are available to try to buff out scratches depending on what type of material your port is. Small scratches on acrylic ports can sometimes be removed with scratch remover liquids.
If you aren’t going to use your housing for a long period of time, remove the O-rings and store them in a Ziplock. This will keep them from drying out, stretching, or molding to the shape of the housing. Always bring spare O-rings with you and when in doubt, change the old ones with new. Generally O-rings are quite cheap and for a few dollars you might prevent a flood that would cost much more.
Servicing
And finally – have your housing serviced by the manufacturer usually about every two years depending on manufacturer recommendation or use.
With a little time and care your housing will be able to do its job and keep your camera dry. Happy shooting!

She is an Ikelite Ambassador and a member of the Ocean Artists Society.
- The Ultimate Guide to Underwater Macro Photography – March 27, 2023
- The Ultimate Lens Guide for Mirrorless Cameras Underwater – February 1, 2023
- The Ultimate Underwater Housing Maintenance Guide – June 16, 2022
6 comments
Excellent article. Never thought to have my housing serviced. Where would you send a Fantasea housing?
Glad you like it Bernie!
Fantasea housings don’t usually need to be serviced as much, only in case of malfunctions. You can also replace the main o-rings as needed.
If you do want to send in your housing for service, you can email Fantasea directly and they can help you with that – info@fantasea.com
I really like your idea of having a checklist. Can you share with us what your checklist is please?
I am very meticulous when I set up the housing and strobes. A while back, on setup, I went over the main o-ring with a high-powered reader to check for any fine hairs and pulling it through my fingers to feel for any grit or sand.
I jumped in the next day and found I’d forgotten one small thing: installing the o-ring on the housing.
A stream of bubbles came up and my Olympus and 60mm lens were flooded and completely ruined. A painful day of diving for me.
Good tip on removing the o-ring and storing in a ziplock baggie between trips/shoots. I always wondered what the best practise should be. Thanks.
It’s too complicated and expensive to maintain an underwater housing and camera. Better just use something like HotDive H2 Pro scuba diving case for iPhone.
https://www.hotdive.org