
 CAD
CADPort Predicaments: All About Ports

So you’ve just shelled out a ton of money on a shiny new camera and array of lenses, decided on what housing you want to keep your new toy dry within and now need to work out what ports you need. But there are so many options it’s all becoming a bit too confusing! Do I need flat port or a dome port? What size? What about extension rings? Have I got the right diameter? HELP!!!!
Hopefully, this guide will answer some of the questions you may have about anything ports-related.

Flat or Dome?
There are two types of ports used in underwater photography: flat ports and dome ports. A flat port is generally used for lenses of around 35mm or longer (this is Full Frame or FX Equivalent) that have a diagonal field-of-view (FOV) of approx. 63 degrees and narrower. A Dome Port is used for lenses with a focal length of around 35mm and wider, so with an approx. FOV of 63 degrees and wider. This basically separates wide-angle lenses to be used behind a dome port and then close-up/macro lenses behind a flat port. The reason for this is that if we were to use a wide-angle lens (say a 16-35mm rectilinear lens with an FOV of 107 degrees at 16mm) behind a flat port we would encounter a reduction in the FOV due to refraction, basically the same effect that we get with our masks (think back to your open water course here), making objects appear closer and bigger than they actually are. The curvature of the dome port corrects for refraction therefore maintaining the lenses original FOV, which is beneficial as we all know that getting close to our subjects underwater is key to great imaging.
For close-up and macro lenses we are able to use a flat port, as if the subject appears closer and bigger than it actually is due to refraction, it isn’t such a problem and can even become helpful when we are shooting small critters, allowing something tiny to fill more of the frame. There are other optical phenomenon that occur, such as aberrations, but for now let’s just consider refraction, as this is more important when considering port choice.
Refraction Explained
Refraction occurs when light changes speed as it travels through different mediums, which in turn causes the light to bend slightly. In the scenario of a camera inside a housing, the light will be travelling first through water, then through the glass/acrylic of the port, and then through air until it reaches the lens. As it passes through each medium, it will be changing speed and direction that will make whatever the camera is seeing appear closer and bigger. If we have a lens with a wide field of view placed behind a flat port, the light will be bent at a greater angle as it passes through the port glass/acrylic that will exaggerate the refraction, greatly reducing the lenses original FOV. This is obviously detrimental and unwanted when shooting with a wide angle lens. Why would you want your FOV reduced?
Dome Port Theory (Simplified)

A dome port corrects for refraction by allowing the light coming from all directions to pass through the port material in a straight line rather than being bent it as it passes through at the wider angles. This in turn allows the original FOV of the lens to be retained, rather than reduced. However in doing so, the dome creates what is known as a ‘Virtual Image’. This is an image of the subject projected closer than it actually is. which the lens will be focusing upon. So we need to have a lens that is capable of focusing close enough on this virtual image. This is why not all wide-angle lenses are suitable and not every lens is recommended and supported by housing manufacturers.
In addition to the virtual image being closer, the focal plane (the distance where the lens is focused) will become curved by the dome, the corners of the frame bending towards the camera, and this will create soft corners in our images if the depth of field is too shallow. We correct for this by shooting with a small enough aperture to give enough depth of field to keep the corners sharp.
What aperture is needed will vary depending on sensor size (larger sensors give a shallower depth of field for a given aperture), the lens being used (fisheye lenses have more depth of field than rectilinear) and the size of the dome (a large dome bends the focal plane less than a small dome).
Fortunately, you do not need to understand the calculations behind dome port theory to get good photos, the manufacturers have done the computations and testing for us for the lenses we use and the results are provided in port charts (more on this later).
Dome Port Sizes
What size dome you need again varies on sensor size and lens, though a general rule of thumb is larger domes produce better image quality. However, larger domes are more expensive, harder to push through the water, bigger for travel, and it’s harder to light subjects placed very close to the glass for Close-Focus Wide-Angle (CFWA) imaging. A small compact dome is great for CFWA, small and light for travel, easier to dive with in a current or when swimming distance and freediving, but are suitable for fisheye lenses only, rectilinear do not perform well behind them.

Fisheye vs. Rectilinear
If using a rectilinear lens then it is best to use the largest dome available for optimal image quality (200mm+ for DX/APS-C and 230mm+ for FX/FF). You can use smaller, but image quality will be reduced. With a fisheye lens we can get away with smaller domes with a steeper curvature, given the greater the depth of field, though we do need to account for this shooting at smaller apertures to keep the corners of the frame sharp. A general rule of thumb for fisheye lenses behind Mini Domes is 100mm / 4” diameter are suitable for M43 and DX/APS-C Cameras, whereas FX/FF need 140mm / 5.5”.
Acrylic vs. Glass
Optically, there isn’t much difference here, though the bulk of pro shooters opt for a glass dome. The main difference is durability; a glass dome is more resistant to scratching than an acrylic dome, however small scratches can easily be polished out of an acrylic dome whereas its not easy to do this on a glass dome. But by polishing out marks and scratches we can reduce the optical quality, especially if the scratch was deep, so its best to be careful and avoid them in the first place.
Glass domes can also be better at limiting lens flare, as they tend to have optical coating on the inside. Acrylic domes, on the other hand, are lighter for travel. However, large acrylic domes are more positively buoyant whereby they want to rotate upwards underwater creating torque on the wrist. You can use some form of weighting to counteract this (motorcycle wheel balance weights are a popular option) that will make shooting more comfortable when your housing is in trim rather than perpetually trying to point towards the surface.
Dome Port Correct Positioning & Extension Rings
Incorrect positioning of the dome is a common mistake and this will lead to optical problems. It seems counterintuitive to drop of lump of cash on a high quality optical glass dome and then not spend a fraction more on the correct length extension ring that will position the lens correctly inside the dome for optimal optical performance. Again, you don’t need to now how to calculate the exact length of the extension needed for your given lens/dome combo, you just need to be able to read a simple port chart.
Diopters
Some manufacturers recommend the use of a diopter with certain rectilinear lenses that do not focus close enough. A diopter is a close-up lens that screws onto the filter thread on the front of your lens and they come in a variety of strengths designated by a number (+2, +4, etc.). These will reduce the minimum focusing distance of your lens, allowing it to focus on the virtual image, though there will be a slight reduction in the FOV.
Flat Ports
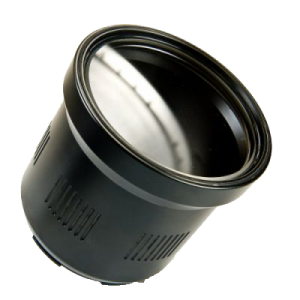
As mentioned previously, we use flat ports for close-up and macro shooting. Obviously we need a port long enough to fit the lens inside, but what if the port is longer than needed, having a space between the end of the lens and the port glass? This can be OK, if not too big a space, it won’t create the same problems we get with dome ports. But there are some issues you should be aware of:
If your macro lens has a short minimum focusing distance like a 40mm or 60mm (i.e. the closest distance the lens can focus is just off the front of the lens) you will be ‘eating into’ the range the lens could be focusing at, loosing you magnification and potentially scaring off subjects where your extra-long port is very close to them. Also, the lens can start to focus on the port glass rather than focusing ‘through it’ on the subject, especially if you haven’t cleaned the glass properly. Finally, if you are using external wet lenses to gain extra magnification (most macro shooter use these), if they are placed too far from your camera lens they will have reduced power and in extreme cases vignetting (dark corners) that you will need to crop away given that the majority of macro lenses are primes and you cannot zoom them to get rid of the vignette like compact shooters do. So even though the optical issues are not as bad as with dome ports, it is still advisable to get the correct length port and extension, if needed, for your macro lenses to perform optimally.
Port Diameter
Some manufacturers make ports in different diameters to accommodate the smaller form factor of lenses for compact cameras and micro four-third systems that are generally smaller overall than larger DSLR’s. So it is important that you get the correct diameter port for your housing otherwise it will be too big or too small and will not fit! Housing brands that use different diameter ports include Ikelite that have the Dry Lock (DL for larger systems) and Dry Lock Micro (DLM for smaller systems), as well as Nauticam that also have a variety of port diameters:
- N50 – used on some compact housings to position wide-angle wet lenses correctly
- N85 – used on micro four-third systems
- N100 – used on mirrorless systems
- N120 – used on DSLR and larger format systems
Both manufacturers make adapters to allow the use of larger port systems onto housings that accept the smaller version. So you can put an N120 Dome Port onto a housing that normally uses the N100 ports via an N120 to N100 Adapter.
Port Charts
As previously mentioned, all the lens measurements, technical calculations and pool testing has been done for us by the manufactures, so you do not need to go through the headache of a trial and error process to work out the correct port/extension combination needed for your lenses. You simply need to navigate to your chosen housing brands website and click on the link for the port chart. In fact you don’t even need to do this, as I’ve done it for you, just click on the appropriate link below!

How to Read a Port Chart
Some manufacturers split the charts into camera brands, some into port diameters, and some both. Once you have located the correct port chart for your camera/housing, it is then a matter of finding the lens that you wish to ascertain the correct port or port/extension combination for. Then follow the chart across, that will advise you of (in various orders depending on the chart layout) the correct port for your lens, any extension ring required, if you need an adapter from one port size to another, if a zoom gear is needed and if a focus gear is an option, and for some rectilinear wide-angle lenses it may then recommend a diopter too.
You may also be advised if an external wet lens is compatible for macro lenses and if flip adapters or bayonet mounting systems are an option.
Sometimes there are more than one port combination option available for your lens and all will therefore be listed i.e. two or more different dome port sizes that could require different length extension rings, or you may have an option for a dedicated flat port and a shorter port with an extension ring added is an alternative; this is useful if, for example, you own a 60mm macro lens and relevant port and then get a longer 105mm lens whereby you can simply purchase an extension ring so that it fits rather than buying a whole new port that would cost more.
Links to Port Charts:
-
Aoi (Olympus Ports)
-
Aquatica
-
Fantasea
-
Ikelite
-
Hugyfot
-
Isotta
-
Nauticam
-
Nexus Anthis
-
Nimar
-
Sea & Sea
-
Sealux
-
Subal (select housing then download PDF Port Chart)
-
Seacam (select lens)
-
Zen

- Holes in My Housing! – September 28, 2021
- Port Predicaments: All About Ports – August 30, 2021
- Through the Lens Master Class: When (and When Not) to Use TTL – June 29, 2021