
 CAD
CADMy First Underwater Compact Camera – Beginners Tutorial
After diving for a while and seeing all those cool divers with alien-like, bulky cameras, lights, antennas and probe thingies, you decided you want a piece of the action, so you ordered your first underwater camera! Alas, your biggest fear is that you will come back with dark, blurry photos of confused and frightened fish… Fear not! We are here to help 🙂

Before you begin
( This is THE MOST IMPORTANT part so don’t skip it ):
- Upon receiving your gear, familiarize yourself with the camera and the housing. Go over the features, try them out and read what every button does. Yes even that small one in the corner.
- Check the O-Rings.* These are the little rubber bands that keep your equipment dry. You should make sure they are smooth and whole, and fitted in the right place.
- Place some tissue inside the housing, fill a sink, and test your housing without the camera. See if the tissue comes out dry.
- Take some photos around the house with the camera inside it’s housing. This is important to get the feel on the housing. Mess around with the functions and then set them back to their previous mode. Feel free to pretend your kids are sharks and your hamster is a Nudibranch.
* Common O-Ring faults are strains of hair on the O-Ring, sand or dirt, or small cracks / nicks on the O-Ring’s surface. A common misconception is that the Silicone Grease keeps out the water. It actually maintains the rubber in proper shape and prevents it from drying out.
On your first dive with the gear:
- Before setting up your gear, make sure you have an empty memory card inserted, a full battery, and the strap is removed. Good idea to pop-up the internal flash if you intend to use it. Remove the lens cap!!
- After locking up your camera, repeat the test from the previous stage with the camera in the sink tank. Make a habit of rechecking your O-Rings always before every dive.
- Don’t try everything you dreamed of on your first dive. Concentrate on one type of photos such as wide angle, and pick 1-2 modes to try out. If not you will probably find yourself staring for 80% of the dive at the camera screen / menu and missing all the whale sharks around you while breaking half the corals in the reef.
- Remember your diving skills and concentrate on your buoyancy. If you feel using the camera and balancing yourself is too much, set the camera aside for a few minutes, using your hand strap.
Some more technical pointers:
* I might be oversimplifying some things to make it easier for beginners. If you already know a thing or two about aperture, shutter speed and ISO, by all means play around with them as you see fit. ** If aperture, shutter speed and ISO sounds like Chinese to you, take a minute to read about them and find them on your camera. Start off by using the Aperture Priority mode. This is a semi-automatic mode and will be marked A or Av.
If you are using ambient light ( no strobe ):
- Set the aperture to the widest setting : f/1.8 – f/3.5, depending on your camera.
- Set the ISO to a higher setting such as 800-1600 and remember where to change it because you will need to change it during the dive.
- If your photos appear blurry (or if you see the shutter speed set by the camera is slower than 1/100) boost the ISO higher and use less zoom. It’s better to raise your ISO higher and lose some quality, than getting blurry images.
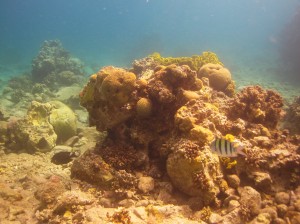
- Get close to your subjects, to minimize the amount of water between you and the subject, thus achieving better contrast.
- Use a red filter for dives under 5-7 meters. It will improve your photos drastically. Remember to remove it in shallow waters.
 Common Problems:
- Problem : Blurry photos

Blurry Shot – Shutter speed too slow Solution : Set your ISO higher or open aperture to make sure your shutter speed is faster than 1/100 sec.
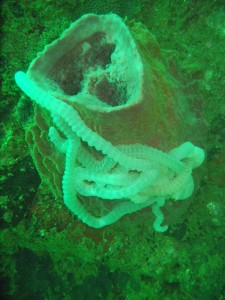
- Problem : Washed out colors
This is how overexposing looks underwater – Light blue instead of white above the surface Solution : You are probably over exposing. It’s harder to tell that underwater because everything is blue anyway. Turn down your exposure using exposure compensation or lowering ISO / Shutter speed / Aperture.
- Problem : Orange photos
Take that red / orange filter off when snorkeling / shallow diving Solution : You are using a warm /red filter in shallow water. Take it off.
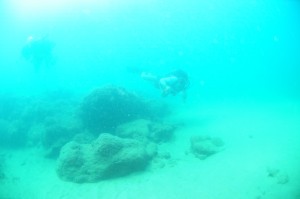
- Problem : Everything is blue

Feeling blue? Put on a warm filter or use a strobe! Solution : No kidding… You are underwater. Use a strobe or a red filter + post processing. No magic solution here.
- Problem : I only get photos of the back side of fish

“Stop running away! So what if i’m 100 times bigger than you and I have weird metal stuff coming out of me?” Solution : This is one of the most common problems. Don’t start out with fish as they are the hardest to shoot. Begin with corals, static marine animals and your dive buddy. When you learn how to patiently wait for fish and capturing them in the right moment you can advance to that.
- Problem : I’m using A (Av) mode and still getting over / under exposed photos. Solution : Check your metering mode – it should be on evaluative / matrix mode. Also check your exposure compensation dial. I should be neutral ( 0 ) or slightly under (-2/3) to achieve nice deep colors. Make sure (by half-pressing the shutter) that you are not at the edge of your settings, e.g highest shutter speed.


If you are using the on-camera flash:
- Here I would also recommend using A (Av) mode.
- Remember to mount the diffuser before the dive and secure it to the housing so it won’t get lost.
- Set the aperture on a few clicks from the widest (smallest number), usually around f/5.6, that’ll keep your sharpness optimal.
- Notice the shutter speed. It will probably be set to 1/60. If you want to darken the background, just raise it to 1/100, 1/150 or more. To light up the background, lower it but try to keep it above 1/30. The shutter speed will not affect your subject too much.
- Get super close to your subjects. The internal flash is usually not very strong, and won’t be effective from more than 1m or even less. If you don’t see it contributing at all, raise the ISO or open your aperture.
Common Problems:
- Problem : The frame is full of annoying spots ( the infamous Backscatter problem )
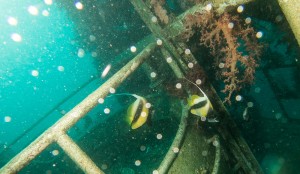
“Hey Plankton! Get out of the frame!” Solution : The best solution would be an external strobe which is offset from the camera. If that isn’t possible, you should get closer to the subject, use a diffuser, avoid kicking sand around you and hope the visibility will improve.
- Problem : Flash isn’t effective or too weak
Internal flash too weak to light up the subject Solution : Boost up the ISO or open the aperture while lowering your shutter speed to avoid over exposure. Oh and get closer, if I haven’t said it enough 🙂


If you are using an external strobe:
- Here I would also recommend using A (Av) mode.
- Remember to check your strobe first above water. Again – O-Rings! Full battery! Make sure it’s connected securely via fiber optic or sync cord and that it triggers well on the surface.
- Set the strobe on TTL mode if you have it. This will simplify your first steps. (To check if your camera & strobe combination supports TTL click here) If you don’t have TTL, set the strobe on maual with power around the middle and try adjusting your distance from the subject instead of adjusting the power. It’s easier and more intuitive.
- Set the aperture on a few clicks from the widest (smallest number), usually around f/5.6, that’ll keep your sharpness optimal.
- Notice the shutter speed. It will probably be set to 1/60. If you want to darken the background, just raise it to 1/100, 1/150 or more. To light up the background, lower it but try to keep it above 1/30. The shutter speed will not affect your subject too much.
* Notice that some cameras (e.g. Canon compacts) will not produce TTL flash on manual (M) mode. You will need to set the strobe power manually.
Strobe Tip: Use exposure compensation set on about -1 to get that deep blue color in the background.
Common Problems:
- Problem : Your external strobe is not firing
Solution : Check that the strobe is ON and READY, the sync cord / fiber optic is connected on both ends, the pre-flash mode fits your camera (if applicable) and if the internal flash fires (if using fiber optic). - Problem : Your strobe is flashing on the dome / lens and ruining the photo
Nope, that isn’t the sun underwater – it’s your strobe… Solution : Retract your strobe backwards and re-align it by shooting a photo of the sand and watching where the light beam hits. Usually happens when shooting wide angle / fisheye.

Bottom Line
Cut yourself some slack. The first few dives will not be your best work, but thanks to digital technology your learning curve should be pretty short. After each dive, grab a cup of tea and go over the photos in a more relaxed atmosphere. Note your common problems according to what you read here and try to understand what you did right in the more successful photos. Use your EXIF or in-camera info to see which apertures / shutter speeds worked for you and repeat them in your next dive. Stick to the type of photos that worked well for you at first, to raise your Good-Photos-Percentage, and help you feel better about the results. Remember that depth is a very important issue for UW photography and keep in mind your best settings for snorkeling / shallow dive / deep dive.
Safe diving and watch out for the corals while taking photos!
If you liked this guide and want to get more helpful tips and info , sign up for our monthly newsletter. We will NEVER spam you.

Visit his personal portfolio at www.ranmorphoto.com.
- Native Lenses vs. Wet Lenses for Underwater Photography – December 20, 2023
- The Complete Guide to Practicing at Home for Underwater Photographers – October 4, 2023
- Best Strobe for Underwater – The Ultimate Strobe Guide (Updated!) – June 29, 2023